
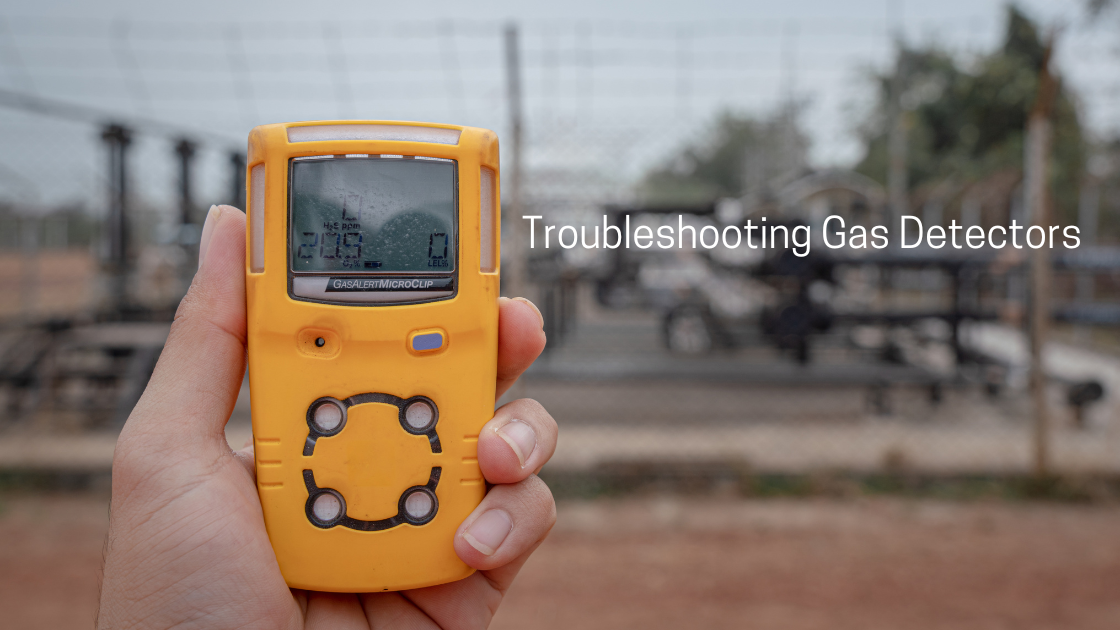
Troubleshooting gas detectors comes down to one question: is the instrument telling the truth? Most problems fall into a handful of categories: power, sensor health, calibration, sampling path, environment, and (for fixed systems) wiring.
Work through them in that order and you will solve the majority of faults in minutes, without sending the unit away for repair.
This guide walks through the most common gas detector problems, what causes each one, and how to fix it. It covers both portable and fixed detectors.
Safety first
A gas detector is a life-safety device. If it alarms, treat the alarm as real until you have proven otherwise from a safe location. If you cannot confirm the detector is working, do not use it for entry, hot work, or area monitoring. Never bypass, inhibit or silence a detector to “get the job done.”
Quick Troubleshooting Table
| Symptom | Most likely cause | First fix to try |
|---|---|---|
| Won’t power on | Dead or deeply discharged battery, dirty charging contacts | Charge fully, clean contacts, try a known-good battery |
| Sensor fault / missing sensor | Loose or failed sensor, damaged connection | Reseat sensor, power cycle, replace sensor |
| Reading above zero in clean air | Zero drift, background gas, temperature or humidity shift | Zero in verified clean air, allow warm-up |
| Failed bump test | Blocked filter, wrong or expired gas, poor flow, weak sensor | Check filters, tubing, cylinder, regulator; retry; calibrate |
| Calibration fails | Expired gas, wrong gas concentration, sensor at end of life | Use fresh, correct gas; replace sensor if it still fails |
| Random false alarms | Cross-sensitivity, radio interference, condensation, solvents | Identify the source, relocate, use correct sensor or filter |
| Slow response | Clogged filter, water trap, long or kinked sampling line | Replace filter, inspect line, check pump |
| LEL reads low | Poisoned or aged catalytic bead sensor | Bump test, calibrate, replace if span is low |
| Fixed detector shows 0 mA or under 3.6 mA | Wiring fault, loss of power, detector fault | Check loop wiring and supply voltage at the detector |
The 5-Step Troubleshooting Routine
Before diving into specific faults, use this sequence. It prevents you from chasing the wrong problem.
Read the display and logs
Note any fault code, sensor name, and the last calibration and bump test dates. Many detectors store event logs that show exactly when the problem began.
Check the basics
Battery or power supply, filters, tubing, physical damage, and whether the detector is overdue for calibration.
Move to clean air
Take the unit to an area you know is free of target gases, away from vehicle exhaust, cleaning chemicals and process vents, then observe the readings.
Run a bump test
If the detector cannot respond to a known gas, you have a sensor, sampling or calibration problem. If it responds, your issue is more likely environmental.
Calibrate or replace
If a bump test fails after you have ruled out gas and flow issues, calibrate. If calibration fails, replace the sensor.
Always follow the manufacturer’s manual for your specific model. Procedures, acceptance limits and fault codes vary between brands.
Gas Detector Won’t Turn On or Dies Too Fast
Symptoms
No display, instant shutdown, or battery life far shorter than normal.
Common causes
- Battery is deeply discharged or has reached end of life
- Dirty or corroded charging contacts
- Extreme cold, which temporarily reduces battery capacity
- A faulty charger or docking station
- Older rechargeable packs losing capacity after many charge cycles
How to fix it
- Charge the detector fully using the original charger or dock.
- Clean the charging contacts with a dry, lint-free cloth.
- Try a known-good battery pack, if your model allows it.
- If the detector works only when warm, cold is reducing battery performance. Keep it in a warm place before use, and plan for shorter run times in cold environments.
- Replace packs that no longer hold a charge through a full shift.
Tip
Sampling pumps, backlights and vibrating alarms all draw extra power. A pumped detector will run for less time than a diffusion unit. Keep that in mind when you compare your run time to the datasheet.
Sensor Fault, Sensor Missing or Sensor Error
Symptoms
The display shows a fault icon, “sensor fail,” “missing sensor,” or a sensor reading that shows dashes or a fixed value.
Common causes
- Sensor not fully seated in its socket
- Sensor has reached the end of its life
- Sensor was exposed to a damaging condition (extreme gas exposure, liquid ingress, or high temperature)
- Corroded or damaged contacts
- Internal electronics fault
How to fix it
- Power the detector off, reseat the sensor firmly, and power on again.
- Inspect the sensor and its contacts for corrosion, moisture or damage.
- Swap in a known-good sensor of the same type to isolate whether the fault is in the sensor or the instrument.
- If a new sensor also faults, the problem is likely in the instrument and needs service.
Electrochemical sensors are consumable parts. Depending on the type and the environment, they typically last from one to a few years, and oxygen sensors are often at the shorter end of that range.
A sensor that faults repeatedly, or needs extreme adjustment during calibration, is telling you it is near the end of its life.
Zero Drift: Reading Above or Below Zero in Clean Air
Symptoms
The detector shows a small positive or negative reading when there should be no gas present, or oxygen does not read 20.9% in fresh air.
Common causes
- Normal sensor drift over time
- Rapid temperature or humidity change, especially after moving from an air-conditioned space to a hot, humid outdoor area
- Not allowing enough warm-up or stabilization time
- Real background gas that you did not know about, such as trace CO or hydrogen
- Zeroing the instrument in air that was not actually clean
- Sensor ageing
How to fix it
- Let the detector stabilize in the environment where you will use it. Sensors need time to settle after a large temperature change.
- Move to verified clean air and perform a fresh-air zero (or use a zero-air cylinder if the ambient air is questionable).
- If the reading returns after zeroing, find the source. Is there a real leak, vehicle exhaust, battery charging area or solvent nearby?
- If zero drifts repeatedly, run a full calibration. If it still drifts, the sensor is likely failing.
Important
Never zero a detector in air that may contain the target gas. Zeroing in contaminated air tells the detector that the gas is “normal,” and it will under-read real hazards afterward.
For a deeper look at this topic, see our guide on How to Troubleshoot Zeroing and Span Issues in Gas Sensors .
Failed Bump Test
A bump test (functional test) briefly exposes the detector to a known gas to confirm that the sensors respond and the alarms activate. A failed bump test means the detector cannot be trusted until the cause is found.
Common causes
- Blocked or dirty sensor filter or hydrophobic membrane
- Expired or empty calibration gas cylinder
- Wrong gas type or concentration for the detector’s configuration
- Incorrect regulator or flow rate
- Leaking, kinked, cracked or wrong-material tubing
- Poor connection between the gas cap and the detector
- Weak or aged sensor
- Test gas reactive gases (like H2S, Cl2 or NH3) adsorbing to the tubing, which reduces the gas reaching the sensor
How to fix it
- Check the cylinder label for gas type, concentration and expiry date.
- Confirm the regulator is correct for the cylinder and supplies the flow rate the manufacturer specifies. Many portable detectors call for a fixed-flow regulator in the range of a few tenths of a litre per minute, but check your manual.
- Inspect the tubing for cracks, kinks and loose connections. Use tubing recommended by the manufacturer, especially for reactive gases.
- Inspect and replace the sensor filter if it looks dirty, wet or blocked.
- Make sure the calibration cap seals correctly over the sensor inlets.
- Retest. If it still fails, perform a full calibration, then bump test again.
- If the detector still fails after calibration with good gas and good flow, replace the failed sensor.
Rule of thumb
A detector that fails a bump test should be taken out of service until it passes. Do not simply “try again until it passes” without understanding why it failed the first time.
Calibration Fails or Span Errors
Symptoms
The detector cannot reach the target span value, displays a calibration error, or requires very large adjustments.
Common causes
- Calibration gas expired, depleted, or the wrong concentration entered in the detector
- Gas not reaching the sensor (blocked inlet, poor seal, low flow)
- Sensor sensitivity has fallen below the acceptable range
- Poisoned or inhibited sensor (especially catalytic LEL)
- Calibrating before the sensor has stabilized
- Temperature outside the recommended calibration range
How to fix it
- Verify that the gas concentration programmed into the detector matches the cylinder label exactly.
- Use fresh gas and confirm cylinder pressure is adequate.
- Let the detector stabilize and complete a clean-air zero first, then apply span gas.
- Calibrate at a stable, moderate room temperature.
- If the sensor still fails span, replace it. Sensor sensitivity loss is not reversible.
Keep a record of each calibration’s “as-found” and “as-left” results. A sensor whose as-found readings are getting steadily worse is telling you it will fail soon, which lets you replace it before it fails in the field.
False Alarms
False alarms are costly and dangerous in a different way: people start to ignore alarms. Find the cause rather than silencing the alarm.
Common causes and fixes
| Cause | What happens | Fix |
|---|---|---|
| Cross-sensitivity | Sensor responds to a gas it was not designed to measure (for example, hydrogen on a CO sensor) | Review the manufacturer’s cross-sensitivity table; use a selective sensor or filter |
| Solvents, cleaners, aerosols, hand sanitizer | Vapors trigger VOC, LEL or toxic sensors | Keep these chemicals away from the detector during use |
| Radio frequency interference (RFI) | Walkie-talkies or nearby transmitters cause spikes | Increase distance, check the detector’s RFI rating, use approved radios |
| Condensation and rapid humidity change | Electrochemical and infrared sensors can spike or drift | Allow time to acclimate; use appropriate filters or heated sampling |
| Pressure changes | Some sensors react to fast barometric changes | Allow stabilization time before entry |
| Vibration or shock | Mechanical stress on sensor or electronics | Mount fixed detectors on stable supports; check for damage |
| Real low-level leak | The detector is right | Investigate the source before dismissing the alarm |
Always assume an alarm could be real until you have verified otherwise from a safe position.
Slow Response or Low Readings
Symptoms
The detector takes too long to reach a reading during a bump test, or it reads much lower than expected.
Common causes
- Clogged dust filter or wet hydrophobic membrane
- Water trap full or blocked (on pumped units)
- Sampling line too long, kinked or made of the wrong material
- Weak or failing pump
- Sensor ageing
- For fixed detectors, a blocked sintered filter or weather guard
How to fix it
- Replace filters and membranes on a schedule, and immediately when they are visibly dirty or wet.
- Check that the pump is running and draws air freely when you block the inlet briefly (most pumped detectors will raise a low-flow alarm).
- Shorten the sampling line or use line materials suited to the gas. Reactive and sticky gases such as H2S, chlorine and ammonia can be adsorbed by unsuitable tubing.
- Clear fixed detector weather guards of dust, paint, insects or ice.
Catalytic (LEL) Sensor Problems
Catalytic bead sensors are widely used for combustible gas detection, and they have a specific set of failure modes.
Poisoning
Silicones, sulfur compounds, lead compounds and some halogenated compounds can coat the catalyst and permanently reduce sensitivity.
Inhibition
Certain compounds temporarily suppress sensitivity, which may recover after exposure ends.
Low oxygen operation
Catalytic sensors need oxygen to burn the gas, so readings in oxygen-deficient atmospheres can be unreliable.
High gas exposure
Very high concentrations can damage the bead.
What to do
Bump test regularly, because a poisoned sensor often still reads zero in clean air and only fails when exposed to gas.
If response is weak after calibration, replace the sensor. If you work around silicone products or sulfur compounds, consider infrared LEL detection instead.
Read more: Why Catalytic Gas Sensors Become Poisoned.
Infrared (NDIR) Sensor Problems
Infrared sensors don’t suffer from poisoning the way catalytic sensors do, but they have their own issues.
- Dirty or fogged optics from dust, oil mist or condensation
- Condensation inside the optical path, causing drift or false readings
- Temperature shock that throws off the baseline until the sensor stabilizes
- Blocked flame arrestor or filter
What to do
Keep optics and filters clean following the manufacturer’s guidance, avoid sudden temperature swings where possible, and zero in clean, dry air.
Read more: How Condensation Affects Infrared Gas Detection.
Fixed Gas Detector Problems: 4-20 mA, Power and Communication
Fixed detectors add a wiring and communication layer to everything above. A few checks solve most problems.
4-20 mA output problems
In most 4-20 mA systems, 4 mA represents zero gas and 20 mA represents full scale. Signals below 4 mA are commonly used to indicate faults, although the exact fault levels vary by manufacturer. Check your manual for the meaning of each current level.
| Loop current | What it usually means |
|---|---|
| About 4 mA | Normal, no gas |
| Between 4 and 20 mA | Gas reading proportional to range |
| Above 20 mA | Over-range |
| Below about 3.6 mA, or 0 mA | Fault, open loop, loss of power or wiring break |
Checks
- Measure supply voltage at the detector terminals, not just at the controller. Voltage drop over long cable runs is a common cause of intermittent faults.
- Verify loop polarity and check for loose, corroded or wet terminals.
- Confirm the controller input is configured for the right signal type (sinking, sourcing, or isolated) and that loop resistance is within limits.
- Look for damaged cable, poor shield grounding, and conduit that lets moisture in.
- Compare with a simulated 4 mA signal or a known-good detector to isolate whether the fault is the detector, the cable or the controller.
Read more: How To Troubleshoot A 4-20 mA Transmitter
Digital communication faults (Modbus, HART and others)
- Confirm address, baud rate, parity and stop bits match on both ends.
- Check termination and biasing on RS-485 networks.
- Watch for duplicate addresses and noisy cabling.
- Separate signal cables from power and variable frequency drive cables.
Environmental issues
- Water ingress through cable glands or damaged seals
- Corrosion in humid or coastal environments
- Sunlight, heat and freezing affecting the sensor head
- Incorrect mounting height for the gas density (lighter-than-air gases usually call for high mounting, heavier-than-air gases for low)
Preventive Maintenance Schedule
Most troubleshooting can be avoided with routine care. Always follow your manufacturer’s recommendations and your site’s safety program; the following is a general guide.
| Task | Typical frequency |
|---|---|
| Visual inspection (damage, filters, display, alarms) | Before each use (portable) or per site schedule (fixed) |
| Bump test | Before each day’s use for portables, per manufacturer and site policy |
| Full calibration | Per manufacturer interval, or sooner if a bump test fails |
| Filter and membrane replacement | When dirty, wet or per schedule |
| Battery and charger check | Monthly and whenever run time drops |
| Fixed detector wiring and housing inspection | Periodically, per site schedule |
| Sensor replacement | Based on performance trends and manufacturer life expectancy |
Logging every test, calibration and repair makes trends visible and helps you prove compliance. For larger fleets, software can automate schedules and records. See Gas Detector Fleet Management Software: Necessity or Luxury? .
When to Repair and When to Replace
Consider replacing the sensor when
- It fails calibration after good gas and good flow
- It needs larger and larger adjustments each time
- It faults repeatedly
- It has passed its expected life
Consider replacing the instrument when
- Multiple sensors fail at once
- The casing, display or electronics are damaged
- The detector has been dropped or flooded and behaves erratically
- Repair costs approach the price of a new unit
- The model is obsolete and parts or service are no longer available

Frequently Asked Questions
Why is my gas detector beeping with no gas present?
A beep can mean low battery, a sensor fault, calibration overdue, a low-flow alarm or a real alarm. Read the display message first. If it is a gas alarm, confirm from a safe location before assuming it is false.
How often should I bump test a gas detector?
Many manufacturers and safety programs recommend a bump test before each day’s use. Follow your manufacturer’s guidance and your site’s policy, which may be stricter.
Why did my gas detector fail a bump test?
The most common reasons are a blocked filter, expired or wrong calibration gas, incorrect flow, leaking tubing, or a weak sensor. Check the gas and the flow path first, then calibrate. If it still fails, replace the sensor.
Can I calibrate a gas detector myself?
If you are trained and have the correct gas, equipment and procedure from the manufacturer, yes. Otherwise, use a qualified technician or service provider. Incorrect calibration can make a detector unsafe.
How long do gas detector sensors last?
It depends on the sensor type, the gas and the environment. Electrochemical and catalytic sensors are consumable and commonly last from one to several years, with oxygen sensors often at the shorter end. Performance trends in calibration are a better guide than age alone.
What does a 4-20 mA signal below 4 mA mean on a fixed gas detector?
It usually indicates a fault, such as a broken wire, loss of power, or an internal detector fault. The exact fault levels vary by manufacturer, so check the manual.
Can humidity or temperature change cause false readings?
Yes. Rapid changes can cause drift or spikes, especially in electrochemical and infrared sensors. Let the detector stabilize before zeroing or entering a space.
Is it safe to use a gas detector that is overdue for calibration?
No. An overdue detector may not respond correctly to a real hazard. Bump test and calibrate it, or use another detector that is in date.
Final Thoughts
Troubleshooting gas detectors is mostly a process of elimination: confirm power, check the sampling path, use good gas, zero in clean air, and watch the trends in your calibration records.
Most “mystery” problems turn out to be filters, gas, flow or environment. The rest are usually sensors that have done their job and need replacing.
The most important rule does not change: if you cannot prove the detector works, do not rely on it to protect people.
Always refer to your detector’s user manual and your site’s safety procedures. This guide is general information and does not replace manufacturer instructions, training or applicable regulations.