
How to Clean Portable Gas Monitors (Without Damaging the Sensors)

Your portable gas monitor spends its working life in one of the dirtiest environments imaginable, clipped to your collar in confined spaces, dusty plants, and greasy mechanical rooms.

And because it has to sit inches from your nose and mouth to do its job, every bit of grime, sweat, and bacteria it collects ends up right in your breathing zone.

So it needs regular cleaning. The problem? The obvious solution, grabbing a disinfecting wipe like you would for any other piece of shared equipment, is one of the fastest ways to compromise your monitor’s sensors and trigger false readings.

After years of working with gas detection systems in industrial environments, I’ve seen perfectly good monitors pulled from service because someone cleaned them the wrong way.

This guide covers how to clean portable gas monitors properly: what to use, what to avoid, and how to verify your instrument still reads accurately afterward.

Why Gas Monitor Placement Makes Cleaning a Health Issue

Portable gas monitors only protect you if they sample the air you actually breathe. That’s why they’re worn in the breathing zone, which OSHA defines as “a hemisphere forward of the shoulders within a radius of approximately six to nine inches” around the nose and mouth.

In practice, that means clipping the monitor to

  • A shirt collar
  • A lapel
  • An outside breast pocket

These positions keep the instrument sampling representative air, and they keep the display visible and important in high-noise environments where you might not hear an audible alarm and need to rely on visual or vibration alerts.

But here’s the trade-off: anything living on the surface of that monitor, dirt, oil, chemical residue, or bacteria from shared instrument pools is now sitting six to nine inches from your face for an entire shift.

On sites where monitors are shared between workers across shifts, hygiene becomes a genuine occupational health concern, not just an equipment care issue.

Regular cleaning is non-negotiable. Cleaning it correctly is what most workers get wrong.

Why You Shouldn’t Use Regular Disinfectants on a Gas Detector

Here’s the counterintuitive part: the chemicals in standard disinfecting wipes and sprays are often the very compounds your monitor is designed to detect.

The rubber housings, plastic casings, and sensor membranes on a gas monitor are slightly porous. When you wipe the instrument down with a disinfectant, those materials absorb some of the chemical alcohols, chlorine compounds, and quaternary ammonium solutions and then slowly off-gas them over the following minutes or hours.

This creates two serious problems:

False alarms and phantom readings

Sensors, particularly PID and some electrochemical sensors, respond to the absorbed chemicals as they off-gas.

You’ll see readings with no actual hazard present, which erodes trust in the instrument. And a workforce that stops trusting its gas monitors is a workforce in danger.

Unreliable zeroing

You can’t simply zero the instrument and move on, because the off-gassing continues at an unpredictable rate.

The effect is temporary, but the length of time you’d need to wait before zeroing varies by chemical, temperature, and how saturated the materials became. That variability leaves far too much room for error on a life-safety device.

Worse still, some cleaning chemicals don’t just cause temporary interference; they cause permanent sensor damage. More on that below.

How to Clean a Portable Gas Monitor: Step by Step

Proper cleaning protects two things at once: the worker wearing the instrument and the sensitive electrochemical, catalytic bead, and infrared sensors inside it.

Step 1: Check the manufacturer’s manual first

Always verify the cleaning procedure in the user manual for your specific instrument. Manufacturers like Honeywell, Dräger, Industrial Scientific, and MSA publish model-specific cleaning guidance, and some instruments have unique requirements around sensor ports, pump inlets, or IP-rated seals. When the manual conflicts with general advice, the manual wins.

Step 2: Switch the monitor off

Power the instrument down completely before cleaning. This prevents the sensors from responding to cleaning agents mid-wipe and protects the electronics if any moisture finds its way inside.

Step 3: Start with a dry, soft cloth

Unless the manufacturer instructs otherwise, your default cleaning tool is a dry, soft, lint-free rag. For everyday dust and light grime, this is often all you need. Wipe down the housing, display, clip, and around (but not into) the sensor ports.

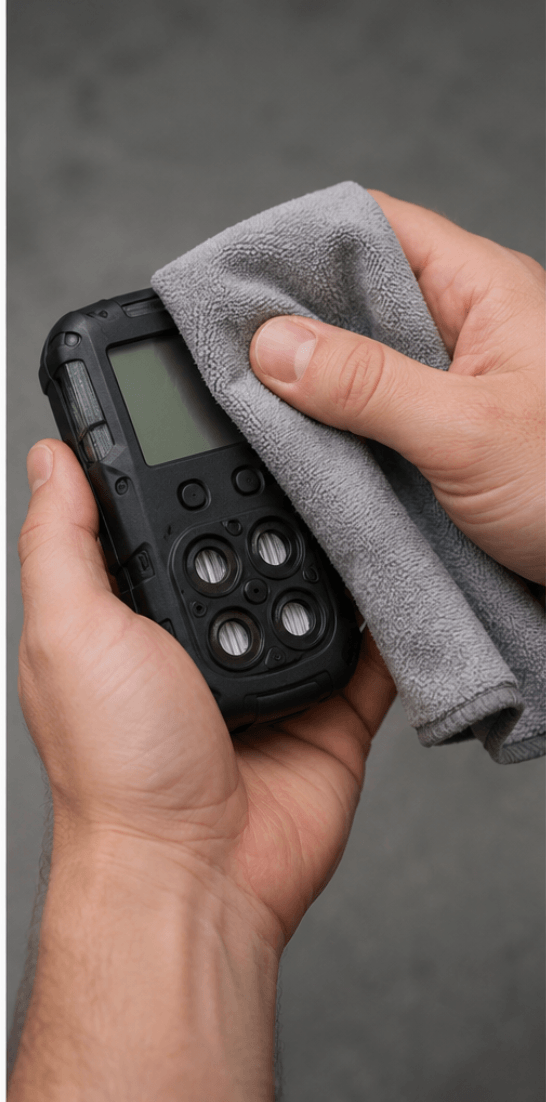
Step 4: Use mild soap and water for heavier soiling

If dry wiping isn’t enough, lightly moisten a soft cloth with a solution of mild soap and water. The key word is lightly.

The cloth should be damp, never dripping. Wipe the exterior surfaces, then follow with a cloth dampened with clean water to remove soap residue.

Be extremely careful not to introduce liquid into the following:

  • Sensor ports and membranes
  • Pump inlets (on pumped/aspirated monitors)
  • Speaker and alarm openings
  • Charging contacts and data ports

Step 5: Let it dry completely before powering on

Do not switch the monitor back on until it is completely dry. Powering up a damp instrument risks short circuits and can pull moisture toward the sensors.

Air-dry at room temperature; never use compressed air, heaters, or direct sunlight to speed things up, as heat can degrade sensor electrolytes.

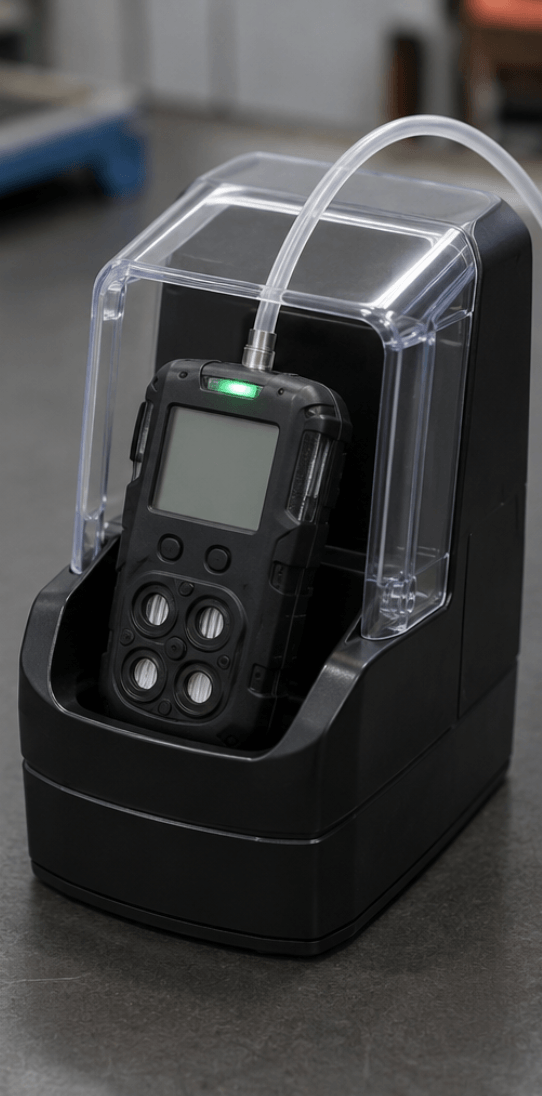
Step 6: Bump test before returning to service

After any cleaning, perform a bump test before the instrument goes back into service. A quick functional check with known concentration gas confirms the sensors still respond correctly and the alarms activate.

If the bump test fails, perform a full calibration, and if readings still drift, the instrument needs professional attention.

Cleaning Agents to Avoid (And What They Do to Sensors)

Not all “gentle” cleaners are safe for gas detection instruments. Keep these away from your monitors:

Alcohol-based products (isopropyl wipes, hand sanitizer residue)

Alcohols cause a temporary response on several sensor types, particularly PID sensors and some electrochemical cells, leading to false alarms and unstable baselines.

If alcohol-based cleaning is unavoidable on your site, expect to wait an extended, unpredictable period before the instrument stabilizes enough to zero accurately.

Chlorine-based cleaners (bleach solutions, chlorinated wipes)

Chlorine compounds can cause permanent loss of sensitivity in catalytic bead (LEL) sensors and some electrochemical sensors. This is sensor poisoning; the damage doesn’t recover, and the sensor must be replaced.

Silicone-containing products (many polishes, protectants, and some lotions)

Silicones are among the most notorious LEL sensor poisons in the industry. Even trace silicone vapor coats the catalytic bead and permanently kills its ability to respond to combustible gas, often without any obvious warning. A poisoned LEL sensor can read zero in an explosive atmosphere.

Solvents and harsh cleansers (acetone, degreasers, ammonia-based cleaners)

These attack the plastics, seals, and sensor membranes and can permanently damage the sensing elements themselves.

The danger with sensor poisoning is that it’s silent. The monitor looks fine, powers on, and displays readings.

It just no longer responds to gas. This is exactly why bump testing after cleaning (and before every day’s use) matters so much.

Quick Reference: Do’s and Don’ts

DoDon’t
Check the instrument manual firstAssume all monitors clean the same way
Switch the monitor off before cleaningClean a powered-on instrument
Use a dry, soft, lint-free clothUse disinfecting wipes or sprays
Use mild soap and a lightly damp cloth if neededSoak the instrument or let liquid pool
Air-dry completely before powering onUse heat or compressed air to dry
Bump test after cleaningReturn a monitor to service, unverified.
Keep silicones and chlorine away entirelyUse bleach, solvents, or polishes

What About Disinfecting Shared Monitors?

Shared instrument pools raise a fair question: if disinfecting wipes are off the table, how do you handle hygiene between users?

A few practical approaches:

  • Assign monitors to individuals where budget allows. Personal hygiene eliminates the cross-contamination problem and improves accountability for care and charging.
  • Clean with mild soap and water between users. Done properly, soap-and-water cleaning removes the oils and grime that harbor bacteria without introducing sensor-poisoning chemicals.
  • Consult the manufacturer for approved disinfection procedures. Some manufacturers have published instrument-specific hygiene guidance (many did during the COVID-19 era) identifying which agents are tolerable for their specific sensor configurations and how long to wait before zeroing. Follow their procedure exactly; don’t generalize it to other brands or models.

Frequently Asked Questions

Can I use alcohol wipes on my gas detector?

Avoid them. Alcohol absorbs into the housing and membranes, then off-gasses and triggers temporary sensor responses and false alarms.

The waiting period before the instrument stabilizes is unpredictable, which makes accurate zeroing unreliable.

How often should I clean my portable gas monitor?

Wipe it down with a dry cloth whenever it’s visibly dirty and as part of routine end-of-shift care. Deeper soap-and-water cleaning depends on the environment; dusty, oily, or shared-use conditions call for more frequent attention.

Why does my gas monitor alarm after cleaning?

Most likely, the cleaning agent has been absorbed into the housing or sensor membrane and is off-gassing. If you used alcohol-based products, the response is usually temporary.

If you used chlorine or silicone-containing products, the sensor may be permanently poisoned; perform a bump test to verify and recalibrate or replace the sensor if it fails.

Do I need to recalibrate after cleaning?

A full calibration isn’t automatically required, but a bump test is strongly recommended after every cleaning. If the bump test fails, calibrate. If calibration fails, the sensor likely needs replacement.

Can I rinse my gas monitor under running water?

No, even monitors with high IP ratings shouldn’t be held under running water for cleaning. Excess liquid can enter sensor ports and pump inlets. A lightly dampened cloth is the maximum moisture the instrument should see.

Final Thoughts

Cleaning a portable gas monitor is simple once you know the rules: read the manual first, power off, use a dry cloth by default, use mild soap and water when needed, dry completely, and perform a bump test before service.

The instruments that fail early aren’t usually the ones that got dirty. They’re the ones that got “cleaned” with disinfecting wipes, bleach, or silicone polish.

Your gas monitor is the last line of defense between you and an invisible hazard. Treat its sensors with the same care you’d expect from them.

Why Carbon Monoxide Is Called “The Silent Killer”

Every year, hundreds of people go to sleep in their homes, cabins, or job site trailers and never wake up.

Others collapse at their workbench, in a boiler room, or inside a confined space with no warning, no smell of danger, and no chance to react.

The cause in these cases is carbon monoxide (CO), a gas so stealthy that safety professionals, firefighters, and toxicologists all use the same nickname for it: The Silent Killer.

But why exactly did carbon monoxide earn that name, and what makes it more dangerous than almost any other common gas hazard?

As someone who has spent years working with industrial gas detection systems, I can tell you the answer comes down to three things: you can’t sense it, your body welcomes it, and its symptoms disguise themselves as something harmless.

Let’s break each one down.

What Is Carbon Monoxide?

Carbon monoxide is a simple molecule: one carbon atom bonded to one oxygen atom (CO). It’s produced whenever a carbon-based fuel burns incompletely, meaning there isn’t enough oxygen present for full combustion.

Common CO sources include:

  • Gas furnaces, boilers, and water heaters with poor ventilation or cracked heat exchangers
  • Gasoline and diesel engines (vehicles, generators, forklifts, pressure washers)
  • Charcoal grills and portable camp stoves used indoors
  • Wood-burning stoves and fireplaces with blocked flues
  • Industrial processes: steel production, foundries, petrochemical operations, kilns
  • Propane-powered equipment like floor buffers and ice resurfacers

Notice a pattern: nearly all of these are everyday appliances and equipment. CO doesn’t come from exotic industrial chemicals.

It comes from the furnace in your basement and the generator in your garage. That ordinariness is part of what makes it so deadly.

Reason #1: CO Is Completely Undetectable by Human Senses

This is the core of the “silent killer” name. Carbon monoxide is

  • Colorless: you cannot see it, even at lethal concentrations
  • Odorless: it has no smell whatsoever
  • Tasteless: it produces no sensation in the mouth or throat
  • Non-irritating: unlike ammonia, chlorine, or hydrogen sulfide, CO doesn’t sting your eyes, burn your nose, or make you cough

Compare that to other toxic gases. Hydrogen sulfide smells like rotten eggs (at least at low concentrations).

Chlorine has a sharp, bleach-like odor. Ammonia is immediately irritating. Naturally odorless, and even natural gas has mercaptan added specifically so you can smell a leak.

Carbon monoxide gives you nothing. No smell, no visible haze, no irritation, no warning of any kind. A room can contain a fatal concentration of CO and feel exactly like a room with clean air.

Your senses, the alarm system evolution gave you, are completely blind to it. That’s the first half of “silent.”

Reason #2: Your Body Actively Prefers CO Over Oxygen

Here’s where the killer part comes in, and it’s genuinely one of the cruelest tricks in toxicology.

When you breathe, oxygen enters your lungs and binds to hemoglobin, the protein in red blood cells that transports oxygen to your tissues and organs.

Carbon monoxide binds to that same hemoglobin but with roughly 200 to 250 times greater affinity than oxygen.

In other words, if both oxygen and carbon monoxide are present in your lungs, your blood chooses the poison.

When CO binds to hemoglobin, it forms carboxyhemoglobin (COHb). Every hemoglobin molecule occupied by CO can no longer carry oxygen.

As COHb levels rise, your body slowly suffocates from the inside even though you’re breathing normally and your lungs are full of air.

Approximate effects by carboxyhemoglobin level.

COHb LevelTypical Effects
0–5%Normal range (smokers may run higher)
10–20%Headache, fatigue, shortness of breath on exertion
20–30%Throbbing headache, dizziness, nausea, impaired judgment
30–40%Severe headache, vomiting, confusion, fainting
40–50%Loss of consciousness, collapse
50%+Seizures, coma, death

And CO doesn’t leave quickly. The half-life of carboxyhemoglobin is around 4–6 hours breathing normal air, which means exposure accumulates over a shift or overnight.

A “low” concentration breathed for eight hours can be just as dangerous as a high concentration breathed briefly.

Reason #3: The Symptoms Disguise Themselves as the Flu

The third reason CO is called the silent killer might be the most insidious: its early symptoms mimic common, harmless illnesses.

Early CO poisoning feels like

  • Headache
  • Fatigue and drowsiness
  • Nausea
  • Dizziness
  • Mild confusion or “brain fog”

Sound familiar? That’s a flu, a hangover, a bad night’s sleep, or simple tiredness at the end of a long shift. Victims routinely misdiagnose themselves. They take a painkiller. They lie down to rest.

And that’s the fatal decision because if the CO source is in the home, lying down to “sleep it off” means continuing to breathe the gas, often at even higher concentrations near a faulty appliance. Many CO fatalities are found in bed.

Worse, CO impairs judgment and cognition as levels rise. By the time symptoms become severe, victims are often too confused or weak to recognize the danger, call for help, or even walk out the door. The gas disables the very mental faculties you’d need to escape it.

Entire families have died this way, one by one, assuming they’d caught the same “stomach bug.”

The Numbers: How Deadly Is Carbon Monoxide?

Carbon monoxide is consistently among the leading causes of accidental poisoning deaths worldwide.

In the United States alone, unintentional, non-fire-related CO poisoning is responsible for roughly 400+ deaths and tens of thousands of emergency department visits every year.

Cases spike in winter, when heating systems run continuously and homes are sealed tight, and after storms and power outages, when portable generators get run in garages or too close to windows.

In industrial settings, CO is a constant concern in steel mills, foundries, mines, warehouses with propane forklifts, boiler rooms, and any confined space where combustion has occurred.

Occupational Exposure Limits for CO

For readers on the industrial side, these are the key exposure benchmarks in the United States:

  • OSHA PEL: 50 ppm (8-hour time-weighted average)
  • NIOSH REL: 35 ppm (8-hour TWA), with a 200 ppm ceiling
  • ACGIH TLV: 25 ppm (8-hour TWA)
  • NIOSH IDLH: 1,200 ppm (Immediately Dangerous to Life or Health)

Put those numbers in context: a poorly ventilated garage with a running vehicle can exceed the IDLH level in minutes.

A faulty furnace can quietly push a home well past occupational limits all night long.

Concentrations of 3,200 ppm can cause loss of consciousness in under 30 minutes; above 12,000 ppm, death can occur within one to three minutes.

The Only Defense: Detection Technology

Because human senses are useless against CO, the only reliable protection is electronic detection. This is not optional equipment; it’s the single layer standing between occupants and a gas they will never perceive.

In Homes

  • Install CO alarms on every level of the home and outside every sleeping area (this is code in most jurisdictions)
  • Choose alarms certified to UL 2034
  • Test monthly and replace units per the manufacturer’s end-of-life date (typically 5–10 years; the sensor degrades even if the unit still powers on)
  • Never run generators, grills, or engines indoors or in attached garages, even with the door open

In Industrial and Commercial Settings

  • Fixed CO detection systems with electrochemical sensors for continuous monitoring in boiler rooms, parking structures, warehouses, and process areas
  • Portable single-gas or multi-gas monitors for workers entering areas with combustion sources or confined spaces. CO is one of the four standard gases on virtually every 4-gas monitor (alongside O₂, H₂S, and LEL) precisely because it is so common and so undetectable
  • Regular bump testing and calibration of a CO sensor that hasn’t been verified is a false sense of security, which is arguably worse than no sensor at all

Electrochemical CO sensors work by oxidizing CO at a sensing electrode, generating a current proportional to gas concentration.

They’re accurate, selective, and inexpensive; there is no economic excuse for leaving people unprotected.

What to Do If You Suspect CO Exposure

Get to fresh air immediately

Don’t stop to open windows or find the source.

Call emergency services

(911 in the US/Mexico area codes vary; use your local emergency number) and report suspected CO poisoning.

Get everyone out

Including pets, animals often show symptoms before humans do.

Do not re-enter

Do not re-enter until the fire department or a qualified technician confirms the space is safe.

Seek medical attention

Even if symptoms seem mild. COHb levels can be measured with a blood test, and treatment with high-flow oxygen dramatically shortens the half-life of carboxyhemoglobin.

    The Bottom Line

    Carbon monoxide is called “the silent killer” because it attacks through a perfect storm of stealth.

    1. It’s invisible to every human sense: no color, no odor, no taste, no irritation.
    2. Your own blood betrays you, binding CO 200+ times more readily than the oxygen you need to live.
    3. Its symptoms impersonate the flu, convincing victims to rest in the very environment that’s killing them while eroding the judgment they’d need to escape.

    Against an adversary like that, awareness and detection technology aren’t just recommendations. They’re the entire defense.

    A $30 CO alarm in a home, or a properly calibrated monitor on a worker’s belt, is quite literally the only voice this silent killer can’t take away.

    FAQ: Why Carbon Monoxide Is Called “The Silent Killer”

    Why can’t you smell carbon monoxide?

    Carbon monoxide is a naturally odorless molecule. Unlike natural gas, no odorant is added to it because CO isn’t a distributed fuel.

    It’s an unwanted byproduct of incomplete combustion, so there’s no supply chain where an odorant could be introduced.

    How long does it take for carbon monoxide to kill you?

    It depends on concentration. At extreme levels (12,000+ ppm), death can occur in 1–3 minutes. At moderate levels (400–800 ppm), serious symptoms develop within 45 minutes, and death can occur within 2–3 hours. Even low levels can be fatal over a full night of exposure.

    Can carbon monoxide poisoning happen with windows open?

    Open windows reduce risk but don’t eliminate it. If a strong CO source (like a generator or running vehicle) is nearby, dangerous concentrations can still accumulate. Never rely on ventilation alone; use a CO alarm.

    Do carbon monoxide detectors expire?

    Yes. The electrochemical sensor inside degrades over time, typically lasting 5–10 years. Every certified CO alarm has a replacement date printed on it; replace the entire unit by that date even if it still passes its test button check.

    Gas Detection Basics: The Complete Guide for Beginners

    Every year, workers are injured or killed by gas hazards they never saw coming because the most dangerous gases in industry are invisible, and many are odorless too.

    Gas detection exists to give people what their senses can’t: an early warning before an atmosphere becomes explosive, toxic, or oxygen-deficient.

    If you’re new to industrial safety, responsible for a facility, or just trying to understand what that beeping monitor on a technician’s chest actually does, this guide covers the gas detection basics you need to know.

    We’ll walk through the three major gas-hazard categories, how the main sensor technologies work, what terms like LEL and PPM mean, the difference between fixed and portable systems, and the maintenance practices that keep detectors reliable.

    Why Gas Detection Matters

    Human senses are unreliable gas detectors. Carbon monoxide is completely odorless. Hydrogen sulfide has a strong rotten-egg smell at low concentrations.

    Still, at dangerous levels it paralyzes your sense of smell within minutes, a phenomenon called olfactory fatigue that has killed workers who assumed the gas had dissipated.

    Methane is odorless in its natural state. And an oxygen-deficient atmosphere gives almost no warning at all before you lose consciousness.

    Gas detection instruments measure the actual concentration of gases in the air and alarm before those concentrations reach dangerous levels.

    They protect against three fundamentally different types of hazard, and understanding these three categories is the foundation of everything else in gas detection.

    The Three Types of Gas Hazards

    Combustible (Flammable) Gas Hazards

    Flammable gases like methane, propane, hydrogen, and gasoline vapors become explosive when they mix with air in the right proportions.

    Every flammable gas has a Lower Explosive Limit (LEL), the minimum concentration in air at which it can ignite, and an Upper Explosive Limit (UEL), above which the mixture is too rich to burn.

    For methane, the LEL is about 5% by volume in air. Gas detectors don’t wait until you reach that point.

    Combustible gas monitors typically alarm at 10% of the LEL for methane, which is just 0.5% gas by volume, giving workers a wide safety margin before the atmosphere becomes genuinely explosive.

    How to Choose the Right LEL Gas Detector

    Toxic Gas Hazards

    Toxic gases harm the body at concentrations far below any explosive threshold, which is why they’re measured in parts per million (ppm) rather than percent. Common industrial toxic gases include the following:

    Carbon monoxide (CO)

    Produced by combustion engines, furnaces, and incomplete burning. Binds to hemoglobin and starves the body of oxygen.

    Hydrogen sulfide (H₂S)

    Common in oil and gas, wastewater, and agriculture. Deadly at 100+ ppm; deadens your sense of smell well before that.

    Ammonia (NH₃)

    Used in industrial refrigeration and fertilizer production.

    Chlorine (Cl₂)

    Water treatment and chemical processing.

    Sulfur dioxide (SO₂)

    Smelting, combustion of sulfur-containing fuels.

    Exposure limits for toxic gases are defined by regulatory and advisory bodies. You’ll see terms like TWA (time-weighted average over an 8-hour shift), STEL (short-term exposure limit, usually 15 minutes), and IDLH (immediately dangerous to life or health). Toxic gas monitors alarm when concentrations approach these limits.

    Oxygen Hazards

    Normal air contains 20.9% oxygen. Anything below 19.5% is considered oxygen-deficient by OSHA, and levels below 16% begin to impair judgment and coordination, often before the victim realizes anything is wrong.

    Oxygen deficiency is usually caused by displacement: nitrogen purging, argon welding gas, CO₂ from fermentation, or decomposition in confined spaces all push breathable air out.

    Oxygen enrichment (above 23.5%) is also dangerous, because enriched atmospheres make materials ignite more easily and burn far more violently.

    This is why the standard confined space monitor always includes an oxygen sensor alongside combustible and toxic gas sensors.

    How Gas Detection Sensors Work

    Different gases require different sensing technologies. These four cover the vast majority of industrial applications.

    Catalytic Bead (Pellistor) Sensors: Combustible Gases

    The workhorse of combustible gas detection. A catalytic bead sensor contains a small heated ceramic bead coated with a catalyst.

    When flammable gas contacts the bead, it oxidizes (burns) on the surface, raising the bead’s temperature and changing its electrical resistance. That resistance change is proportional to gas concentration.

    Strengths

    Broad response to most flammable gases, proven technology, and relatively inexpensive.

    Limitations

    Requires oxygen to function, can be poisoned by silicones and sulfur compounds, and sensors degrade over time, which is why bump testing matters (more on that below).

    Electrochemical Sensors: Toxic Gases and Oxygen

    Electrochemical cells work like tiny fuel cells. The target gas diffuses into the sensor and undergoes a chemical reaction at an electrode, generating a small electrical current proportional to the gas concentration. Most CO, H₂S, O₂, Cl₂, SO₂, and NH₃ sensors in portable monitors are electrochemical.

    Strengths

    Excellent sensitivity at ppm levels, low power consumption, gas-specific.

    Limitations

    Finite lifespan (typically 2–3 years) as the cell chemistry depletes, sensitivity to temperature and humidity extremes, and potential cross-sensitivity (some sensors respond partially to gases other than their target).

    Infrared (IR) Sensors: Combustible Gases and CO₂

    Infrared sensors measure how much IR light a gas absorbs at specific wavelengths. Hydrocarbons and CO₂ absorb infrared energy in predictable patterns, so the amount of absorption reveals the concentration.

    Strengths

    No oxygen required, immune to catalytic poisoning, long service life, fail-safe design (a blocked optical path triggers a fault).

    Limitations

    Higher cost, and IR sensors cannot detect hydrogen, which doesn’t absorb infrared light.

    Photoionization Detectors (PID): Volatile Organic Compounds

    PIDs use ultraviolet light to ionize gas molecules, producing a measurable current. They excel at detecting volatile organic compounds (VOCs), solvents, fuels, and industrial chemicals at very low ppm or even ppb levels that other sensors would miss entirely.

    Strengths

    Extremely sensitive to a wide range of VOCs.

    Limitations

    Non-specific (a PID tells you something is present, not exactly what), and readings must be adjusted with correction factors for specific compounds.

    Quick Sensor Comparison

    Sensor TypeDetectsMeasurement RangeTypical LifespanKey Limitation
    Catalytic beadCombustible gases0–100% LEL3–5 yearsNeeds O₂; can be poisoned
    ElectrochemicalToxic gases, O₂ppm / % volume2–3 yearsCell depletion, cross-sensitivity
    InfraredHydrocarbons, CO₂0–100% LEL / % vol5+ yearsCan’t detect hydrogen
    PIDVOCsppb–ppm1–3 years (lamp)Non-specific readings

    Fixed vs. Portable Gas Detection: What’s the Difference?

    Gas detection systems fall into two broad categories, and most facilities with serious gas hazards need both.

    Fixed gas detection systems are permanently installed sensors wired (or wirelessly connected) to a central controller.

    They monitor specific locations, such as compressor rooms, chemical storage, and boiler rooms, 24 hours a day, and can automatically trigger alarms, ventilation fans, or process shutdowns. Fixed systems protect places and processes.

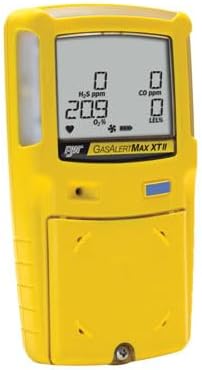
    Portable gas monitors are worn or carried by workers. The most common configuration is the 4-gas monitor, which measures combustible gases (LEL), oxygen, carbon monoxide, and hydrogen sulfide, the standard package for confined space entry and general industrial work. Portable monitors protect people wherever they go, including areas fixed sensors don’t cover.

    A simple way to think about it: fixed systems guard your facility around the clock; portable monitors guard the worker in their immediate breathing zone. They complement each other rather than compete.

    Understanding Gas Detector Readings and Alarms

    A gas monitor is only useful if you understand what it’s telling you. The essentials:

    %LEL

    Combustible gas readings displayed as a percentage of the lower explosive limit, not a percentage of gas in air.

    A reading of 10% LEL for methane means the atmosphere contains 0.5% methane (10% of methane’s 5% LEL). Typical alarm setpoints: low alarm at 10% LEL, high alarm at 20% LEL.

    PPM

    Parts per million, used for toxic gases. For reference, 1% by volume equals 10,000 ppm. Typical CO alarms are set around 35 ppm (low) and 200 ppm (high); H₂S around 10 ppm and 15 ppm.

    %O₂

    Oxygen is displayed as a percentage by volume. Alarms typically at 19.5% (deficiency) and 23.5% (enrichment).

    Modern monitors also log TWA and STEL values, tracking cumulative exposure across a shift, critical for demonstrating regulatory compliance and protecting workers from chronic low-level exposure that never triggers an instantaneous alarm.

    Calibration and Bump Testing: The Basics of Detector Maintenance

    A gas detector that hasn’t been verified is a false sense of security clipped to your shirt. Two maintenance practices keep detectors honest:

    Bump testing is a quick functional check: expose the monitor to a known concentration of test gas and confirm the sensors respond and alarms activate.

    It doesn’t adjust anything; it simply proves the instrument works. Industry best practice (and ISEA guidance) is to bump test portable monitors before each day’s use.

    Calibration goes further: the instrument’s response is adjusted to match a certified concentration of calibration gas, correcting for sensor drift.

    Full calibration is typically performed monthly, or per the manufacturer’s schedule, and always after a failed bump test.

    Skipping these steps is one of the most common and most dangerous failures in gas detection programs.

    Sensors drift, get poisoned, and degrade silently. The instrument will still power on and display comforting zeros right up until the moment it fails to warn you.

    Regulatory Framework: Who Requires Gas Detection?

    In the United States, several OSHA standards drive gas detection requirements.

    29 CFR 1910.146 (Permit-Required Confined Spaces)

    It requires atmospheric testing for oxygen, combustible gases, and toxic contaminants before and during confined space entry, in that specific order.

    29 CFR 1910.1000

    It establishes permissible exposure limits (PELs) for hundreds of air contaminants.

    Substance-specific standards

    Gases like hydrogen sulfide and formaldehyde have their own detailed requirements.

    Beyond OSHA, standards from NFPA, ANSI/ISEA, and international bodies like IEC 60079-29 govern detector performance, placement, and maintenance.

    If your facility handles flammable or toxic gases, some combination of these almost certainly applies to you.

    Common Beginner Mistakes in Gas Detection

    Trusting your nose

    Olfactory fatigue, odorless gases, and adaptation make human smell worthless as a safety system.

    Skipping bump tests

    A monitor that hasn’t been verified today is an assumption, not a safeguard.

    Ignoring sensor placement

    Heavier-than-air gases (propane, H₂S) accumulate low; lighter gases (methane, hydrogen) rise. Fixed sensors mounted at the wrong height can miss a leak entirely.

    Using the wrong sensor for the environment

    Catalytic bead sensors in oxygen-deficient inert atmospheres will read zero even in pure methane.

    Ignoring cross-sensitivity

    An unexpected reading on one sensor may actually be caused by a different gas. Know your monitor’s cross-sensitivity table.

    Treating alarms as nuisances

    Alarm fatigue, silencing or ignoring alarms is a documented factor in serious incidents.

      Frequently Asked Questions

      What are the basics of gas detection?

      Gas detection uses sensors to measure combustible gases, toxic gases, and oxygen levels in the air, alarming before concentrations reach dangerous thresholds.

      The fundamentals include understanding the three hazard types, the sensor technologies that detect them, alarm setpoints like 10% LEL, and regular bump testing and calibration.

      What is the difference between LEL and PPM?

      %LEL measures combustible gas as a percentage of its lower explosive limit, an explosion-hazard scale.

      PPM (parts per million) measures much smaller concentrations and is used for toxic gases, where health effects occur far below explosive levels.

      What four gases does a standard multi-gas monitor detect?

      The standard 4-gas monitor detects combustible gases (as %LEL), oxygen, carbon monoxide, and hydrogen sulfide, the four most common atmospheric hazards in industrial and confined space work.

      How often should a gas detector be calibrated?

      Best practice is a bump test before each day’s use and full calibration monthly or per the manufacturer’s recommendation. Any monitor that fails a bump test must be fully calibrated before it returns to service.

      Can I rely on my sense of smell to detect gas leaks?

      No. Carbon monoxide and methane are odorless, and hydrogen sulfide paralyzes your sense of smell at dangerous concentrations. Only calibrated instruments can reliably confirm whether an atmosphere is safe.

      Building on the Basics

      Gas detection isn’t complicated at its core: know your hazards, match the right sensor technology to each one, set appropriate alarm levels, and verify your instruments regularly.

      But the details of sensor selection, placement, calibration programs, and regulatory compliance are where safety programs succeed or fail.

      From here, a good next step is learning about multi-gas monitor sensor selection, the differences between fixed and portable gas detection systems, and proper bump testing and calibration procedures.

      At SafeguardSense, we break down industrial gas detection topics with practitioner-level depth so safety managers, technicians, and facility owners can make informed decisions. Explore our guides or contact us with your gas detection questions.

      This article is for informational purposes only and does not replace site-specific hazard assessments, manufacturer instructions, or applicable regulations. Always consult qualified safety professionals for your facility’s gas detection program.

      Gas Detection for Water Treatment: The Complete Safety Guide

      Water treatment keeps communities alive, but the same processes that clean our water can quietly generate some of the deadliest gases workers ever encounter.

      Hydrogen sulfide, methane, chlorine, and oxygen-deficient atmospheres all lurk in wet wells, digesters, and confined spaces, and most give little or no warning before they incapacitate someone.

      Gas detection technology has come a long way, with smarter sensors, better data logging, and rugged portable monitors that clip to a belt.

      Yet none of that matters if the wrong system is installed, the sensors drift out of calibration, or a worker trusts their nose instead of a meter.

      Gas detection isn’t a nice-to-have in water and wastewater treatment; it’s the layer of protection standing between a routine shift and a fatality.

      This guide breaks down which gases threaten water treatment facilities, why hydrogen sulfide deserves special respect, and how to choose and maintain a gas detection system that actually keeps your team safe.

      The gases that threaten water treatment facilities

      Water treatment doesn’t produce a single hazard; it produces a shifting cocktail of them, depending on the process stage and whether an area is enclosed. The main offenders are the following:

      Hydrogen sulfide (H₂S)

      The most common and most lethal gas in wastewater environments. Colorless, flammable, and heavier than air, so it pools in low-lying and confined spaces.

      Methane (CH₄)

      A byproduct of anaerobic digestion. It’s flammable and, in high concentrations, displaces oxygen. Monitored on the %LEL scale.

      Chlorine (Cl₂)

      Used as a disinfectant. Toxic and corrosive even at low concentrations, with a sharp, irritating odor.

      Carbon dioxide (CO₂) and oxygen deficiency

      Biological activity and displacement by other gases can drop oxygen below the safe 19.5% threshold, causing asphyxiation with no warning.

      Ammonia (NH₃)

      Present in some treatment streams and used in certain disinfection processes; toxic and pungent.

      A single portable monitor set up only for one gas can leave a worker blind to the others. That’s why multi-gas detection, typically H₂S, LEL (combustibles), oxygen, and carbon monoxide as a four-gas baseline, is the standard for anyone entering a treatment area or confined space.

      Why hydrogen sulfide is the silent killer

      Hydrogen sulfide earns its reputation. It’s a colorless, flammable gas with the unmistakable “rotten egg” smell at low concentrations, and that smell is exactly what makes it so dangerous, because you cannot trust it.

      Where H₂S actually comes from

      Contrary to a common misconception, chlorine does not create hydrogen sulfide in water treatment.

      It’s the opposite. H₂S is produced biologically: sulfate-reducing bacteria (SRB) break down organic matter under anaerobic (oxygen-free) conditions and convert sulfate compounds into hydrogen sulfide.

      This happens wherever wastewater goes stagnant, such as septic lift stations, force mains, wet wells, gravity sewers with low flow, and anaerobic digesters.

      Chlorine is an oxidizer that facilities actually use to help control sulfide and odor, not a source of it.

      Because H₂S is heavier than air, it accumulates in exactly the places workers are asked to enter: manholes, sumps, tanks, and utility vaults.

      That combination, biologically generated, invisible, and concentrated in confined spaces is why H₂S is one of the leading causes of occupational fatalities in the wastewater industry.

      Why you can never trust your nose

      At low levels, H₂S smells strongly. But within minutes of exposure to higher concentrations, olfactory fatigue sets in; the gas deadens your sense of smell, so it seems to “disappear” even as the concentration climbs.

      OSHA is explicit on this point: smell must never be used to gauge the presence or safety of hydrogen sulfide.

      A worker who thinks the danger has passed because the odor faded may actually be standing in a lethal atmosphere.

      H₂S health effects by concentration

      The following figures are drawn from OSHA and NIOSH guidance. They illustrate how quickly the margin for error vanishes.

      Concentration (ppm)Effect on the body
      0.02Odor threshold detectable “rotten egg” smell
      20 (OSHA PEL ceiling)Ceiling limit not to be exceeded; irritation to eyes, nose, throat
      50 (OSHA peak)Permitted only up to 10 minutes with no other exposure; increasing irritation
      ~100 (NIOSH IDLH)Immediately Dangerous to Life or Health; olfactory fatigue (loss of smell) within minutes
      500–700Staggering, collapse within minutes; death possible in 30–60 minutes
      700+“Knockdown”, collapse and loss of consciousness within one or two breaths; rapid death

      Note

      OSHA’s construction and shipyard standards apply an even stricter 8-hour limit of 10 ppm. Always confirm the exposure limits that apply to your specific operation and jurisdiction.

      What to do if you suspect an H₂S release

      If gas alarms sound or you suspect a dangerous atmosphere:

      Evacuate immediately

      Move upwind and to higher ground, since H₂S settles low. Do not stop to investigate.

      Never enter to rescue without protection

      A huge share of H₂S deaths are of would-be rescuers who collapse alongside the first victim. Entry requires SCBA or supplied-air respirators and a trained standby team.

      Account for everyone and call emergency services

      Report a hydrogen sulfide exposure so responders arrive equipped for a toxic atmosphere.

      Ventilate before re-entry

      Ventilate before re-entry and confirm safe readings with a calibrated monitor before anyone goes back in.

        Unlike a natural-gas leak, there’s no external “gas supply” to shut off — H₂S is generated on-site by the process itself.

        Control comes from ventilation, atmospheric monitoring, and confined-space procedures, not from closing a valve to a utility.

        The role of gas detection in water treatment

        Every hazard above shares one solution: continuous, reliable atmospheric monitoring. A gas detection system watches the air around the clock, and when a gas crosses a preset threshold, it triggers audible and visual alarms so workers can act before the atmosphere turns deadly.

        There are two fundamental deployment types, and most facilities need both.

        Fixed gas detection systems are permanently installed at known risk points: pump rooms, chlorine storage, digester galleries, and headworks and wired into a central panel or SCADA system for remote, continuous monitoring.

        They provide always-on coverage of a defined area and can automatically trigger ventilation or plant alarms.

        Portable gas detectors are worn or carried by workers, moving the protection with the person. They’re essential for confined-space entry, maintenance rounds, and any task where the hazard travels with the job.

        A confined-space entry should never happen without a portable multi-gas monitor and pre-entry atmospheric testing.

        Fixed systemsPortable monitors
        CoverageContinuous, fixed high-risk zonesTravels with the worker
        Best forChlorine rooms, digesters, headworksConfined-space entry, rounds, maintenance
        CostHigher install and integration costLower per-unit cost
        IntegrationTies into SCADA, ventilation, alarmsStandalone, personal protection

        Neither type is optional in a well-run facility; fixed detection guards the plant, and portable detection guards the individual.

        Calibration and bump testing: non-negotiable

        A gas detector is only as trustworthy as its last calibration. Sensors drift over time, and exposure to contaminants can degrade them. Two routines keep them honest.

        Bump test

        A quick check before each use, exposing the sensor to a known gas concentration to confirm the sensor responds and the alarms activate. Do this daily or before every entry.

        Full calibration

        A more thorough adjustment against certified calibration gas, performed on the manufacturer’s recommended schedule (commonly every few months, sooner in harsh environments).

        Skipping these steps is how facilities end up with monitors that read “clear” in a lethal atmosphere. If a detector fails a bump test, it comes out of service until it’s calibrated or repaired — no exceptions.

        How to choose the right gas detection system

        Selecting a system comes down to matching the equipment to your facility’s real hazards and layout. Weigh these factors.

        Which gases you actually face

        Map every process stage: H₂S at the headworks and wet wells, methane at the digesters, chlorine at disinfection, and oxygen deficiency in confined spaces.

        Your detection must cover all of them, not just the obvious one. A four-gas monitor (H₂S, LEL, O₂, CO) is a sensible baseline for personal protection.

        The area you need to monitor

        A sprawling plant needs multiple fixed points and remote monitoring; a small station may need a couple of fixed detectors plus portables. Match sensor coverage to the physical space and the way gases pool.

        Confined-space demands

        If workers enter tanks, vaults, or manholes, prioritize rugged portable monitors with sampling pumps for pre-entry testing, plus datalogging for compliance records.

        Sensor technology

        Electrochemical sensors for toxic gases like H₂S, catalytic bead or infrared for combustibles, and appropriate sensors for chlorine and ammonia. The right sensor type matters as much as the alarm.

        Integration and alerts

        Decide whether you need standalone alarms or integration with SCADA, ventilation, and remote notifications. In unmanned or remote stations, remote alerting can be the difference between a controlled response and a delayed one.

        Budget over the full lifecycle

        Factor in sensor replacement, calibration gas, and servicing, not just the purchase price. The cheapest monitor that goes uncalibrated is the most expensive mistake you can make.

        Investing in the right gas detection system is one of the highest-leverage safety decisions a water treatment facility can make.

        The gases are invisible, the margins are thin, and the technology to see them clearly already exists. The only real question is whether it’s deployed, calibrated, and trusted before the next confined-space entry, not after an incident.

        This article is for general educational purposes and does not replace site-specific risk assessment, manufacturer guidance, or applicable OSHA and local regulations. Always consult a qualified safety professional when designing or operating a gas detection program.

        Why Is a Sensor Showing Negative Values? Causes and Fixes

        If you’re staring at a gas detector or process sensor that reads below zero, you’re right to be concerned.

        A negative value isn’t just a cosmetic glitch. It’s the instrument telling you that something in the measurement chain has shifted.

        In most cases, it’s harmless and easily corrected, but in safety-critical environments, it can mask a genuine hazard.

        Below, I’ll walk through why this happens, drawing on years of commissioning and troubleshooting gas detection systems in the field.

        Why Is a Sensor Showing Negative Values?

        A sensor shows negative values when its measured signal falls below the zero (baseline) point it was calibrated against.

        This almost always comes down to one of four things: zero drift, calibration in clean air that was actually contaminated, an environmental change (temperature, pressure, or humidity), or an electronic or wiring fault. The fix depends on which one you’re dealing with.

        What “Negative” Actually Means on a Sensor

        Most gas detectors and analog sensors don’t measure an absolute quantity directly. They establish a zero point, a baseline reading they treat as “nothing present,” and then report deviations from it. A toxic gas sensor zeroed in clean air, for example, calls that condition 0 ppm.

        If the sensor’s baseline later drifts upward, the instrument interprets genuinely clean air as being below its stored zero, so it displays a negative number.

        The sensor isn’t detecting “negative gas,” which is physically impossible. It’s reporting that current conditions are cleaner or different from the reference it was told to expect.

        The Most Common Causes

        Zero Drift

        Electrochemical and catalytic sensors age. Over weeks and months, the chemistry inside shifts, and the baseline the sensor established at calibration slowly moves.

        If the sensor was zeroed in an environment that had a trace background of the target gas, and you later move it to genuinely clean air, the reading dips below zero.

        This is the single most common reason a healthy sensor reads negative, and it’s usually a sign that the unit is simply due for re-zeroing or calibration.

        Calibration in Contaminated “Clean” Air

        A surprising number of negative readings trace back to a flawed calibration. If the zero calibration was performed in an area that wasn’t truly clean, say, near a running vehicle, a solvent station, or residual gas in a confined space, the sensor locked in an artificially high baseline. Every time it later sees real clean air, it reports negatively.

        Always zero a sensor in confirmed fresh air or with a certified zero-grade gas cylinder, never just “outside” or “in the corner of the shop.”

        Temperature, Pressure, and Humidity Swings

        Sensors are sensitive to their environment. A unit calibrated in a warm calibration room and then deployed in a cold outdoor location can read negative purely from the temperature differential.

        Rapid pressure changes (moving between altitudes or in and out of pressurized spaces) and large humidity swings affect electrochemical cells the same way.

        These readings often self-correct once the sensor equilibrates to its new environment. If yours doesn’t settle within the manufacturer’s stated warm-up and stabilization window, look elsewhere.

        Electronic, Wiring, or Bridge Faults

        On fixed systems and 4–20 mA loops, a negative or below-zero indication can signal an electrical problem rather than a sensing one.

        A failing sensor element, a corroded connection, a loose terminal, or an imbalanced Wheatstone bridge in a catalytic (pellistor) sensor can all push the signal below baseline.

        A reading that’s deeply negative or erratic, not just slightly under zero, points strongly toward a hardware fault.

        Cross-Sensitivity and Recovery Overshoot

        After a sensor is exposed to a high concentration of gas and then returns to clean air, some electrochemical cells temporarily overshoot below zero as they recover. This is normal transient behavior and typically clears within minutes.

        How to Diagnose It Step by Step

        Confirm the environment is truly clean

        Move the sensor to known fresh air and give it the full warm-up period.

        Check the magnitude

        A small negative value (a few ppm, or a fraction of %LEL) usually means drift. A large or jumpy negative value suggests a fault.

        Perform a bump test

        Apply a known gas concentration. If the sensor responds correctly and accurately, the cell is healthy, and you simply need to re-zero. If it under-responds or doesn’t respond, the cell may be failing.

        Re-zero in confirmed clean air

        This corrects the majority of legitimate negative readings.

        Calibrate the sensor

        Run a full calibration if re-zeroing alone doesn’t hold or if the bump test was marginal.

        For a fixed gas detector, check the wiring

        Inspect wiring and connections on fixed systems before condemning the sensor itself.

          When a Negative Reading Is a Safety Concern

          Here’s the part that matters most in safety work: a sensor reading negative cannot be trusted to detect a real hazard.

          If the baseline has drifted down by, say, 10 ppm, then a genuine 10 ppm exposure of toxic gas would display as a “safe” 0 reading while you’re actually being exposed. The negative offset eats into your safety margin.

          For this reason, you should never simply ignore a persistent negative value or “wait for it to come back up.”

          Treat it as a fault condition: remove the instrument from service, re-zero or recalibrate it, and verify with a bump test before trusting it in a hazardous area.

          Preventing Negative Readings

          The best defense is a disciplined maintenance routine. Bump test before each use or shift; calibrate on the manufacturer’s recommended schedule (typically every 6 months for many electrochemical sensors, but follow your specific equipment’s guidance).

          Always zero in on confirmed clean air, and replace sensor cells before they reach the end of life. Logging your readings over time also makes drift visible early, before it becomes a safety gap.

          Frequently Asked Questions

          Is a negative gas detector reading dangerous?

          The negative number itself isn’t dangerous, but it means the instrument’s zero has shifted, which can cause it to under-report real gas. Treat it as a calibration fault and correct it before relying on the detector.

          Can I just ignore a small negative value?

          No. Even a small negative offset reduces your effective detection margin. Re-zero the sensor in clean air to bring it back to a trustworthy baseline.

          Why does my detector read negative after exposure to gas?

          This is usually a temporary recovery overshoot as the electrochemical cell returns to baseline. It typically clears within a few minutes. If it persists, re-zero the unit.

          How often should I calibrate to prevent this?

          Follow your manufacturer’s schedule, commonly every six months for electrochemical sensors, and bump test before each use. Regular calibration is the main way to prevent drift-related negative readings.

          This article is for general informational purposes. Always follow your specific equipment manufacturer’s documentation and your site’s safety procedures when calibrating or servicing gas detection equipment.

          Fire Escape Plan Checklist for Families: A Complete Step-by-Step Guide

          When a fire breaks out, you may have as little as two minutes to get everyone out safely. That isn’t enough time to think, search for exits, or figure out where to meet.

          There’s only enough time to execute a plan you already made. A fire escape plan turns panic into action, and for families with children, elderly relatives, or pets, having one practiced and posted can be the difference between a close call and a tragedy.

          This guide gives you a complete fire escape plan checklist for families, walks you through building and practicing your plan, and covers the details most households overlook.

          Why Every Family Needs a Fire Escape Plan

          House fires spread faster than most people expect. Modern homes, filled with synthetic furnishings and open floor layouts, can become fully involved in flames in a matter of minutes, far quicker than homes built decades ago.

          Smoke, not flames, is the leading cause of fire deaths, and it can fill a room and block visibility before you’re even aware of the danger.

          A documented, rehearsed escape plan matters because it removes guesswork during a crisis. Children who have practiced know not to hide under beds or in closets.

          Everyone knows two ways out of every room. And critically, everyone knows where to regroup so you can confirm in seconds that no one is still inside.

          The Complete Fire Escape Plan Checklist for Families

          Use this checklist to build your plan. Work through every item, and don’t skip the practice steps at the end; they’re what make the plan actually work.

          Map Every Room and Identify Two Exits

          Draw a simple floor plan of your home, marking every room. For each room, identify two ways out. The primary exit is usually the door, and the secondary is typically a window.

          This “two ways out” rule is the foundation of any reliable escape plan, because the most obvious route may be blocked by fire or smoke.

          For upper-floor rooms, the second exit may require an escape ladder. Keep a collapsible, fire-rated escape ladder in each upstairs bedroom and make sure family members know how to deploy and use it.

          Test All Doors and Windows

          Walk through your home and physically open every window and door on your escape routes. Windows painted shut, stuck in their frames, or blocked by security bars are a common and dangerous problem.

          Make sure security bars have quick-release mechanisms that everyone old enough can operate. Check that doors aren’t blocked by furniture and that locks can be opened quickly in the dark.

          Install and Maintain Smoke Alarms

          Your escape plan depends entirely on early warning. Install smoke alarms inside every bedroom, outside each sleeping area, and on every level of your home, including the basement.

          A few maintenance essentials

          • Test every smoke alarm monthly using the test button.
          • Replace batteries at least once a year, or use ten-year sealed-battery units.
          • Replace the entire alarm every ten years.
          • Interconnect alarms where possible, so when one sounds, they all sound.

          Consider combination smoke and carbon monoxide alarms for added protection, particularly near sleeping areas and fuel-burning appliances.

          Choose an Outside Meeting Place

          Pick a safe, specific meeting spot a safe distance from the house, something fixed and unmistakable like a mailbox, a neighbor’s driveway, a particular tree, or a streetlight.

          Everyone, including young children, should know exactly where it is. This is how you confirm everyone made it out without anyone going back inside to look.

          Assign Roles for Those Who Need Help

          Decide in advance who is responsible for helping infants, young children, older adults, anyone with mobility limitations, and pets.

          Assign a backup person in case the primary helper isn’t home. Don’t leave this to chance in the moment.

          Establish Clear Escape Rules

          Teach and reinforce these core rules with everyone in the household.

          Get out and stay out

          Never go back inside for belongings, valuables, or even pets.

          Get low under the smoke.

          Crawl on hands and knees where the air is cleaner.

          Check doors before opening

          Use the back of your hand to feel for heat. If a door is hot, use your second exit.

          Close doors behind you as you escape to slow the spread of fire and smoke.

          Call 911 from outside, never from inside the burning home.

          Plan for Children, Seniors, and Pets

          Children often react to fire by hiding, so teach them not to. Practice having them respond to the alarm even when sleeping, since many children sleep through smoke alarms; an adult may need to be assigned to wake and guide them.

          For seniors or anyone with limited mobility, plan escape routes that avoid stairs where possible, keep mobility aids within reach of the bed, and consider sleeping on the ground floor.

          For pets, keep leashes and carriers near an exit, but make clear that human safety always comes first; never delay your own escape for an animal.

          Post the Plan and program emergency numbers

          Post your floor plan and meeting-place details somewhere visible, such as the refrigerator. Program emergency numbers into every family member’s phone and post them by a landline if you have one.

          How to Practice Your Fire Escape Plan

          A plan on paper isn’t enough. Practice is what builds the automatic response that takes over when fear sets in.

          Run a home fire drill at least twice a year. Practice both daytime and nighttime drills, since escaping in the dark is very different.

          Time your drill, aiming to get everyone to the meeting place in under two minutes. Practice using your second exits, not just the front door, and have children practice the drill so the actions feel familiar.

          Once your family is confident, occasionally run a drill with simulated obstacles, such as pretending the main staircase is blocked, to test the backup routes.

          Common Fire Escape Plan Mistakes to Avoid

          Even families who make a plan often undermine it with a few avoidable mistakes. Watch out for these:

          • Only planning one exit per room. Always have a backup route.
          • Never practicing. An unrehearsed plan rarely works under stress.
          • Forgetting upper-floor escapes. Bedrooms above ground level need escape ladders.
          • Choosing a vague meeting spot. “The front yard” isn’t specific enough.
          • Ignoring smoke alarm maintenance. A dead alarm gives no warning at all.
          • Planning to gather belongings. Every second spent collecting items is a second of breathing toxic smoke.

          Frequently Asked Questions

          How often should we practice our fire escape plan?

          At least twice a year, including at least one nighttime drill. Families with young children or anyone needing assistance may benefit from practicing more often.

          What should the family do if the planned exit is blocked by fire?

          Use the second exit identified for that room. If both routes are blocked, close the door, seal gaps with towels or clothing to keep smoke out, signal from a window, and call 911 to report your exact location.

          At what age can children learn a fire escape plan?

          Children as young as three or four can begin learning basic concepts like recognizing the smoke alarm and going to the meeting place. Make practice age-appropriate and repeat it often so the response becomes automatic.

          Should we go back for pets or valuables?

          No. Once you are out, stay out. Tell firefighters if a pet is still inside, and let trained professionals handle it.

          Final Thoughts

          A fire escape plan is one of the simplest and most effective steps you can take to protect your family.

          It costs nothing but a little time, and the payoff is the confidence that everyone in your home knows exactly what to do when seconds count.

          Build your plan using the checklist above, post it where everyone can see it, and most importantly, practice it until the response becomes second nature.

          Set aside thirty minutes this week to map your home, test your exits, and run your first drill. The plan you build today is the one that protects your family tomorrow.

          Carbon Monoxide Detector Placement Guide: Room by Room

          Carbon monoxide kills quietly. It has no smell, no color, and no taste, and by the time most people feel its effects, they are already too impaired to react.

          A working CO detector is the only reliable warning you get, but a detector only protects you if it is in the right place.

          After years of working with gas and flame detection systems in industrial environments, I can tell you the same principle holds at home: detection coverage fails far more often because of poor placement than because of faulty hardware.

          This guide walks through carbon monoxide detector placement room by room, explains the physics of why placement matters, and clears up the height myth that trips up most homeowners. By the end, you will know exactly how many detectors you need and where each one should go.

          How Carbon Monoxide Behaves in a Room

          Placement decisions only make sense once you understand how CO moves. Carbon monoxide has a molecular weight very close to that of air, so it does not sink to the floor like some heavier gases or rise straight to the ceiling like smoke. Instead, it mixes evenly with the surrounding air and disperses throughout the room.

          Two practical consequences follow from this. First, CO tends to travel with warm air currents, which is why it can spread from a basement furnace to upstairs bedrooms surprisingly fast.

          Second, because it diffuses rather than stratifies, you have more flexibility in mounting height than you do with a smoke alarm.

          Manufacturers generally allow CO detectors to be placed on a wall, on a ceiling, or even on a tabletop, as long as the location is not obstructed.

          The Golden Rule: Cover Every Sleeping Area

          If you remember nothing else, remember this: the single most important job of a CO detector is to wake you up.

          Most fatal carbon monoxide poisonings happen at night, when victims are asleep and never notice the early symptoms. That means your placement strategy should start from the bedrooms and work outward.

          The widely accepted baseline, reflected in NFPA 720 (now folded into NFPA 72) and most US building codes, is straightforward:

          • Install a CO detector on every level of the home, including the basement.
          • Install one outside each separate sleeping area, within hearing distance of the bedrooms.
          • For added protection, install one inside each bedroom, especially where someone sleeps with the door closed.

          A closed bedroom door can significantly slow how fast an alarm in the hallway reaches a sleeper. If anyone in your home sleeps with the door shut, a detector inside that room is not optional in my view; it is the difference between a warning and a tragedy.

          Room-by-Room Placement

          Bedrooms

          Place a detector inside each bedroom or, at minimum, in the hallway immediately outside the cluster of bedrooms.

          Mount it where the alarm will be loud enough to wake a sleeping person. Keep it at least 10 feet (about 3 meters) from fuel-burning appliances, if any are present, and avoid placing it directly above or beside a heat or air-conditioning vent, which can blow CO away from the sensor and delay detection.

          Hallways and Landings

          A detector on each upstairs landing protects the path people travel during an emergency. In multi-story homes, a unit near the top of the stairwell catches CO rising with warm air from lower levels.

          This is one of the highest-value placements in the entire house because a single detector covers the transition between floors.

          Living Room and Common Areas

          If your living room contains a fireplace, wood stove, pellet stove, or gas heater, it needs its own detector.

          Mount it on a wall roughly 5 feet (1.5 meters) above the floor, which corresponds to the breathing zone of a seated or standing adult and gives a representative sample of room air.

          Keep it at least 10 feet from the appliance itself to avoid nuisance alarms from brief, normal startup emissions.

          Kitchen

          Gas ranges and ovens produce small amounts of CO during normal operation, so the kitchen does need coverage, but placement requires care to avoid false alarms.

          Mount the detector at least 10 to 15 feet (3 to 4.5 meters) from cooking appliances. Placing it too close means it will trigger every time you sear a steak.

          Far enough away, it still catches a genuine problem such as a malfunctioning burner or a blocked flue.

          Basement and Furnace Room

          The basement is where most household CO originates: the furnace, water heater, and sometimes the laundry dryer all live here.

          Install a detector in the basement, mounted on the wall about 5 feet above the floor, and keep it 10 to 20 feet from the furnace or water heater.

          You want it close enough to detect a developing problem but not so close that routine combustion cycling sets it off.

          If you have an attached garage, this level matters even more, because exhaust from a running engine migrates indoors fast.

          Attached Garage

          Never start a vehicle, generator, or gas-powered tool in a closed or attached garage. CO concentration climbs to lethal levels within minutes.

          Place a detector in the living space adjacent to the garage, particularly near the door connecting the garage to the house.

          Detectors inside the garage itself can be triggered by normal vehicle entry and exit, so the protective unit belongs on the house side of that shared wall.

          The Height Myth: Does CO Detector Height Matter?

          This is the most common question I get, and the answer surprises people. Because carbon monoxide mixes evenly with air rather than rising or sinking, mounting height is far less critical than it is for smoke alarms.

          You can place a CO detector low on a wall, high on a wall, on the ceiling, or on a shelf, and it will still sample a representative slice of room air.

          That said, there are sensible defaults. Wall-mounted units are usually placed at about eye level or roughly 5 feet from the floor.

          Always follow the specific manufacturer’s instructions for your model, since some combination smoke-and-CO units must be ceiling-mounted to satisfy the smoke detection requirement. When in doubt, the manufacturer’s manual wins over any general rule of thumb.

          Where NOT to Place a CO Detector

          Just as important as the right spots are the wrong ones. Avoid these locations, which either blind the sensor or cause constant nuisance alarms.

          • Within 10 to 15 feet of fuel-burning appliances such as furnaces, stoves, and water heaters, where normal startup emissions cause false alarms.
          • Directly above or beside heating and cooling vents, fans, or open windows, where moving air sweeps CO past the sensor.
          • In humid, steamy areas like directly inside bathrooms, where moisture can damage the sensor over time.
          • In dead air spaces such as the peak of a vaulted ceiling or tight wall-ceiling corners, where air circulation is poor.
          • In unconditioned spaces that get extremely hot or cold, like an unheated attic or an exposed garage, which fall outside most units’ rated operating range.
          • Behind curtains, furniture, or anything that blocks airflow to the sensor.

          Quick Reference: Detectors by Home Size

          Home TypeMinimum DetectorsKey Placement Priorities
          Single-level apartment / condo2Outside sleeping area + main living space
          Two-story house3 to 4One per floor + outside bedrooms + basement
          House with attached garage4+Add unit on house side of garage door
          Multi-story with finished basement4 to 5Every level + each bedroom + near furnace

          Treat these as minimums. More coverage is always safer, and interconnected detectors that all sound when one triggers offer the best protection.

          Installation and Maintenance Tips

          1. Mount each detector firmly and confirm it is not loosened by vibration or drafts.
          2. Test every detector monthly using the test button and after any power outage.
          3. Replace batteries at least once a year, or choose units with sealed 10-year lithium batteries.
          4. Replace the entire detector every 5 to 7 years, or per the manufacturer’s stated lifespan, because the electrochemical sensor degrades over time even if the unit still powers on.
          5. Write the installation date on the back of each unit with a marker so you know when to replace it.
          6. Never paint over a detector or cover it, as this blocks the sensor.

          What to Do When the Alarm Sounds

          A CO alarm is not a drill. If it sounds like anyone feels dizzy, nauseous, has a headache, or feels confused, get everyone outside to fresh air immediately and call your local emergency number from outside.

          Do not re-enter until emergency responders confirm the home is safe. If the alarm sounds but no one has symptoms, still move to fresh air, then call your gas utility or fire department’s non-emergency line to investigate the source. Resetting the alarm and going back to sleep is the mistake that kills people.

          Final Thoughts

          Carbon monoxide detection is one of the cheapest, highest-impact safety investments you can make in a home, but only when the detectors are placed correctly.

          Start with the sleeping areas, cover every level, keep units away from appliances and vents, and respect the manufacturer’s instructions. Do that, and you turn a silent threat into one you will always hear coming.

          This guide is for general educational purposes. Always follow your local building codes and the installation instructions provided with your specific detector model.

          How to Test and Maintain Your Smoke Detectors the Right Way

          A smoke detector that doesn’t work is worse than no detector at all, because it gives you a false sense of safety.

          I’ve spent my career working on industrial gas, flame, and safety systems, and the single most common failure I see isn’t hardware failure. It’s neglect. The device is on the ceiling, the green light is on, and everyone assumes it’s doing its job. Often it isn’t.

          The good news is that keeping smoke detectors in working order takes a few minutes a month and almost no money. Here’s exactly how to do it the right way.

          Why Testing Matters More Than You Think

          Roughly three out of five home fire deaths happen in homes with no smoke alarms or no working smoke alarms.

          In a real fire, you may have less than two minutes to get out before smoke makes escape impossible. The alarm is what buys you those minutes.

          The problem is that detectors degrade silently. Sensors drift, dust accumulates, batteries weaken, and the unit itself ages past its rated lifespan. None of this is visible from the floor. The only way to know your detector will sound when it matters is to test it on a schedule and maintain it properly.

          How to Test a Smoke Detector (The Right Way)

          The monthly test button check

          Every smoke detector has a test button. Pressing it checks the electronics, the battery, and the horn, confirming that the alarm circuit can sound.

          1. Tell anyone in the house you’re about to test, so the noise doesn’t alarm them.
          2. Press and hold the test button for a few seconds.
          3. Listen for a loud, sustained alarm. A weak, faint, or delayed sound is a failure.
          4. Release the button. The alarm should stop within seconds.

          Do this once a month for every detector in the home. If you have interconnected alarms, pressing one button should trigger all of them within seconds. If only the unit you pressed sounds, your interconnection has a fault worth investigating.

          Important

          The test button confirms the alarm works, but it does not confirm the smoke sensor is responding to actual smoke. That’s a distinction most people miss.

          Testing the smoke sensor itself

          To verify that the sensing chamber actually detects smoke, use a can of smoke-detector test aerosol (sold at hardware stores).

          Spray a short burst toward the detector from the distance listed on the can. The alarm should sound within seconds, then clear once the air settles.

          Do this once or twice a year. Avoid using real smoke, candles, or matches. These leave residue inside the chamber, can damage the sensor, and don’t deliver a controlled, repeatable test.

          Battery Maintenance

          Replaceable-battery units

          If your detector uses a removable 9V or AA battery, replace it at least once a year, or immediately when you hear the low-battery chirp.

          A reliable habit is to swap batteries when the clocks change in spring or fall, since it’s an easy date to remember.

          That intermittent chirp, usually one short beep every 30 to 60 seconds, means the battery is nearly dead.

          Don’t ignore it or pull the battery to silence it. A disabled detector is the leading reason alarms fail during fires.

          Sealed 10-year units

          Many newer alarms have a sealed lithium battery rated for the life of the unit, around ten years. You never change the battery on these.

          When the battery dies, the whole unit is replaced. These are an excellent choice precisely because they remove the “forgot to replace the battery” failure mode.

          Cleaning Your Smoke Detectors

          Dust, cobwebs, and insects are the quiet enemies of smoke detectors. Debris inside the chamber can cause two opposite problems: nuisance false alarms or a sensor too clogged to respond.

          Clean each detector every few months

          • Gently vacuum the exterior vents with a soft brush attachment, or
          • Blow out the chamber with a short burst of compressed air.
          • Wipe the cover with a dry or barely damp cloth. Never use cleaning sprays, solvents, or water near the unit.

          Cleaning takes under a minute per detector and dramatically reduces false alarms, which are the reason people disable detectors in the first place.

          When to Replace a Smoke Detector Entirely

          This is the step almost everyone forgets: smoke detectors expire.

          The sensing technology degrades over time, and manufacturers rate most units for ten years. After that, the detector may still light up and pass a button test while being unable to reliably detect smoke.

          To check the age, take the unit off its mount and look on the back for the manufacture date. If it’s more than ten years old, or you can’t find a date at all, replace it. When in doubt, replace it.

          A few replacement rules worth knowing

          • Replace the entire unit at ten years regardless of how it looks or tests.
          • Replace any detector that has been exposed to fire, heavy smoke, or water damage.
          • Replace any detector that gives inconsistent test results.

          Ionization vs. Photoelectric: Use Both

          There are two main sensing technologies. Ionization detectors respond faster to fast-flaming fires; photoelectric detectors respond faster to slow, smoldering fires.

          Because you can’t predict which kind of fire you’ll face, the safest approach is to have both types covered, either through dual-sensor alarms or a mix of the two throughout the home.

          How to choose the right smoke detector

          Where Detectors Should Be Installed

          Maintenance only helps if detectors are in the right places to begin with. At minimum:

          • Inside every bedroom.
          • Outside each sleeping area.
          • On every level of the home, including the basement.

          Keep them on the ceiling or high on the wall, away from corners, vents, and the immediate vicinity of kitchens and bathrooms where steam and cooking cause false alarms.

          A Simple Maintenance Schedule

          TaskHow Often
          Press the test buttonMonthly
          Test with smoke aerosol1–2 times per year
          Replace removable batteryYearly (or at first chirp)
          Clean the unitEvery 3 months
          Check manufacture dateYearly
          Replace the whole unitEvery 10 years

          Final Thoughts

          Smoke detector maintenance isn’t complicated, but it does require consistency. A monthly button press, a yearly battery change, a quarterly cleaning, and a calendar reminder to replace units at the ten-year mark are all it takes to keep the one device in your home that’s standing guard while you sleep.

          Set a recurring reminder on your phone today. The minute you spend now is the kind of preparation that, on the worst night of your life, gives you the time to get everyone out.

          Confined Space Gas Testing: A Step-by-Step Guide

          I’ve spent enough years around industrial safety systems to know that confined spaces don’t kill people because the hazards are exotic.

          They kill people because the testing was rushed, done in the wrong order, or skipped entirely. A tank, a vault, a sewer, a storage bin.

          They look quiet and harmless right up until someone climbs in and discovers the air won’t keep them alive.

          Confined space gas testing is the procedure that separates a routine job from a fatality. In this guide, I’ll walk you through exactly how to do it: the order you test in, the gases you’re looking for, the equipment you need, and the mistakes I see people make over and over.

          This is the practical, field-level version, not a wall of regulation citations, though the regulations are here too.

          What Counts as a Confined Space

          Before you test anything, you need to know whether the space even qualifies. A confined space has three defining features: it’s large enough for a worker to enter and perform work, it has limited or restricted means of entry and exit, and it isn’t designed for continuous occupancy.

          A permit-required confined space goes a step further. It has one or more of these added hazards: a hazardous atmosphere (or the potential for one), a material that could engulf a worker, walls that converge inward or a floor that slopes down to a smaller cross-section, or any other recognized serious safety hazard.

          Gas testing matters most in permit-required spaces, but the principle applies anywhere the atmosphere is uncertain.

          Common examples include storage tanks, process vessels, silos, manholes, pits, sewers, boilers, ductwork, and pipelines.

          If you can climb in, can’t easily climb out, and nobody lives in there, treat it as confined until proven otherwise.

          Why the Atmosphere Is the Biggest Killer

          Atmospheric hazards account for the majority of confined space fatalities, and the cruel part is that many of those deaths are of would-be rescuers who rushed in to help. The air inside a confined space can fail you in four basic ways:

          Oxygen deficiency

          Normal air is 20.9% oxygen. Below 19.5%, it’s considered oxygen-deficient. Rust, fermentation, decomposition, and inert gas purging all quietly consume or displace oxygen. You feel fine, and then you don’t.

          Oxygen enrichment

          Above 23.5%, the atmosphere becomes a fire and explosion accelerant. A leaking oxygen line or an over-purge can saturate the space so that any spark becomes catastrophic.

          Flammable atmosphere

          Methane, solvent vapors, residual fuels, and anything that can reach its lower explosive limit (LEL) turn the space into a bomb waiting for ignition.

          Toxic atmosphere

          Hydrogen sulfide, carbon monoxide, and other toxic gases can incapacitate or kill at concentrations you can’t see or, in some cases, smell.

          Hydrogen sulfide in particular paralyzes your sense of smell at higher concentrations, which is exactly when it’s most dangerous.

          The Equipment You Need

          The workhorse for confined space entry is a multi-gas monitor, usually a 4-gas monitor that simultaneously reads oxygen, combustible gases (LEL), carbon monoxide, and hydrogen sulfide.

          For specific industries or known contaminants, you may add sensors for gases like ammonia, chlorine, sulfur dioxide, or volatile organic compounds via a PID sensor.

          A few non-negotiables for the instrument itself:

          • It must be calibrated and within its calibration interval.
          • It must be bump tested before each day’s use to confirm sensors respond to gas and alarms activate.
          • For testing before entry, it needs a sampling pump and probe so you can draw air from inside the space without entering it.
          • It must be intrinsically safe, rated for use in hazardous atmospheres.

          If your monitor hasn’t been bump tested that day, you don’t have a reliable monitor. You have a paperweight with a screen.

          The Correct Testing Order: O₂, Then LEL, Then Toxics

          This is the single most important technical point in the entire procedure, and it’s the one people get wrong. You must test the atmosphere in this specific order:

          Oxygen first

          Combustible gas sensors (catalytic bead LEL sensors) need oxygen to work correctly. If you test for flammable gas in an oxygen-deficient atmosphere, the reading will be falsely low, and you’ll trust an atmosphere that’s actually explosive. Oxygen also tells you immediately whether the space can support life.

          Combustible gases (LEL) second

          Once you’ve confirmed adequate oxygen, check for flammable vapors. A flammable atmosphere is an immediate stop condition.

          Toxic gases third

          Finally, check carbon monoxide, hydrogen sulfide, and any other toxics relevant to the space.

            A good 4-gas monitor displays all readings at once, but the sensor logic and your interpretation still follow this hierarchy. Oxygen validates the LEL reading; never reverse them.

            Step-by-Step Confined Space Gas Testing Procedure

            Here is the full sequence, start to finish.

            Step 1: Review the Permit and hazard assessment

            Before you touch the monitor, know what you’re walking into. Review the entry permit, the contents the space previously held, adjacent processes that could leak in, and any historical incidents. The space’s history tells you which gases to expect.

            Step 2: Bump Test and Verify the Monitor

            Confirm the monitor is calibrated, bump test it with a known gas concentration, and verify all alarms (audible, visual, and vibrating) activate. Check the battery and confirm the sampling pump pulls air without leaks. Record it.

            Step 3: Test From Outside

            Attach the sampling probe and draw air from the space without entering it and without putting your head over the opening.

            Leaning in to “take a quick whiff” or lower a monitor by hand has killed people. The probe and pump exist precisely so your body stays in clean air.

            Step 4: Test at Multiple Levels

            Gases stratify by density. Heavier-than-air gases like hydrogen sulfide and many solvent vapors pool at the bottom. Lighter gases like methane rise to the top.

            Test the top, middle, and bottom of the space and remember to allow enough time at each level for the pump to draw a full sample through the hose (a common rule is roughly two seconds of draw time per foot of sample tubing, plus sensor response time).

            Step 5: Interpret the Readings Against Acceptable Limits

            Compare each reading to acceptable entry conditions:

            • Oxygen: 19.5% to 23.5%
            • Combustible gas (LEL): below 10% of LEL (many sites use a stricter limit for hot work)
            • Carbon monoxide: below the applicable exposure limit (commonly 35 ppm as an 8-hour reference, with action well before that)
            • Hydrogen sulfide: below the applicable exposure limit (commonly 10 ppm as a reference)

            If any reading is outside acceptable limits, do not enter. Ventilate and retest.

            Step 6: Ventilate If Needed, Then Retest

            If the atmosphere fails, mechanically ventilate the space and purge the contaminant. Never use pure oxygen to “freshen” the air; it creates an oxygen-enriched explosion hazard. After ventilating, retest fully before reconsidering entry.

            Step 7: Document and Authorize Entry

            Record all readings on the permit, note the time, and have the entry supervisor authorize entry. The permit is a legal record and a communication tool for everyone on the job.

            Step 8: Monitor Continuously During Entry

            Testing before entry is not a one-time pass. Conditions change: work activities generate gases, surrounding processes shift, and ventilation falters.

            Keep a monitor inside the space throughout occupancy, ideally on the entrant, and respond immediately to any alarm with evacuation, not investigation.

            OSHA and Regulatory Requirements

            In the United States, confined space work in general industry is governed by OSHA standard 29 CFR 1910.146 (Permit-Required Confined Spaces), with a separate standard, 29 CFR 1926 Subpart AA, covering construction.

            These standards require atmospheric testing before entry, testing in the correct order, continuous or periodic monitoring as conditions warrant, and a documented permit system.

            The core regulatory expectations track closely with the procedure above: test before entry, test oxygen first, keep readings within acceptable limits, ventilate rather than “wait it out,” and monitor throughout the entry.

            If you’re outside the U.S., your jurisdiction’s equivalent standard will mirror most of these principles, but always work to your local regulations.

            Common Mistakes That Get People Killed

            After all the procedures, these are the failures I see most often, and every one of them has a body count behind it somewhere:

            • Skipping the bump test because the monitor “worked fine yesterday.”
            • Testing in the wrong order and trusting a falsely low LEL reading in low-oxygen air.
            • Testing only one level and missing a layer of heavy gas pooled at the bottom.
            • Leaning into the opening to test or look and getting overcome at the lip of the space.
            • Treating the pre-entry test as final and not monitoring continuously.
            • Using oxygen to ventilate, turning a stale space into an explosive one.
            • Rushing rescue. When an entrant goes down, the instinct to dive in unprotected is what turns one fatality into two or three. Rescue is a planned, equipped operation, never a reflex.

            Frequently Asked Questions

            What order do you test the atmosphere in a confined space?

            Always oxygen first, then combustible gases (LEL), then toxic gases. Oxygen is tested first because combustible gas sensors need adequate oxygen to read accurately, and the oxygen level also tells you immediately whether the space can support life.

            How often should a confined space be tested?

            Test before entry, and then monitor continuously or periodically throughout the entire occupancy. Conditions inside a confined space change as work proceeds and surrounding processes shift, so a single pre-entry test is never sufficient on its own.

            What gases does a 4-gas monitor detect?

            A standard 4-gas monitor detects oxygen, combustible gases as a percentage of the lower explosive limit (LEL), carbon monoxide, and hydrogen sulfide.

            Additional sensors can be added for site-specific hazards like ammonia, chlorine, or volatile organic compounds.

            Can you enter a confined space if oxygen is above 23.5%?

            No. An oxygen level above 23.5% is oxygen-enriched and dramatically increases fire and explosion risk. The space must be ventilated with fresh air, never pure oxygen, and retested before entry is considered.

            Do I need to test multiple levels of a confined space?

            Yes. Gases stratify by density, so heavier gases pool at the bottom and lighter gases rise to the top. Test the top, middle, and bottom to be sure you haven’t missed a dangerous layer.

            Final Thoughts

            Confined space gas testing isn’t complicated, but it is unforgiving. The procedure rewards discipline, bump tests, tests from outside, oxygen first, multiple levels, and continuous monitoring and punishes shortcuts with no second chances.

            The most experienced people I’ve worked with are the ones who run the full procedure every single time, on the boring jobs as much as the obviously dangerous ones. That consistency is the whole point.

            Get the equipment right, follow the order, document everything, and never let urgency override the sequence. The atmosphere doesn’t care how late you’re running.

            How to Choose Calibration Gas for Your Specific Detector in 6 Steps

            I worked in the gas detection industry for the last 8 years, and one thing I always tell my customers is to make sure you calibrate your unit using the right gas. In this article, I share how to choose calibration gas for your specific detector.

            A gas detector is only as trustworthy as its last calibration, and a calibration is only as good as the gas you use to perform it.

            Choose the wrong calibration gas concentration, balance, or cylinder type, and you can end up with a monitor that reads low when a real hazard is present, alarms falsely on a clean atmosphere, or drifts out of compliance with the standards your facility is audited against.

            This guide walks you through exactly how to select the right calibration gas for your detector, covering target gases, concentrations, balance gases, cylinder sizing, and the documentation you need to stay audit-ready.

            What Calibration Gas Actually Does

            Calibration gas is a certified mixture of one or more gases at a known concentration, used to verify and adjust a detector’s response. There are two distinct operations people often confuse.

            Bump test (functional test)

            A short exposure to gas that confirms the sensor responds and the alarms trigger. It checks that the detector works, not how accurately.

            Learn more about the bump tests.

            Calibration (span calibration)

            A full adjustment that aligns the detector’s reading to the certified concentration of the gas. It confirms how accurately the detector measures.

            Learn more about calibration

            How to Choose Calibration Gas for Your Specific Detector

            Here are the 6 steps you need to follow in order to select the right calibration gas for your detector.

            Both rely on accurate, traceable calibration gas. If the gas is wrong, expired, or mislabeled, every reading downstream is suspect.

            Step 1: Match the Calibration Gas to Your Sensor

            The single most important rule: calibrate each sensor with the gas it is designed to detect, unless the manufacturer specifies a cross-calibration gas.

            Common pairings include

            Combustible (LEL) sensors

            Typically calibrated with methane or pentane in air. Always confirm which one your monitor’s curve is set to, because a methane-calibrated unit will misread pentane and vice versa.

            Oxygen sensors

            Calibrated with a known O₂ concentration (often 20.9% in fresh air for the zero/span baseline, with a low-O₂ mix for span on some units).

            Carbon monoxide (CO) sensors

            Calibrated with CO in air or in a nitrogen balance.

            Hydrogen sulfide (H₂S) sensors

            Calibrated with H₂S, usually in a nitrogen balance to keep the reactive gas stable.

            Photoionization detectors (PIDs)

            Calibrated with isobutylene, the industry-standard reference gas, then corrected for the target VOC using a response factor.

            For multi-gas monitors, you’ll generally use a four-gas mix (commonly CH₄/LEL, O₂, CO, and H₂S) so all sensors are calibrated in a single operation.

            Step 2: Choose the Right Concentration

            Concentration matters as much as the gas itself. The certified value should align with how your detector’s alarm points and measuring range are configured.

            • Span the sensor near its alarm setpoints, not at the very bottom or top of its range. A span value in the middle of the working range gives the most reliable accuracy where it counts.
            • Common four-gas mix values: Many facilities standardize on a mix such as 2.5% CH₄ (≈50% LEL), 18% O₂, 25 ppm or 100 ppm CO, and 25 ppm H₂S, but always verify against your detector manufacturer’s recommended span concentrations, as these vary by model.
            • Single-gas detectors: Match the concentration to the manufacturer’s spec sheet. Using a higher-than-recommended concentration won’t make the detector “more sensitive”; it can saturate the sensor and skew the span.

            When in doubt, the detector’s operations manual lists the exact recommended calibration gas concentration and balance.

            Step 3: Select the Correct Balance Gas

            The “balance” is the inert gas that makes up the remainder of the mixture. It is not a minor detail. It directly affects sensor behavior.

            • Balance air is used when an oxygen sensor is part of the calibration because the sensor needs a realistic O₂ background.
            • Balance nitrogen is used for reactive or single-gas mixes (like standalone H₂S or CO) where you don’t want oxygen present and where nitrogen keeps the reactive component stable longer.

            A frequent mistake is using a nitrogen-balanced cylinder on a multi-gas monitor with an O₂ sensor, which throws off the oxygen reading. Match the balance to your sensor suite.

            Step 4: Confirm Reactivity and Cylinder Material

            Reactive gases like H₂S and chlorine can degrade inside the wrong cylinder, slowly lowering the actual concentration below the label value.

            • Buy reactive gas mixes in treated/passivated aluminum cylinders designed to preserve concentration stability.
            • Respect the shelf life printed on the certificate. Reactive mixes expire faster than stable mixes like methane or CO. An expired cylinder may still hold pressure while reading well below its certified value, producing a bad calibration that looks fine.

            Step 5: Size the Cylinder for Your Usage

            Cylinder size is a cost-and-logistics decision, not a calibration-accuracy one, but getting it wrong wastes money.

            • High-volume / frequent calibration: Larger cylinders (e.g., 58L or 116L) lower the per-test cost.
            • Occasional or field use: Smaller, lightweight cylinders are more portable and reduce the risk of paying for gas that expires before you use it.
            • Match the regulator flow rate to your detector’s requirements (typically 0.25–0.5 LPM for diffusion sensors, higher for pumped/aspirated units). Too little flow starves the sensor; too much wastes gas.

            Estimate your annual number of bump tests and calibrations, then choose a size where the cylinder will be used before its expiration date.

            Step 6: Verify Traceability and Certification

            For compliance and audits, calibration gas should be certified and traceable to a recognized standard (such as NIST-traceable in the U.S.). Each cylinder should ship with a certificate of analysis showing it.

            • The exact certified concentration of each component
            • The balance gas
            • The lot number
            • The expiration / use-by date

            Keep these certificates on file. During an OSHA or internal safety audit, the certificate is what proves your monitor was calibrated against a known, valid standard.

            Quick Reference: Calibration Gas Selection Checklist

            Before you order, confirm:

            1. Target gas(es) match every sensor in the detector.
            2. Concentration aligns with the manufacturer’s recommended span values and alarm setpoints.
            3. Balance gas (air vs. nitrogen) suits your sensor suite, especially if an O₂ sensor is present.
            4. Cylinder material is appropriate for any reactive components.
            5. Cylinder size and regulator flow fit your calibration frequency and detector type.
            6. The certificate of analysis is traceable, current, and filed.

            Common Mistakes to Avoid

            Using expired gas, the pressure remaining in the cylinder does not mean the concentration is still valid.

            Mismatching the LEL reference gas (methane vs. pentane) to the detector’s configured curve.

            Using nitrogen balance with an O₂ sensor corrupts the oxygen calibration.

            Spanning at the wrong concentration, leaving the detector inaccurate near its alarm thresholds.

            Skipping the certificate leaves you unable to prove compliance later.

            Final Thoughts

            Choosing the right calibration gas comes down to a disciplined match: the correct target gases at the correct concentration, in the correct balance, in a cylinder that preserves the mixture and is certified to a traceable standard. Get those five elements right, and your detector will read true when it matters most.

            Always defer to your detector manufacturer’s documentation for exact span values and procedures.

            This guide explains the why behind each choice, but the spec sheet provides the precise numbers for your specific model.