Fire Suppression Systems 101: A Beginner’s Guide

Fire suppression systems are one of the most critical layers of protection in any industrial, commercial, or residential safety plan.

Yet for many facility managers, safety officers, and even seasoned engineers stepping outside their specialty, the world of suppression systems can feel overwhelming fast.

This guide breaks it all down plainly, practically, and with enough technical depth to actually be useful.

What Is a Fire Suppression System?

A fire suppression system is an engineered assembly of components designed to detect, control, or extinguish a fire automatically, manually, or both before it causes catastrophic damage.

Unlike a fire alarm system, which only detects and alerts, a fire suppression system actively intervenes.

It delivers a suppression agent (water, gas, foam, dry chemical, or other media) directly to the fire or to the protected space, either cutting off the heat, the oxygen, or the fuel needed for combustion to continue.

Fire suppression systems are governed by a web of standards and codes, including NFPA 13, NFPA 72, NFPA 2001, and local building and fire codes, depending on the system type and jurisdiction.

Why Fire Suppression Systems Matter

Every year, uncontrolled fires cause billions of dollars in property damage, significant production downtime, and, most critically, loss of life. In industrial environments, the stakes are especially high: flammable gases, combustible dust, high-value electrical equipment, and large open areas all create conditions where a fire can escalate within seconds.

A properly designed and maintained fire suppression system.

  • Limits fire spread by acting faster than a human response can.
  • Protects assets, including equipment, inventory, and structures.
  • Supports safe evacuation by buying time for occupants to exit.
  • Reduces insurance liability and may lower premiums.
  • Ensures regulatory compliance with fire safety codes.

How Fire Suppression Systems Work

Most fire suppression systems operate on the same fundamental principle: detect the fire, trigger the suppression agent delivery, and suppress or extinguish the fire.

The three core phases are

Detection

Detection triggers the suppression response. This can come from.

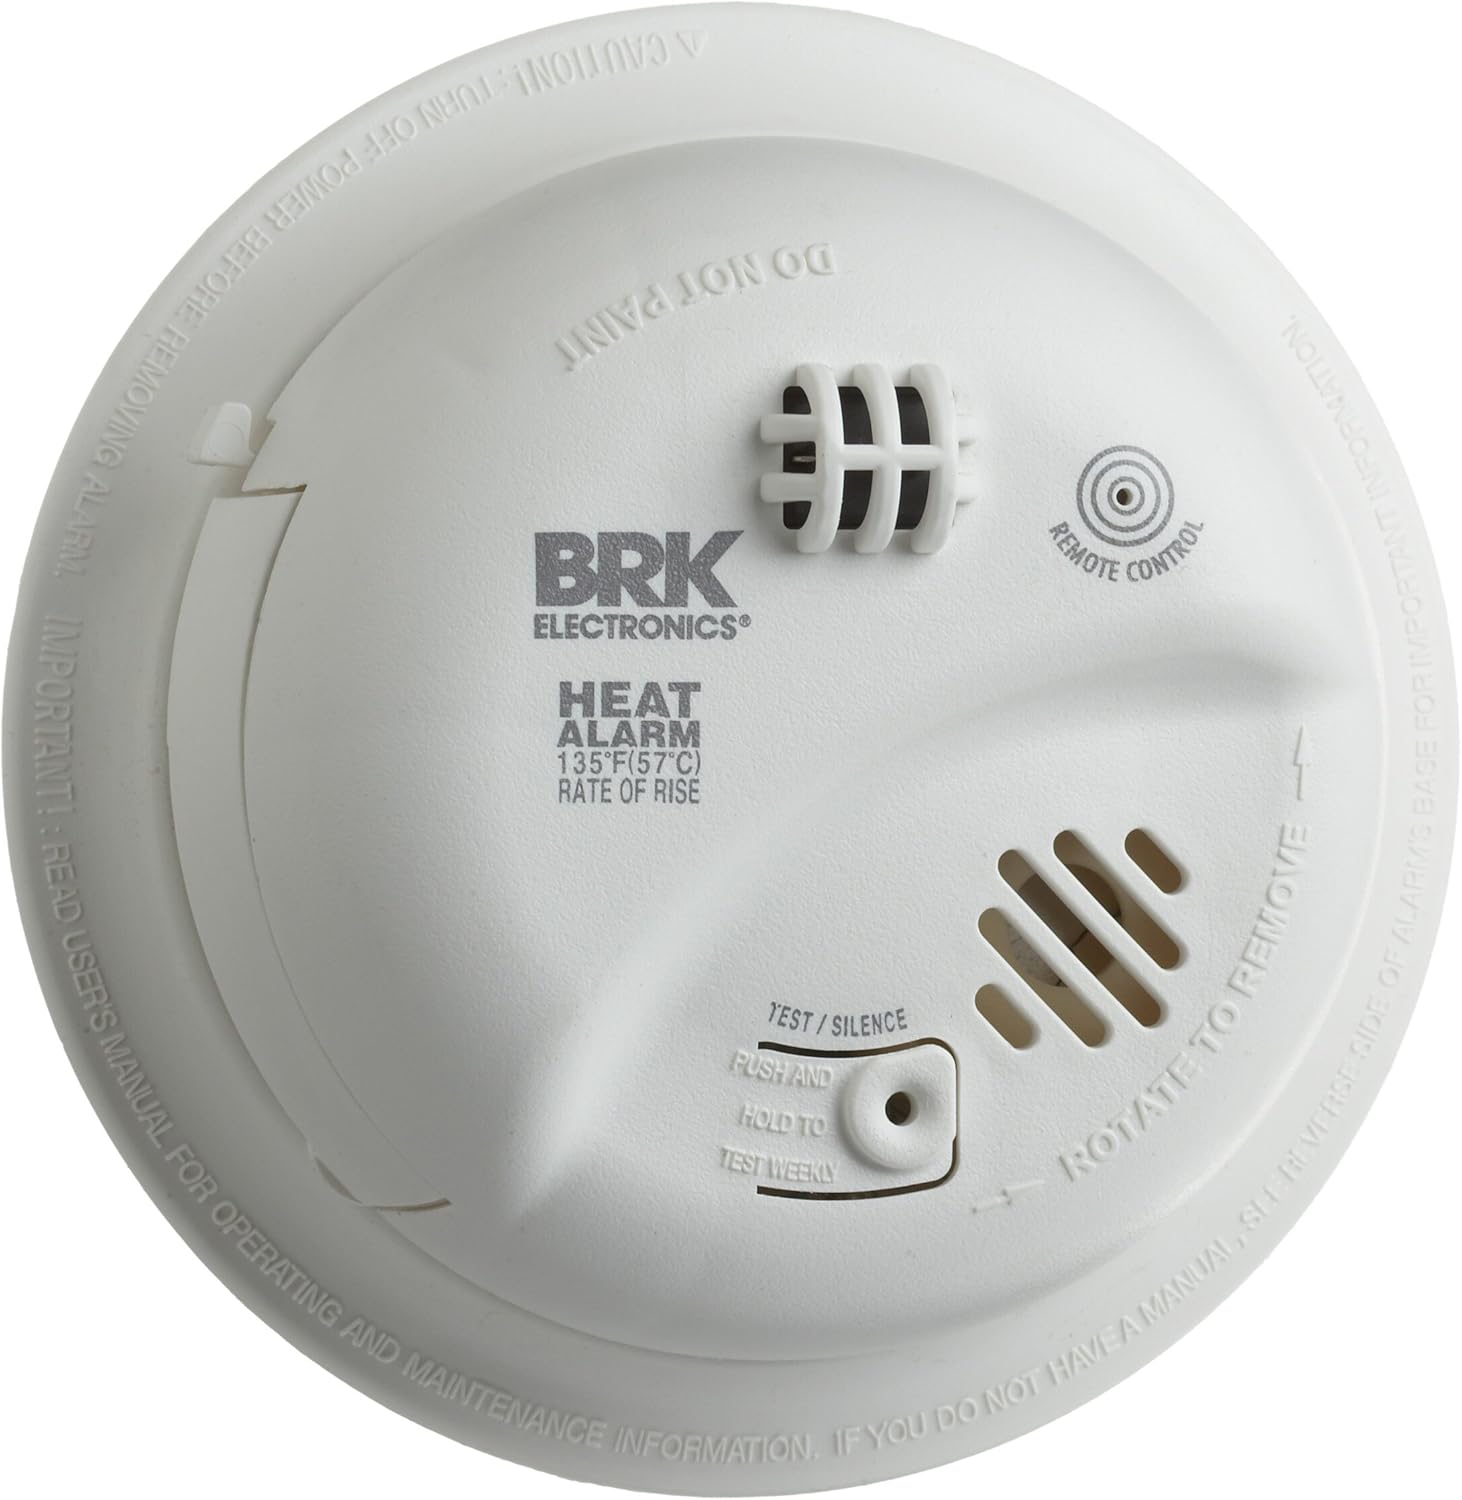
  • Heat detectors (fixed-temperature or rate-of-rise).
  • Smoke detectors (ionization or photoelectric).
  • Flame detectors (UV, IR, or multi-spectrum).
  • Manual pull stations.
  • Sprinkler head activation (in the case of wet pipe systems, the detector and delivery mechanism are the same component).

Actuation

Once detection occurs, the system actuates opening valves, releasing pressurized agent, or triggering a pump to pressurize a distribution network.

Actuation can be

  • Automatically triggered by the detector without human intervention.
  • Manual triggered by an operator at a local or remote panel.
  • Deluge-type all nozzles open simultaneously on command.

Agent Delivery

The suppression agent is delivered through a network of pipes, nozzles, or discharge heads engineered for coverage density, flow rate, and the specific hazard class of the protected area.

Types of Fire Suppression Systems

This is where most people need the most clarity. Here is a breakdown of the major system types, what they use, and where they are typically applied.

Water-Based Systems

Water is the most widely used suppression agent in the world. It works primarily by cooling the burning material below its ignition temperature and, to a lesser degree, by smothering through steam generation.

Wet Pipe Sprinkler Systems

The most common type. Pipes are always filled with pressurized water. When a sprinkler head reaches its activation temperature, it opens and water discharges immediately.

Best for

Office buildings, warehouses, hotels, retail spaces, and any area where pipes won’t freeze.

Pros

Simple, reliable, low maintenance, cost-effective.

Cons

Not suitable for freezing environments or areas where accidental discharge would cause significant water damage (data centers, archives, museums).

Dry Pipe Sprinkler Systems

Pipes are filled with pressurized air or nitrogen, not water. When a sprinkler head activates, the air escapes first, which allows water to rush in and discharge.

Best for

Unheated warehouses, parking garages, cold-storage facilities, anywhere pipes could freeze.

Pros

Freeze-resistant.

Cons

Slightly slower response than wet pipe; more complex; requires more maintenance.

Pre-Action Systems

A two-step system: a detection event must occur before water is allowed into the pipes, and then a sprinkler head must also activate before water discharges. This “double interlock” virtually eliminates accidental discharge.

Best for

Data centers, server rooms, libraries, and museums are high-value spaces where accidental water discharge would be catastrophic.

Pros

Extremely low risk of accidental discharge.

Cons

More complex design and maintenance; higher cost.

Deluge Systems

All sprinkler heads are open at all times. There are no individual heat-sensitive elements. Water fills the entire system when a detection signal is received, soaking the entire protected area simultaneously.

Best for

High-hazard industrial areas, such as aircraft hangars, chemical plants, power generation facilities, and warehouses with highly flammable materials.

Pros

Extremely fast, simultaneous coverage of a large area.

Cons

Large water consumption; significant water damage to non-fire areas.

Water Mist Systems

Uses very fine water droplets (mist) at high pressure to suppress fire. The tiny droplets absorb heat rapidly, create a cooling steam layer, and displace oxygen using far less water than conventional sprinkler systems.

Best for

Marine vessels, turbine enclosures, hotel corridors, and areas where water damage is a concern.

Pros

Water-efficient; less secondary damage; effective on Class A, B, and C fires.

Cons

Higher installation cost; sensitive to draft conditions in some configurations.

Gaseous Suppression Systems

Gaseous systems discharge a suppression agent in gas form to reduce the oxygen concentration in the protected space or to chemically interrupt the combustion reaction.

They are clean, they leave no residue, making them ideal for sensitive equipment.

Clean Agent Systems (HFCs, FKs, and Inert Gas Blends)

Common agents include.

  • FM-200 (HFC-227ea): A hydrofluorocarbon that works by heat absorption (chemical mechanism). Fast-acting and widely used.
  • Novec 1230 (FK-5-1-12): A fluoroketone with a very low global warming potential; popular as an environmentally preferable alternative to FM-200.
  • Inert gas blends (e.g., Inergen, Argonite): Mixtures of argon, nitrogen, and sometimes CO₂ that reduce oxygen concentration to below the level that supports combustion but above the level dangerous to humans (typically 12–15%).

Best for

Server rooms, data centers, control rooms, telecom facilities, archives, museums, switch rooms.

Pros

No residue; safe for electronics; does not damage the protected space; safe for occupied areas (with proper design).

Cons

High agent cost; room must be sealed to maintain concentration; requires enclosure integrity testing.

Carbon Dioxide (CO₂) Systems

CO₂ suppresses fire by displacing oxygen. It is highly effective and leaves zero residue.

Best for

Unoccupied or normally unoccupied spaces, printing presses, engine rooms, spray booths, and flammable liquid storage.

Pros

Inexpensive agent; electrically non-conductive; leaves no residue.

Cons

Lethal to humans at suppression concentrations. Must not be used in normally occupied spaces without strict safety lockouts, pre-discharge alarms, and evacuation protocols.

Foam Suppression Systems

Foam systems discharge a mixture of water, foam concentrate, and air. The resulting foam blanket smothers the fire by sealing the fuel surface from oxygen and also cools and suppresses vapors from flammable liquids.

Types include:

  • AFFF (Aqueous Film-Forming Foam): Highly effective on hydrocarbon fuels; historically the industry standard, though PFAS concerns are driving transitions to alternatives.
  • FFFP (Film-Forming Fluoroprotein): Similar to AFFF with added protein base.
  • Protein-based foams: Longer burnback resistance; used on fuel storage tanks.
  • AR-AFFF (Alcohol-Resistant): Effective on polar solvents and alcohols.

Best for

Flammable and combustible liquid hazards include fuel storage tanks, aircraft hangars, refineries, loading terminals, and fuel spill areas.

Pros

Excellent on Class B (flammable liquid) fires; seals vapor to prevent re-ignition.

Cons

Messy cleanup; environmental and regulatory concerns around PFAS-based foams.

Dry Chemical and Dry Powder Systems

These systems discharge a fine chemical powder that interrupts the chemical chain reaction of combustion. They are not to be confused with each other:

  • Dry chemical: Effective on Class A, B, and C fires (ordinary combustibles, flammable liquids, energized electrical equipment). Common agents: monoammonium phosphate (ABC powder), sodium bicarbonate.
  • Dry powder: Specifically for Class D fires (combustible metals like magnesium, titanium, sodium, lithium).

Best for

Industrial kitchens, vehicle suppression systems, chemical storage, metalworking facilities (Class D).

Pros

Fast knockdown; effective on multiple fire classes.

Cons

Messy; corrosive to equipment; limited cooling effect (fire can reignite if not fully controlled); not suitable for sensitive electronics.

Kitchen Hood Suppression Systems (Wet Chemical)

A specialized category designed specifically for commercial cooking operations. Wet chemical agents (typically potassium-based solutions) react with cooking oils to form a soapy layer through saponification, sealing the fuel surface and preventing re-ignition.

Best for

Commercial restaurant hoods, fryers, griddles, and broilers.

Required by

NFPA 96 for commercial cooking operations in most jurisdictions.

Pros

Highly effective on cooking oil fires (Class K); automatic and manual actuation; integrated with gas shutoff.

Cons

Limited to cooking hazards; requires annual inspection and semi-annual cleaning.

Fire Suppression System Classes: A Quick Reference

Understanding fire classes helps you match the right system to the right hazard.

Fire ClassFuel TypeSuitable Suppression
Class AOrdinary combustibles (wood, paper, fabric)Water, clean agent, dry chemical
Class BFlammable and combustible liquidsFoam, CO₂, dry chemical, clean agent
Class CEnergized electrical equipmentCO₂, clean agent, dry chemical
Class DCombustible metalsDry powder only
Class KCooking oils and greasesWet chemical

Key Components of a Fire Suppression System

Regardless of the agent type, most fire suppression systems share similar core components.

  • Detection devices: Heat, smoke, or flame detectors that initiate the response.
  • Control panel: The “brain” that receives detection signals and commands for actuation.
  • Suppression agent storage: Tanks, cylinders, or reservoirs holding the agent.
  • Piping and distribution network: Delivers the agent from storage to the hazard area.
  • Discharge nozzles or sprinkler heads: Release the agent into the protected space.
  • Actuators and valves: Mechanical or electrical components that open flow paths on command.
  • Pressure gauges and supervisory devices: Confirm the system is pressurized and ready.
  • Manual release stations: Allow human-initiated discharge.
  • Annunciation and alarm outputs: Alert occupants and connect to building fire alarm systems.

Choosing the Right Fire Suppression System

Selecting the appropriate system depends on several factors

Hazard Classification

What is actually burning, or what could burn? Ordinary combustibles, flammable liquids, sensitive electronics, and cooking oils each demand different suppression strategies.

Occupancy and Human Safety

Is the space normally occupied? CO₂ systems, for example, are lethal at suppression concentrations and must not be the primary protection method in occupied spaces.

Asset Sensitivity

Water is cheap and effective, but it destroys servers and archival documents. A pre-action or clean agent system may cost more upfront, but far less in secondary losses.

Environmental and Regulatory Considerations

PFAS regulations are actively reshaping foam system specifications globally. FM-200 and CO₂ both carry environmental or climate concerns. Local codes and NFPA standards must be reviewed.

Facility Size and Layout

Large open areas with rapid fire growth potential (hangars, warehouses) may need deluge or high-expansion foam. Small enclosed rooms may be ideal candidates for clean agent total flooding.

Maintenance and Inspection Requirements

Every system type carries its own inspection, testing, and maintenance schedule per NFPA standards. Factor this into the total cost of ownership.

Inspection, Testing, and Maintenance

A fire suppression system that isn’t properly maintained is a liability, not an asset. NFPA standards prescribe minimum inspection and testing frequencies.

  • Weekly/Monthly: Visual inspection of gauges, tamper switches, and control panel status.
  • Quarterly: Inspection of sprinkler heads, hangers, and piping.
  • Annually: Full system functional testing, agent weight checks (for gaseous systems), flow tests.
  • 5-Year: Internal inspection of select sprinkler heads, obstruction investigation.

Always work with a licensed fire protection contractor for testing and maintenance. Document everything. Your records are your compliance proof.

Common Misconceptions About Fire Suppression Systems

Sprinklers go off everywhere when one head activates

Not in standard wet or dry pipe systems. Each sprinkler head activates independently when it reaches its activation temperature. Only deluge systems discharge all heads simultaneously.

A fire suppression system replaces the need for a fire alarm

No. Suppression and detection/alarm systems are complementary. Most jurisdictions require both. The suppression system extinguishes the fire; the alarm system notifies occupants and emergency services.

Clean agent systems are completely safe for people

Generally, yes, if designed correctly, with proper room integrity, pre-discharge alarms, and agent selection for occupied spaces. CO₂, however, is a different story entirely and must be treated as a life-safety hazard.

Once installed, suppression systems are set and forget.

Far from it. Sprinkler heads degrade over decades, agent cylinders lose pressure, nozzles clog, and detection components drift. Regular inspection is non-negotiable.

Final Thoughts

Fire suppression systems are not a one-size-fits-all product. They are engineered solutions, and the right system for a data center is entirely different from the right system for a paint booth or a commercial kitchen.

As a safety engineer or facility professional, your job starts with understanding the hazard — what’s burning, where, under what conditions, and who might be present. From there, the standards and system types will guide the design conversation.

This guide is your starting point. Dive deeper into specific system types using the resources below, and always consult a licensed fire protection engineer for design and compliance work.

Further Reading and Standards

  • NFPA 13: Standard for the Installation of Sprinkler Systems
  • NFPA 72: National Fire Alarm and Signaling Code
  • NFPA 2001: Standard on Clean Agent Fire Extinguishing Systems
  • NFPA 11: Standard for Low-, Medium-, and High-Expansion Foam
  • NFPA 12: Standard on Carbon Dioxide Extinguishing Systems
  • NFPA 17: Standard for Dry Chemical Extinguishing Systems
  • NFPA 96: Standard for Ventilation Control and Fire Protection of Commercial Cooking Operations

Carbon Monoxide Detectors: What Every Homeowner Needs to Know

Carbon monoxide kills roughly 400 Americans every year and sends more than 100,000 to the emergency room, and most of those incidents happen inside the home.

What makes it so dangerous is exactly what makes it so hard to detect: you cannot see it, smell it, or taste it.

A carbon monoxide detector is the only reliable line of defense between your family and this silent killer.

Yet many homeowners either don’t have one, have one in the wrong place, or are using a detector that expired years ago without realizing it.

This guide covers everything you need to know about CO forms, how detectors work, where to place them, which type to buy, and how to maintain them so they actually protect you when it matters.

What Is Carbon Monoxide and Why Is It So Dangerous?

Carbon monoxide (CO) is a colorless, odorless gas produced when fuels such as natural gas, propane, wood, coal, gasoline, and kerosene burn incompletely.

Any combustion appliance in your home is a potential CO source if it malfunctions, is poorly maintained, or is used in an enclosed space.

Common household sources include:

  • Gas furnaces and boilers
  • Gas water heaters
  • Fireplaces and wood-burning stoves
  • Attached garages (running vehicles)
  • Gas ranges and ovens
  • Portable generators (a leading cause of fatal CO poisoning)
  • Kerosene space heaters

The reason CO is so deadly is biochemical. When you inhale it, CO binds to hemoglobin in your red blood cells roughly 200 times more readily than oxygen does, forming carboxyhemoglobin.

Your cells are starved of oxygen even as your body keeps breathing normally. Because the early symptoms, headache, dizziness, nausea, and fatigue, resemble the flu, many victims don’t connect their symptoms to CO until it’s too late.

At higher concentrations, CO causes confusion, loss of consciousness, and death. Infants, elderly individuals, and people with heart or respiratory conditions are especially vulnerable, but no one is immune.

How Do Carbon Monoxide Detectors Work?

A carbon monoxide alarm doesn’t just flip a switch when CO appears. It measures accumulation over time, which is important because the danger threshold depends on both concentration and duration of exposure.

There are three main sensor technologies used in residential CO detectors.

Electrochemical Sensors

The most common and most accurate type found in modern home detectors. A chemical reaction between the CO gas and an electrolyte solution generates a small electric current proportional to the CO concentration.

The detector measures the current and triggers the alarm when a dangerous level is reached. Electrochemical sensors are highly sensitive and reliable, with a typical lifespan of five to seven years.

Metal Oxide (Semiconductor) Sensors

These use a metal oxide film, usually tin oxide, whose electrical resistance drops in the presence of CO.

They are durable and work well over a wide temperature range, but tend to be less precise than electrochemical sensors and can generate more false alarms. They are commonly found in lower-cost units.

Biomimetic Sensors

A gel that changes color when it absorbs CO, mimicking the binding reaction in human blood. A light sensor detects the color change and triggers the alarm.

These are less common in modern detectors but are used in some marine and specialty applications.

Alarm Thresholds

Detectors in the United States must meet UL 2034 standards, which require the alarm to trigger at the following exposure levels (at a minimum).

CO Concentration (ppm)Time to Alarm
70 ppmWithin 1–4 hours
150 ppmWithin 10–50 minutes
400 ppmWithin 4–15 minutes

This time-weighted design means a detector will not alarm immediately at low concentrations. It’s calibrated to reflect genuine biological risk, not instantaneous trace readings.

Where to Place Carbon Monoxide Detectors in Your Home

Placement is just as important as having a detector at all. CO mixes readily with air and doesn’t stratify the way some gases do, but there are still best-practice guidelines for placement.

General Rules

Install at least one detector on every level of your home

, including the basement. Carbon monoxide can accumulate anywhere, but a leak in the basement can take longer to reach upper floors, giving you valuable warning time if you have basement coverage.

Place one outside each sleeping area

CO poisoning is especially dangerous at night because victims may not wake up from the early symptoms.

A detector outside bedroom doors can alert occupants before CO concentrations become incapacitating.

Mount detectors at wall-outlet height or on a shelf

Unlike smoke, which rises and hugs the ceiling, CO is very close to the same density as air. The International Association of Fire Chiefs recommends placing CO detectors at knee-to-shoulder height on the wall or on a shelf, not on the ceiling.

Strategic Placement Tips

  • Place a detector in or near the garage if your home has an attached garage. Running a car engine, even briefly, with the door open, can push CO into living spaces.
  • Place one near any fuel-burning appliance: furnace room, utility room, boiler room.
  • If you use a fireplace frequently, place a detector in that room.
  • Avoid placing detectors directly next to fuel-burning appliances (within five feet) — this can cause nuisance alarms from minor combustion by-products.
  • Keep detectors away from humid areas like bathrooms, which can interfere with electrochemical sensors.

How Many Do You Need?

For a typical two-story home with a basement, three detectors is a reasonable minimum: one on each floor and one in the basement.

Larger homes or homes with multiple sleeping areas may need more. Think of it like smoke detectors: one per floor is the floor, not the ceiling.

Types of Carbon Monoxide Detectors: Which One Should You Buy?

The market offers several formats, each with trade-offs in terms of convenience, reliability, and cost.

Plug-in CO Detectors

Plug directly into a standard wall outlet, usually with a battery backup for power outages. Easy to install, easy to move, and the battery backup is a critical safety feature.

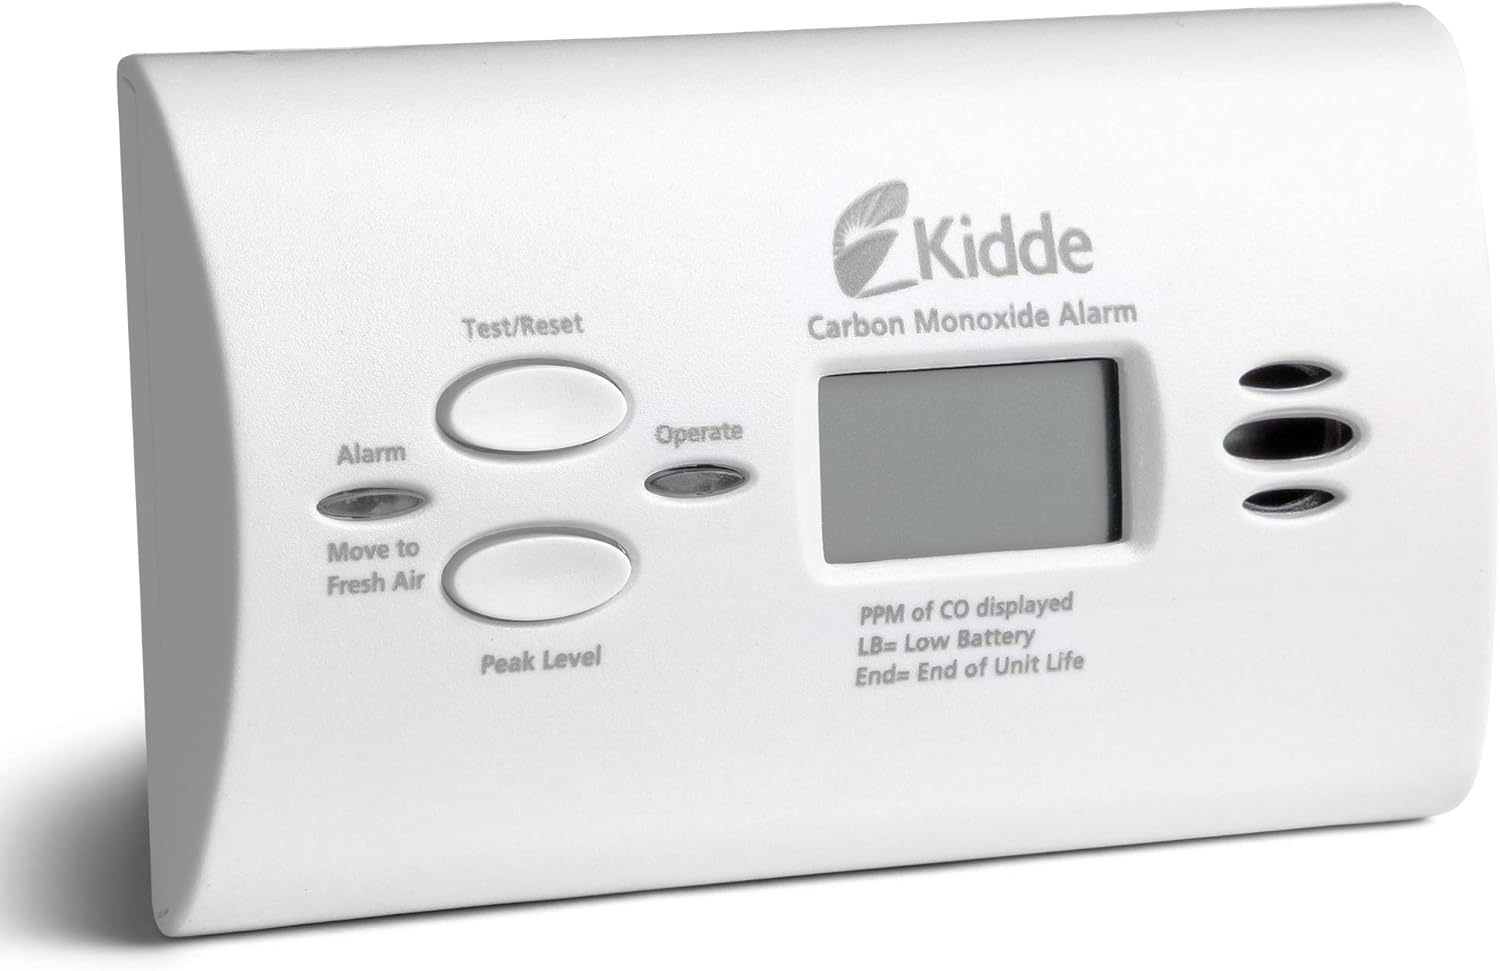
Look for models with a digital display showing current CO levels, useful for monitoring low-level buildup before it reaches alarm thresholds.

Best for

Most homeowners. Simple, reliable, and versatile.

Hardwired CO Detectors

Wired directly into your home’s electrical system, typically with battery backup. Often interconnected, meaning if one alarm triggers, all alarms in the house sound simultaneously.

This is a significant safety advantage in larger homes where a single detector might not be heard from all areas.

Best for

New construction, renovations, or homeowners who want a whole-home system.

Battery-Only CO Detectors

Entirely battery-powered, no outlet or wiring required. Flexible placement, including areas without nearby outlets.

The trade-off is the need to replace batteries regularly; many units chirp when the battery runs low, but this is easy to ignore.

Best for

Locations without a convenient outlet or as supplemental detectors.

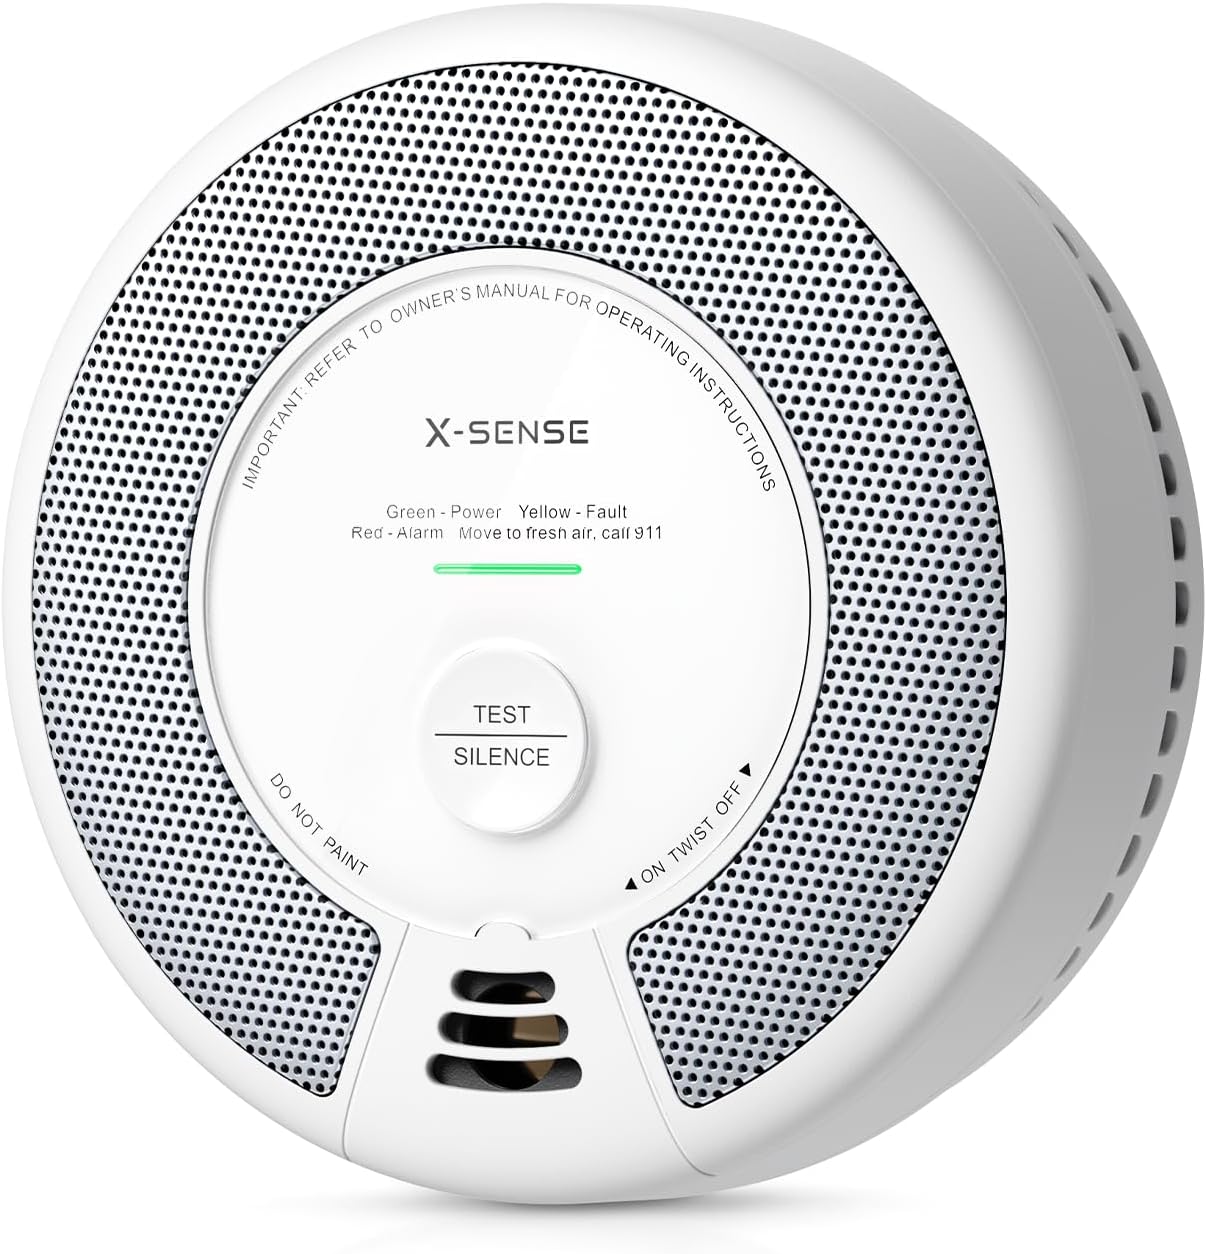
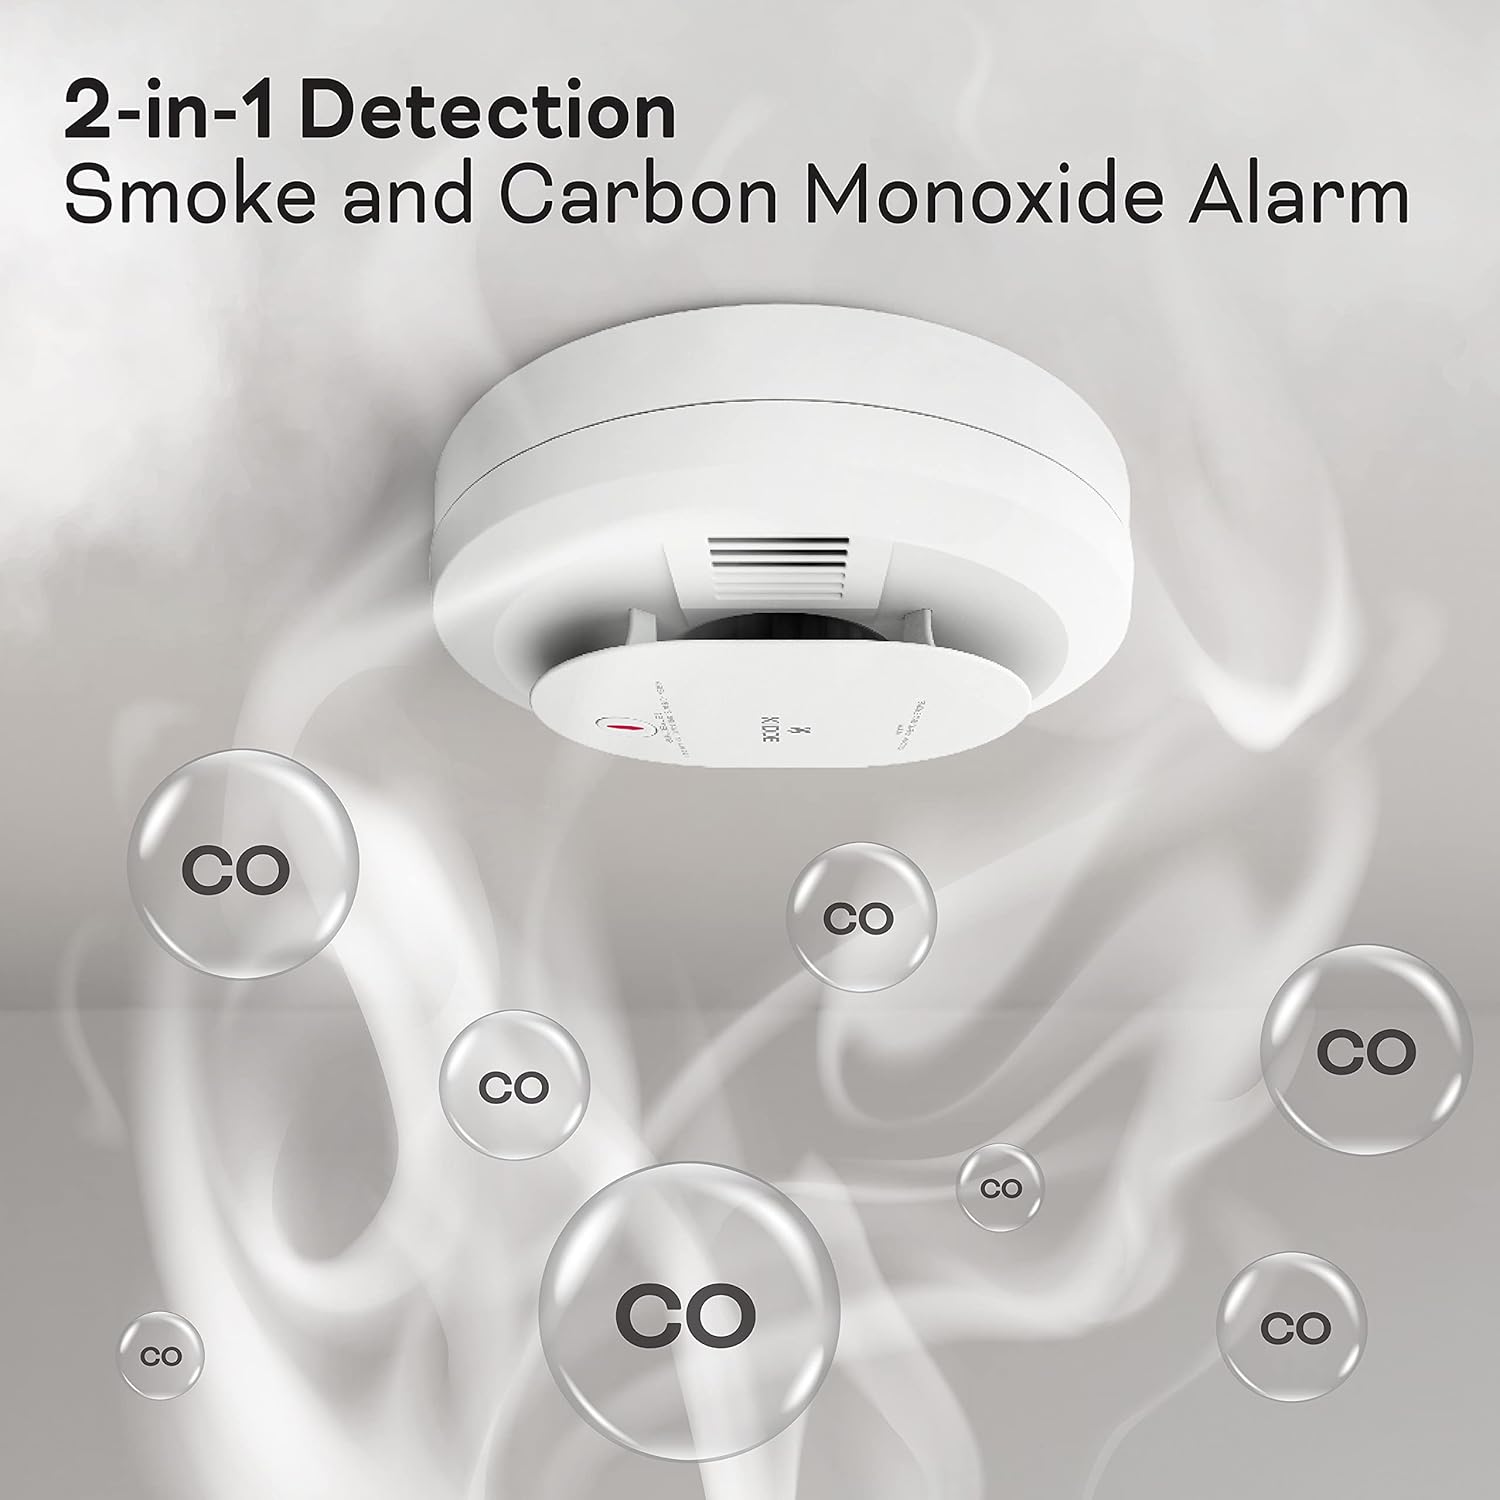
Combination Smoke/CO Detectors

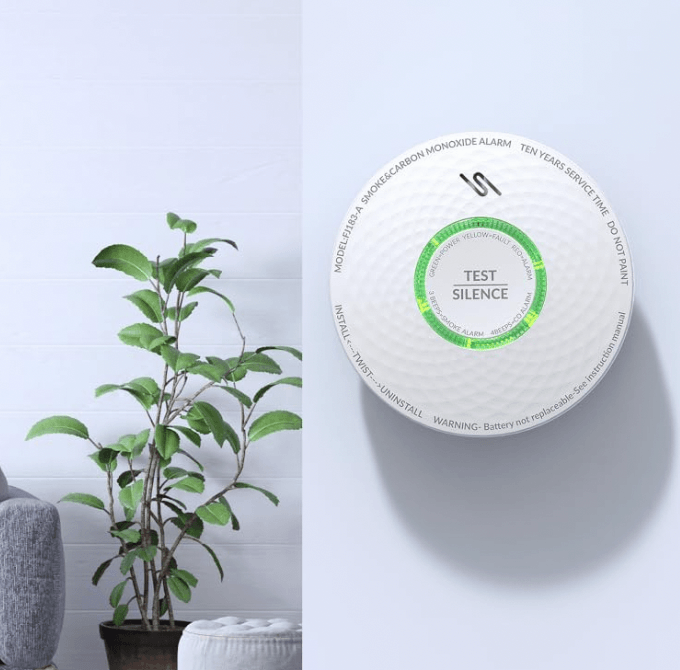
A single unit that detects both smoke and carbon monoxide. Convenient for reducing the number of devices on ceilings and walls.

The caveat: since smoke detectors belong on the ceiling and CO detectors work best at wall height, a combination unit is a compromise.

If you choose a combo unit, ceiling placement is still preferred since smoke detection is typically the higher priority.

Best for

Rentals, minimalists, or areas where a single device needs to cover both hazards.

Smart CO Detectors

Wi-Fi or Bluetooth-connected units that send alerts to your smartphone, log CO levels over time, and integrate with smart home systems.

Some models, like the Nest Protect, also perform regular self-tests and notify you of low batteries or end-of-life status.

Premium price, but the remote notification capability is genuinely useful if you travel or rent out your property.

Best for

Tech-savvy homeowners, landlords, and smart home enthusiasts.

What to Look for When Buying a Carbon Monoxide Detector

Not all detectors are created equal. Here are the key factors to evaluate.

UL 2034 Certification

The baseline standard for residential CO alarms in the US. Any detector you buy should carry this certification. Don’t settle for uncertified products.

Digital Display

A display showing current CO concentration in parts per million (ppm) tells you far more than a simple alarm.

You can monitor low-level accumulation and catch problems before they reach alarm thresholds.

Battery Backup

If your detector is hardwired or plug-in, battery backup is non-negotiable. Power outages often accompany the weather events and system failures that can also cause CO leaks.

Lifespan Indicator

Good detectors include an end-of-life signal, typically a different chirp pattern, to tell you when the unit needs replacing. Some have a clearly marked expiration date on the back.

Sensor Type

For home use, electrochemical sensors are the gold standard. Look for units that specify the sensor type in their product documentation.

Interconnectability

If you’re outfitting a larger home, choose a brand that offers interconnected units (either wired or wireless) so all alarms sound together.

Carbon Monoxide Detector Maintenance and Lifespan

Buying a detector is step one. Keeping it functional is step two, and this is where many homeowners fall short.

Test Your Detectors Monthly

Every CO detector has a test button. Press it monthly to confirm the alarm sounds and the unit is functioning. This takes five seconds and could save your life.

Replace Batteries at Least Annually

If your detector uses replaceable batteries, change them every year, even if they haven’t died. A convenient habit is to change them when you set the clocks back in the fall. Never ignore a low-battery chirp.

Know the Lifespan of Your Detector

This is the most commonly overlooked maintenance issue: CO detectors expire. The electrochemical sensors degrade over time, typically after five to seven years, and a detector that has passed its lifespan may not alarm even when CO is present.

Check the manufacturer’s date, usually on a label on the back or bottom of the unit, and replace the detector within the manufacturer’s recommended timeframe. If you don’t know how old your detector is, replace it.

Don’t Paint Over or Cover Detectors

Paint, stickers, or covers that block the sensing vents will impair the unit’s ability to detect CO. Keep the sensing area clear.

Respond Immediately to Any Alarm

If your CO detector alarms.

  1. Immediately move everyone (including pets) outside to fresh air.
  2. Call 911 from outside. Do not re-enter to make the call.
  3. Do not return inside until emergency services have cleared the building and identified the source.
  4. Seek medical attention if anyone feels unwell.

Do not assume the alarm is a false alarm. Investigate every CO alarm as if it were real.

Carbon Monoxide Laws and Requirements by State

Most US states now require CO detectors in residential properties, though the specifics vary. Requirements typically cover.

  • Single-family homes
  • Multi-family dwellings and apartments
  • New construction vs. existing homes
  • Rental properties (landlord obligations)

States with fuel-burning appliances in homes, attached garages, or both almost universally mandate CO alarms.

Check your state’s fire code or consult your local fire marshal’s office for the requirements in your area. If you are a landlord, compliance is typically your legal responsibility.

Even in states without a mandate, installation is basic common sense. The cost of a quality CO detector, typically $25 to $60, is trivially small compared to the risk.

Frequently Asked Questions

How long do carbon monoxide detectors last?

Most residential CO detectors have a lifespan of five to seven years. Check the manufacturer’s date on the back of your unit and replace it within the manufacturer’s recommended window. When in doubt, replace it.

Can a CO detector detect natural gas?

No. CO detectors are specifically calibrated for carbon monoxide. Natural gas (methane) requires a separate gas leak detector. Combination CO/natural gas detectors are available if you want both functions in one unit.

What does a CO alarm sound like?

The standard alert pattern under UL 2034 is four beeps, a pause, then four more beeps repeated continuously.

This distinguishes it from a smoke alarm (typically a continuous or three-beep pattern) and from a low-battery chirp (usually a single chirp every 30–60 seconds).

Can I put a CO detector in the garage?

The garage itself is not typically recommended as a primary installation location because CO concentrations there can be extremely high during normal vehicle operation, leading to nuisance alarms.

A better approach is to place a detector near the interior door connecting your garage to your living space.

Where should you not put a CO detector?

Avoid placing detectors within five feet of fuel-burning appliances, in high-humidity areas like bathrooms, in direct sunlight, near windows or air vents that could dilute readings, and in enclosed spaces like closets.

Final Thoughts

A carbon monoxide detector is one of the simplest and most effective safety investments a homeowner can make.

The technology is reliable, the cost is minimal, and the protection it provides is real. But it only works if you have the right number of detectors, they are properly placed, and they are not expired.

Take fifteen minutes to audit your home today

  • Check the manufacturer’s date on every CO detector you own.
  • Verify they are positioned at the right height, on every level, and outside every sleeping area.
  • Test each unit with the test button.
  • Replace any unit older than seven years or without a known manufacturer date.

If you’re starting from scratch, invest in detectors with digital displays and battery backup from a reputable brand carrying UL 2034 certification. Interconnected units are worth the upgrade in larger homes.

Carbon monoxide protection doesn’t require expertise or a large budget. It requires the right equipment, correctly placed, and properly maintained. That’s entirely within reach for any homeowner.

Smoke Detector Selection Guide: Ionization vs. Photoelectric vs. Combination

When was the last time you thought seriously about your smoke detectors? Most people install them, test the battery once a year (if that), and never think twice about whether they have the right type for their home.

But here’s the thing: not all smoke detectors respond to the same kind of fire the same way, and choosing the wrong type could cost you critical minutes in an emergency.

This guide breaks down the three main smoke detector technologies: ionization, photoelectric, and combination, so you can make an informed decision about protecting your home, family, or facility.

Why the Type of Smoke Detector Matters?

There are two fundamentally different types of fires you need to protect against.

Fast-flaming fires

These ignite and spread rapidly, producing intense heat and large combustion particles. Think of grease fires, paper fires ignited by a candle, or electrical sparks that catch on dry material.

Slow-smoldering fires

These can burn for hours before breaking into flames, producing dense, fine smoke particles and toxic gases long before visible fire appears. A smoldering couch cushion or overheated wiring inside a wall are classic examples.

The critical problem: no single sensor technology detects both equally well.

That’s not a minor technicality. A 2004 NIST (National Institute of Standards and Technology) study found that ionization detectors responded to fast-flaming fires faster, while photoelectric detectors were significantly quicker to alert during slow-smoldering fires, sometimes by 30 to 50 minutes. In a residential fire, that time gap can be the difference between evacuation and tragedy.

This is why understanding the technology behind your detector isn’t just an interesting engineering detail; it’s a life-safety decision.

How Ionization Smoke Detectors Work

The Technology

Ionization detectors contain a small amount of Americium-241 (Am-241), a mildly radioactive element.

This material continuously ionizes the air between two electrically charged plates inside the detector, creating a small, steady current.

When smoke enters the sensing chamber, the combustion particles disrupt this ionized current. The detector’s electronics register the drop in current and trigger the alarm.

What Ionization Detectors Detect Best

Ionization detectors excel at detecting large combustion particles produced by fast-flaming fires. Because these particles are physically large enough to significantly disrupt the ion current, the detector responds quickly.

Best applications.

  • Kitchens (though placement matters, see common mistakes below)
  • Living rooms where fast-igniting materials are present
  • Garages with flammable liquids or materials

Limitations of Ionization Detectors

  • Slower response to smoldering fires that produce fine, dense smoke.
  • More prone to nuisance alarms from cooking vapors, steam, and humidity.
  • Contain a small radioactive source (safe in normal use, but requires proper disposal; do not throw in regular trash).

Cost

Ionization detectors are generally the least expensive option, often available for $8–$20 per unit. They are the most widely deployed type in North American homes, largely due to their lower cost.

How Photoelectric Smoke Detectors Work

The Technology

Photoelectric detectors use a light source (typically an LED) and a light sensor positioned at a 90-degree angle inside a sensing chamber. Under normal conditions, the beam travels straight across the chamber without reaching the sensor.

When smoke enters the chamber, particles scatter the light beam, deflecting some of it toward the sensor. The detector interprets this light scattering as smoke and triggers the alarm.

This principle is known as the Tyndall effect, the same physics behind why sunlight appears to scatter through dusty or foggy air.

What Photoelectric Detectors Detect Best

Photoelectric detectors excel at detecting fine smoke particles from slow-smoldering fires. Because smoldering combustion produces dense, fine aerosol particles that scatter light very effectively, photoelectric technology responds to these fires significantly faster than ionization technology.

Best applications

  • Bedrooms
  • Hallways
  • Living rooms with upholstered furniture
  • Offices and areas with electronics that might smolder before flaming

Limitations of Photoelectric Detectors

  • Slightly slower response to fast-flaming fires compared to ionization detectors.
  • Generally cost more than basic ionization units ($15–$35 per unit).
  • May be triggered by heavy steam or dusty environments if poorly positioned.

Why Safety Organizations Increasingly Favor Photoelectric

The U.S. Fire Administration, several state fire marshals, and fire safety advocacy groups have increasingly recommended photoelectric detectors for residential bedrooms and sleeping areas.

The reasoning: smoldering fires are particularly dangerous at night because occupants are asleep, and the slow buildup of toxic gases (particularly carbon monoxide) can incapacitate people before a full flaming fire develops.

How Combination (Dual-Sensor) Smoke Detectors Work

The Technology

Combination detectors integrate both ionization and photoelectric sensing technologies into a single unit.

Some models process both sensor inputs independently and alarm when either threshold is exceeded.

More advanced models use signal processing algorithms to reduce nuisance alarms while maintaining fast response across both fire types.

What Combination Detectors Detect Best

The straightforward answer: both types of fires.

Combination detectors are engineered to close the detection gap. They offer.

  • Fast response to flaming fires (via the ionization sensor).
  • Early warning for smoldering fires (via the photoelectric sensor).
  • Reduced the need for installing two separate detector types in some locations.

Are Combination Detectors Always the Best Choice?

Not necessarily, and this is a nuance that often gets overlooked in simple buying guides.

A few considerations.

Cost

Combination units cost more ($25–$60+), and if you’re equipping a large home or facility, that cost multiplies.

Nuisance alarm management

Combining two technologies doesn’t automatically reduce false alarms. In fact, without smart signal processing, a combination unit could alarm more frequently than a single-technology unit.

Look for models that specifically address nuisance alarm performance (discussed in the recommendations section below).

Not a substitute for strategic placement

Even a combination detector positioned incorrectly provides suboptimal protection.

Ionization vs. Photoelectric vs. Combination: Key Differences at a Glance

FeatureIonizationPhotoelectricCombination
Best forFast-flaming firesSlow-smoldering firesBoth fire types
Response to smoldering firesSlowerFasterFast
Response to flaming firesFasterSlightly slowerFast
Nuisance alarm tendencyHigher (kitchen fumes)LowerVaries by model
Cost range$8–$20$15–$35$25–$60+
Contains a radioactive sourceYes (Am-241)NoYes (if ionization sensor included)
Recommended for bedroomsLess idealYesYes
Recommended for kitchensWith cautionPreferredPreferred

Which Smoke Detector Type Is Best for Which Room?

Bedrooms and Sleeping Areas

Recommended: Photoelectric or Combination

The most common deadly residential fires, smoldering fires from upholstered furniture, bedding, and electronics, produce the fine smoke particles that photoelectric technology detects earliest. Since occupants are asleep and may not notice the smoke odor, early warning is critical.

Hallways and Corridors

Recommended: Photoelectric or Combination

Hallways serve as escape routes. Smoke from either fire type can fill these spaces, and early detection here buys evacuation time. Photoelectric technology generally performs well in these locations.

Kitchen

Recommended: Photoelectric, but placement is everything

Kitchens are the leading source of nuisance alarms. Ionization detectors are particularly prone to false alarms from cooking vapors, which frustrates users and, more dangerously, trains them to ignore or disable detectors.

Photoelectric units perform better in kitchens, but placement matters enormously.

  • Keep detectors at least 10 feet from cooking appliances.
  • Avoid positioning directly above or adjacent to stoves, toasters, and ovens.
  • Consider a heat detector (not a smoke detector) directly over a cooking area as a supplementary device.

Living Rooms

Recommended: Combination

Living rooms contain a mix of fuel types, upholstered furniture (smoldering risk), curtains, paper materials, and electronics. A combination detector provides the broadest coverage.

Garage

Recommended: Heat detector (not smoke detector) or dedicated garage model

Standard smoke detectors in garages are highly susceptible to false alarms from exhaust fumes, dust, and humidity. A rate-of-rise heat detector is often better suited for garage applications.

Basement

Recommended: Combination or Photoelectric

Basement fires often smolder from electrical or stored material ignition. Photoelectric or combination units are well-suited here.

What Fire Codes and Standards Say

NFPA 72 (National Fire Alarm and Signaling Code)

NFPA 72 is the primary standard governing smoke detector installation in the United States. It specifies placement requirements (floor coverage, ceiling mounting rules, distance from walls and HVAC vents) but does not mandate a specific smoke detector technology for residential applications. It does, however, include performance testing criteria that detectors must meet.

Key placement requirements from NFPA 72

  • Install on every level of the home, including the basement.
  • Install inside every bedroom and outside each sleeping area.
  • Mount on the ceiling or high on walls (4–12 inches from the ceiling for wall-mounted units).
  • Keep at least 3 feet from HVAC supply registers.
  • Test monthly and replace units every 10 years.

UL 217 (Standard for Smoke Alarms)

Underwriters Laboratories UL 217 is the testing standard that smoke detectors sold in the U.S. must meet.

An important update to UL 217 (the 9th edition, effective in 2021) added new smoldering fire performance requirements, making it harder for ionization-only detectors to pass without smoldering sensitivity improvements.

This has gradually pushed manufacturers toward improving ionization detector performance on smoldering fires or adopting combination/photoelectric designs.

When purchasing, look for the UL 217 listing on the packaging.

International Building Code (IBC) and International Residential Code (IRC)

These model codes, adopted with local variations across most U.S. jurisdictions, follow NFPA 72 placement requirements for residential applications.

Commercial and industrial applications are subject to more detailed requirements based on occupancy classification.

Local Jurisdiction Requirements

Always verify local requirements. Some states and municipalities have adopted specific language recommending or requiring photoelectric detectors in certain occupancy types.

California, for example, has enacted legislation (SB 1394) requiring photoelectric-only smoke alarms in certain residential applications for new construction.

Common Mistakes When Choosing and Installing Smoke Detectors

Installing Only One Technology Type Throughout the Home

Given the detection differences between ionization and photoelectric technologies, relying on a single technology in every location leaves coverage gaps.

If the budget allows only one type, photoelectric detectors in bedrooms and sleeping areas are the higher-priority choice.

Installing Detectors Too Close to Kitchens

One of the most common nuisance alarm scenarios, and the one most likely to cause homeowners to remove batteries or permanently disable detectors.

Follow manufacturer clearance recommendations (typically 10+ feet from cooking appliances).

Neglecting to Replace Units Every 10 Years

Smoke detector sensors degrade over time. A 15-year-old detector may appear functional (indicator light is on, test button sounds alarm) but have a significantly degraded sensing capability.

The alarm circuit and the smoke sensing chamber are separate systems. Replace detectors every 10 years from the manufacture date printed on the back of the unit.

Not Interconnecting Detectors

Modern best practice and increasingly a code requirement in new construction is interconnected smoke detectors. When one alarm sounds, all sound.

This is particularly important in larger homes where a basement fire may not be audible in an upstairs bedroom.

Interconnection can be done via hardwired systems or, increasingly, via wireless/RF interconnection in battery-powered units.

Ignoring Combination CO/Smoke Detectors

Combination smoke and carbon monoxide detectors are worth serious consideration, particularly for bedrooms near attached garages, homes with gas appliances, or any sleeping area. CO is colorless and odorless. Only a dedicated sensor can detect it.

Skipping Monthly Testing

The test button only verifies that the alarm circuit (horn and electronics) functions. It does not test the actual smoke-sensing chamber.

While there’s no practical way to test smoke sensing without exposing the unit to smoke or aerosol, regular testing at least confirms the alarm will sound if the sensor triggers.

Top Smoke Detector Recommendations by Category

Note: These recommendations are based on widely recognized performance and feature characteristics. Always verify current availability and confirm UL 217 listing at purchase.

Best Photoelectric Detector

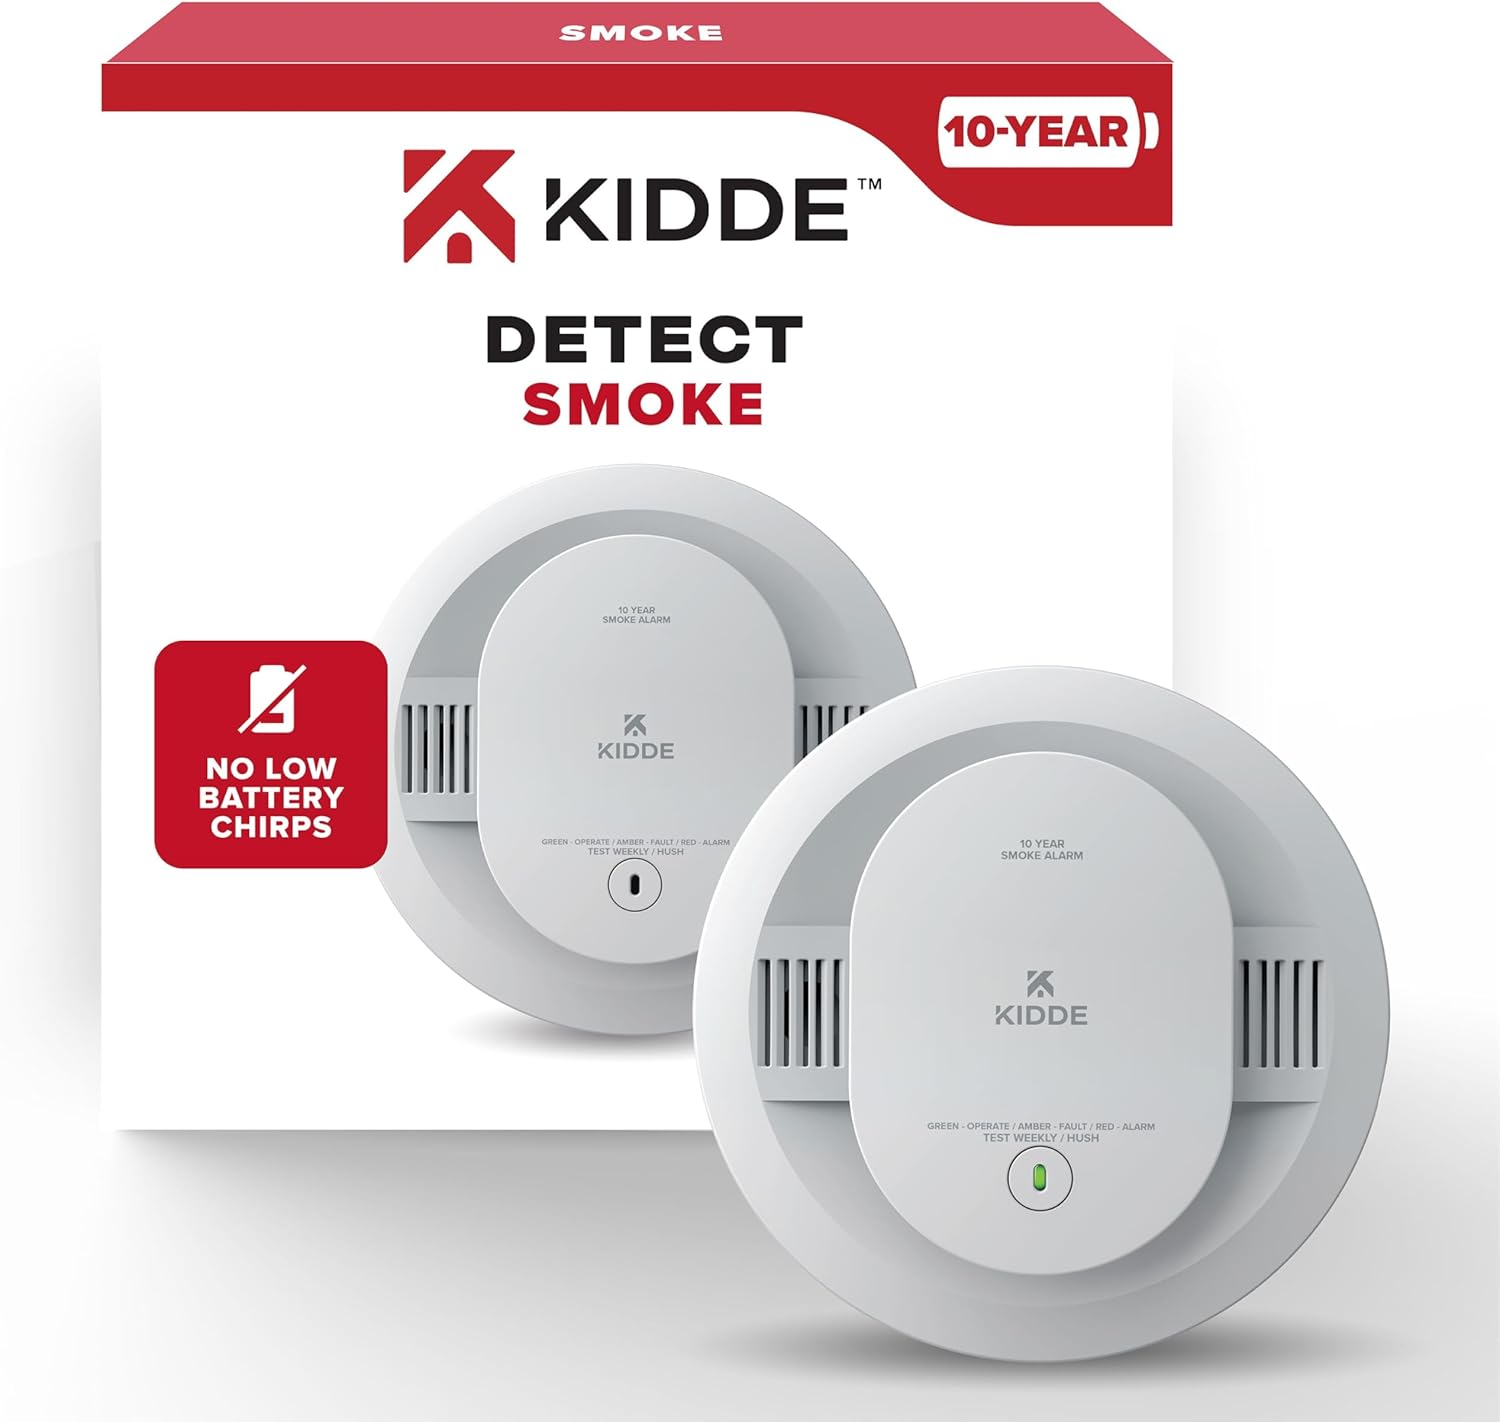
Kidde 10-Year Sealed Battery Photoelectric Smoke Detector

  • 10-year sealed lithium battery eliminates battery replacement for the life of the unit
  • Photoelectric sensing ideal for bedrooms and hallways
  • Meets UL 217 standards
  • Straightforward installation, large Test/Hush button

First Alert BRK PF1911 Photoelectric Detector

  • Well-regarded photoelectric unit from an established manufacturer
  • Affordable entry point for photoelectric coverage
  • Available in interconnectable versions

Best Combination (Dual-Sensor) Detector

Kidde KN-COSM-IBA (Combination Smoke + CO)

  • Integrates ionization smoke detection with photoelectric and CO sensing
  • Hardwired with battery backup
  • Interconnectable up to 18 units

Nest Protect (2nd Generation)

  • Photoelectric sensor with split-spectrum sensing technology
  • Smart home integration (Wi-Fi, app alerts, voice alarm with location announcement)
  • Self-testing, interconnectable, combination smoke + CO
  • Premium price point; well-suited for tech-forward households

Best for Interconnected Systems

First Alert Z-Wave Smoke Detector (ZSMOKE)

  • Z-Wave wireless interconnection for smart home integration
  • Works with most Z-Wave hubs (SmartThings, Wink, etc.)
  • Allows retrofit of interconnection in existing homes without rewiring

Frequently Asked Questions

Do I need both ionization and photoelectric detectors in my home?

The safest approach recommended by many fire safety authorities is to have both technologies represented either as separate units or through combination detectors. At a minimum, ensure photoelectric detectors are in bedrooms and sleeping areas.

Are photoelectric smoke detectors safer than ionization detectors?

Neither type is universally “safer”; they detect different fire signatures with different effectiveness. Photoelectric detectors have an advantage in detecting the smoldering fires that most commonly cause overnight residential fatalities, which is why they’re increasingly recommended for sleeping areas.

Is the radioactive material in ionization detectors dangerous?

The amount of Americium-241 in a residential ionization smoke detector is extremely small and poses no radiation health risk during normal use.

The material is safely enclosed in the sensing chamber. The primary concern is proper disposal. Do not discard ionization detectors in regular household trash. Contact your local waste management authority for hazardous materials disposal options.

How often should I replace smoke detector batteries?

For detectors with replaceable batteries, replace annually or when the low-battery chirp activates.

Many modern units use 10-year sealed lithium batteries that eliminate the annual replacement burden. Regardless of battery status, replace the entire detector unit every 10 years.

Can I install smoke detectors myself, or do I need an electrician?

Battery-powered and plug-in smoke detectors are DIY-installable. Hardwired smoke detectors, particularly in new construction or systems being connected to an existing wired circuit, should be installed by a licensed electrician to comply with electrical codes and ensure proper interconnection.

What is the difference between a smoke detector and a smoke alarm?

A smoke detector is technically a sensing device that is part of a larger fire alarm system it detects smoke and sends a signal to a central control panel.

A smoke alarm is a self-contained unit with its own sensor and audible alert. Most residential products are smoke alarms, though the terms are commonly used interchangeably.

Should I get a combination smoke and CO detector?

For most residential applications, yes, particularly in bedrooms and any area near gas appliances or an attached garage.

Carbon monoxide is an invisible, odorless gas that causes hundreds of deaths annually in the U.S. A single combination unit covers both hazards in one installation.

The Bottom Line

Choosing the right smoke detector comes down to understanding two realities: fires behave differently, and no single sensor technology is perfect for every scenario.

For most homes, the practical answer is this.

  • Photoelectric detectors in all bedrooms and sleeping areas
  • Combination detectors in living rooms and common areas, where the budget allows
  • Interconnect everything so the whole house knows when any detector activates
  • Replace every 10 years without exception

If you’re outfitting a single-family home on a budget and can only choose one technology, lean photoelectric particularly if there are sleeping occupants who may not wake at the first sign of smoldering smoke.

For industrial and commercial applications, the selection criteria expand significantly, factoring in environmental conditions, required detection standards (NFPA 72, FM, UL), duct detection requirements, and system integration with suppression and evacuation systems topics we cover in dedicated guides on SafeguardSense.

What Is Calibration in Gas Detection? A Complete Guide for Safety Professionals

If you work with portable or fixed gas detection equipment, you have almost certainly been told that your detectors need calibration.

But what does that actually mean? What happens during calibration, why does it matter, and how often does it need to be done?

This guide answers all of those questions in plain language. Whether you are a safety officer managing a fleet of gas monitors, a technician responsible for bump testing instruments on a plant site, or simply someone trying to understand what the regulations require, this article will give you a solid foundation.

⚡ Key Takeaway

Calibration in gas detection is the process of exposing a gas detector to a known concentration of target gas and adjusting the instrument’s response to match that known value.

Without regular calibration, a detector may fail to alarm in a genuinely hazardous atmosphere, silently putting workers at risk.

What Is Gas Detector Calibration?

Gas detector calibration is the process of exposing an instrument to a precisely known concentration of target gas called calibration gas or span gas, and adjusting the detector’s output so that it accurately displays that concentration.

The goal is to verify and correct the instrument’s response curve, ensuring the readings shown on the display reflect the actual gas concentration in the air.

To understand this, it helps to know how most electrochemical and catalytic bead sensors work. Over time, sensor output drifts.

Electrochemical sensors age as their electrolyte gradually depletes. Catalytic bead sensors (also called pellistors) can be poisoned by silicones, halogenated compounds, or lead vapors, which coat the catalytic bead and reduce its sensitivity.

Environmental factors, such as heat, humidity, and UV exposure, also contribute to drift. Without calibration, a sensor that has drifted may still power on and appear functional, but its reading may be meaningfully off from the true gas concentration.

Calibration corrects for that drift by resetting the instrument’s span point to a verified reference. Most modern detectors also include a zero calibration step, which sets the baseline reading in clean, fresh air before the span adjustment is made.

Why Calibration Matters in Industrial Safety

The entire purpose of a gas detector is to warn workers before a hazardous atmosphere develops. If the detector’s readings are inaccurate, that warning system fails, and the failure is invisible.

A detector that underreads by 30% will not alarm at the correct threshold. A detector that overreads may trigger nuisance alarms that workers learn to ignore. Both scenarios create serious safety problems.

Consider a confined space entry scenario. The permit requires oxygen levels above 19.5% and combustible gas below 10% of the Lower Explosive Limit (LEL).

If the LEL sensor is drifting low due to sensor aging, it may read 8% LEL when the actual concentration is already at 15% LEL well into the warning zone. The worker enters based on a false reading, and the true hazard is invisible.

This is not a hypothetical risk. Incident reports across the oil and gas, chemical, mining, and utilities sectors document cases where sensor drift contributed to fatalities and serious injuries.

Calibration is the primary technical control that prevents sensor drift from becoming a hidden hazard.

???? Safety Principle

A gas detector with an uncalibrated sensor is not a safety instrument. It is a false sense of security. Regular calibration is the only way to confirm that an alarm threshold is meaningful.

Bump Testing vs. Calibration: Understanding the Difference

These two terms are often confused, and the confusion can lead to inadequate maintenance programs. They are related but not the same thing.

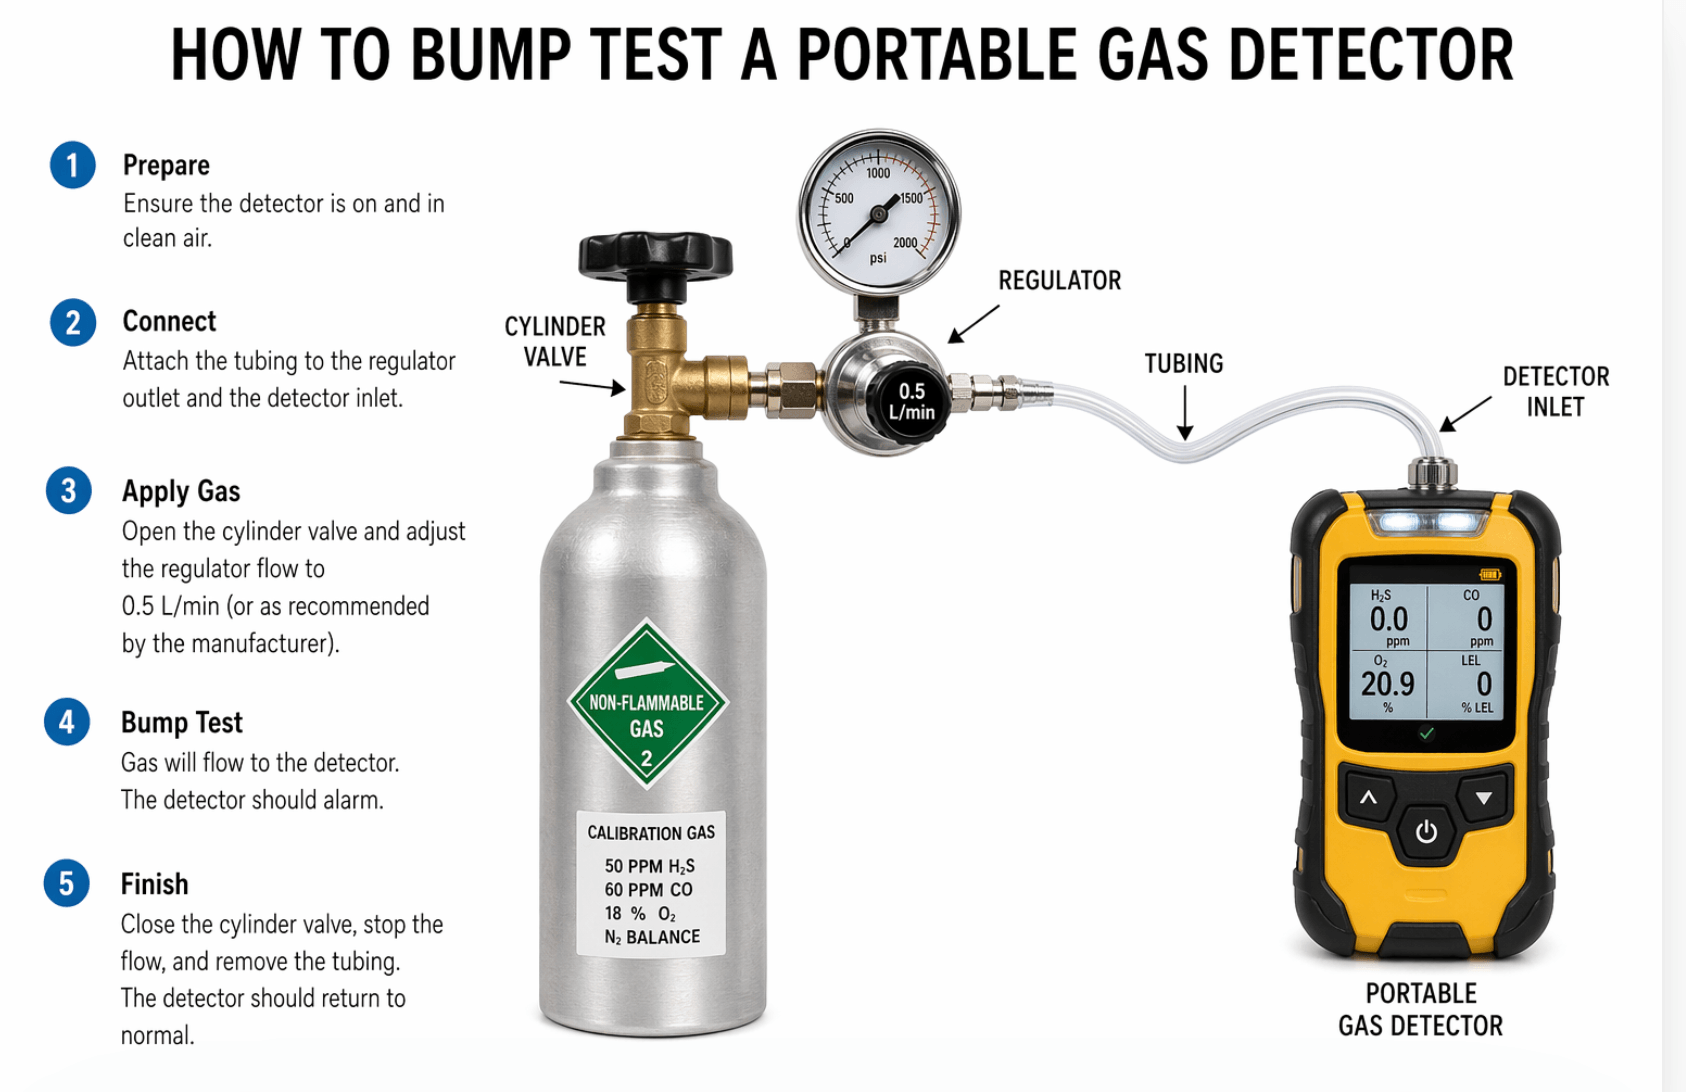
Bump Test (Function Check)

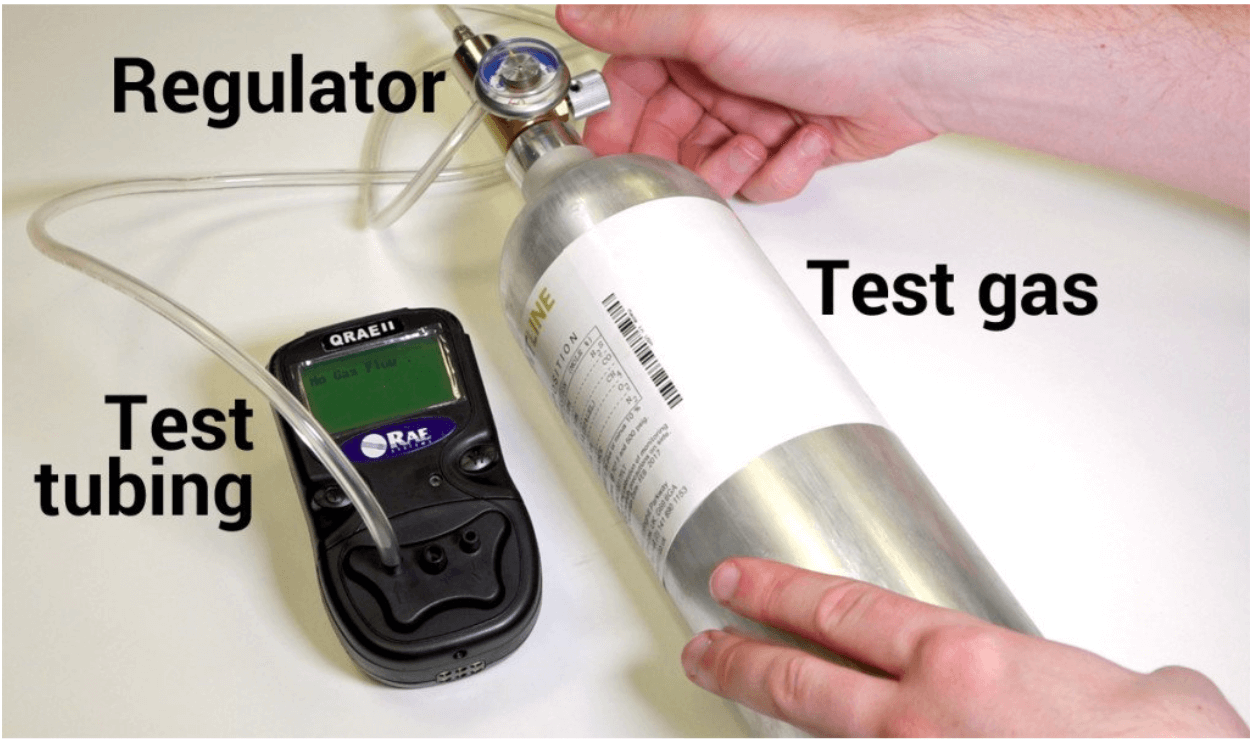
A bump test, also called a function check or challenge test, involves briefly exposing a gas detector to a low concentration of target gas to confirm that the sensor responds and the alarm activates.

It is a qualitative check: it answers the question “does this detector respond to gas?” but does not verify the accuracy of the reading.

A bump test is fast (typically 10–30 seconds per sensor channel), uses relatively small quantities of calibration gas, and can be performed before every shift using a simple docking station or a bump test cap.

What Is a Bump Test in Gas Detection?

Full Calibration (Span Calibration)

A full calibration exposes the instrument to a certified concentration of gas for a sufficient period and adjusts the sensor’s output to match. It answers a more precise question: “Does this detector read accurately?”

This process takes longer, requires a certified calibration gas cylinder with a traceable concentration, and must be performed at defined intervals regardless of bump test results.

Bump TestFull Calibration
PurposeConfirm sensor responds to gasVerify and adjust reading accuracy
FrequencyBefore each use (recommended)Typically every 3–6 months
Duration10–30 secondsSeveral minutes per channel
Typically, every 3–6 monthsLow concentration, any suitable gasCertified calibration gas with traceable concentration
ResultPass / FailSensor adjusted to match known value
Replaces calibration?NoYes (is the calibration)

The practical recommendation from most instrument manufacturers and safety standards is to bump test before every use and perform full calibration at intervals defined by the manufacturer, site conditions, and applicable regulations.

Types of Gas Detector Calibration

Zero Calibration (Fresh Air Calibration)

Zero calibration sets the detector’s baseline reading in a clean atmosphere. The instrument is exposed to either certified zero air (a cylinder of clean, dry air free of target gases) or ambient air that has been verified to be free of contaminants.

The instrument’s zero point is then adjusted to read 0 ppm (or 0% LEL for combustible gas sensors, or 20.9% for oxygen sensors).

Zero calibration should always be performed before span calibration. If the zero is incorrect, the span adjustment will simply shift a drifted baseline rather than correcting it.

Span Calibration

Span calibration is what most people refer to when they say “calibration.” The detector is exposed to a calibration gas cylinder with a certified concentration of the target gas, for example, 50 ppm of hydrogen sulfide (H2S), or 2.5% methane (equivalent to 50% LEL for methane).

The instrument’s display reading is then adjusted until it matches the certified concentration on the calibration gas cylinder certificate.

Two-Point vs. Multi-Point Calibration

Most field instruments use a two-point calibration: zero and one span point. This is sufficient for most industrial applications where the detector operates within a predictable concentration range.

Analytical instruments used in laboratory settings or high-precision monitoring applications may require multi-point calibration, where the instrument’s response is verified and adjusted at several concentrations to characterize the full response curve.

Automatic vs. Manual Calibration

Modern instruments increasingly support automatic calibration via docking stations or calibration controllers.

The instrument is placed in the dock, the calibration gas flows automatically, the instrument adjusts itself, and a calibration record is generated without technician intervention.

Manual calibration requires the technician to control gas flow, observe the reading stabilize, and make adjustments using instrument menus.

Both approaches are valid; automatic calibration reduces human error and is preferred for large fleets of instruments.

How Calibration Works: Step-by-Step

The exact procedure varies by instrument model and manufacturer, but the following sequence describes the general process for a typical portable multi-gas detector.

  • Allow the instrument to warm up fully. Most electrochemical sensors require 30–60 seconds of stabilization time after powering on.
  • Perform a zero calibration in clean, fresh air (or using certified zero air). Verify the reading stabilizes at the correct zero value before proceeding.
  • Attach the calibration gas regulator and demand-flow fitting (or use a calibration dock). Confirm you are using the correct calibration gas mixture for all sensor channels.
  • Initiate the span calibration mode through the instrument menu. Apply calibration gas at the flow rate specified by the manufacturer, typically 0.5 to 1.0 L/min for most portable instruments.
  • Wait for the reading to stabilize. This typically takes 30–90 seconds per sensor channel. Electrochemical sensors may take longer in cold or humid conditions.
  • Accept the calibration. The instrument adjusts its internal coefficients to match the certified gas concentration.
  • Remove the calibration gas. Verify the reading returns to zero in clean air. A reading that does not return to zero after gas removal may indicate sensor contamination or a failing sensor.
  • Record the calibration results: instrument serial number, sensor type, calibration gas concentration, cylinder lot number, date, technician name, and pass/fail status. Retain this record according to your site’s document control requirements.

Calibration Gas: What You Need to Know

Calibration gas quality directly determines calibration accuracy. A gas detector can only be as accurate as the calibration gas used to set it.

Certified Reference Mixtures

Calibration gases should be certified reference mixtures (CRMs) with a traceable concentration accuracy of ±2% or better, certified against national standards such as NIST (National Institute of Standards and Technology) in the United States.

The cylinder should come with a certificate of analysis (COA) showing the certified concentration, the expiry date, and the traceability chain.

Never use calibration gas from an expired cylinder. The gas mixture stability cannot be guaranteed beyond the certified shelf life.

Common Calibration Gas Mixtures

Multi-gas detectors require a calibration gas blend that contains all the target gases in a single cylinder. A typical four-gas monitor calibration mixture might contain.

  • Methane (CH4) at 50% LEL (approximately 2.5% by volume in air).
  • Oxygen (O2) at 18% by volume (to challenge both the oxygen sensor and, in some instruments, the catalytic bead sensor).
  • Carbon monoxide (CO) at 100 ppm.
  • Hydrogen sulfide (H2S) at 25 ppm.

The balance gas (the remainder of the cylinder contents) matters. Nitrogen-balanced calibration gas is appropriate for instruments used in oxygen-deficient environments.

Air-balanced calibration gas is more common for general industrial use and is required for catalytic bead LEL sensors, which need oxygen present to oxidize the combustible gas on the bead.

Cross-Gas Calibration

When it is not practical to calibrate with the actual target gas, for example, when the target gas is highly toxic or difficult to handle safely, some instruments can be calibrated using a surrogate gas and a correction factor.

This is called cross-gas calibration or relative response calibration. The instrument manufacturer provides conversion factors for each sensor and surrogate gas combination.

Cross-gas calibration introduces additional uncertainty and should be used only when direct calibration is not feasible.

How Often Should You Calibrate a Gas Detector?

There is no single universal answer, but there are several authoritative sources of guidance that most safety professionals follow.

Manufacturer Recommendations

Most portable gas detector manufacturers recommend full calibration every 3 to 6 months under normal use conditions, combined with a bump test before each use.

Always consult your specific instrument’s manual. Some sensors, such as photoionization detector (PID) lamps used for VOC monitoring, may require more frequent calibration due to lamp aging and contamination.

Regulatory Requirements

Regulations vary by jurisdiction and industry. In the United States, OSHA does not prescribe specific calibration intervals for gas detectors in most standards, but does require that equipment be maintained in a safe operating condition. However, specific industry standards and consensus standards do set calibration requirements.

  • ANSI/ISA-92.00.01 (Performance Requirements for Gas Detection Instruments) provides technical standards for fixed gas detection equipment.
  • The International Safety Equipment Association (ISEA) published the “Agreement on Gas Detector Bump Testing and Calibration,” which recommends bump testing before each use and calibration at intervals not exceeding the manufacturer’s recommendation or 6 months, whichever is shorter.
  • In regulated industries such as offshore oil and gas, mining, and utilities, company HSE management systems and third-party audit requirements often specify calibration intervals of 3 months or less.
???? Practical Rule of Thumb

Bump test before every use. Calibrate every 3–6 months, or immediately after any event that may have compromised sensor accuracy: high-concentration gas exposure, sensor replacement, instrument repair, or any instance where the detector failed a bump test.

Factors That Affect Calibration Frequency

A fixed interval schedule is a minimum baseline. Several real-world factors should prompt more frequent calibration.

Sensor Type

Electrochemical sensors for toxic gases (CO, H2S, SO2, NH3, Cl2, etc.) typically have working lifespans of 2–3 years and drift gradually over that period.

Catalytic bead (pellistor) sensors for combustible gases are more susceptible to rapid drift from poisoning events.

Infrared (IR) sensors for CO2 and hydrocarbons are more stable and may support longer calibration intervals, but still require regular verification.

Environmental Exposure

Instruments used in harsh environments, such as high temperature, high humidity, corrosive atmospheres, or high-concentration gas exposure events, drift faster than instruments used in mild conditions.

A detector used in a petrochemical plant where H2S concentrations routinely approach alarm thresholds needs more frequent calibration than one used for occasional confined space entry in a municipal utility.

Storage Conditions

Electrochemical sensors can degrade during storage if exposed to temperature extremes or if the sensor dries out.

Instruments that have been stored for extended periods should be calibrated before use, regardless of when the last calibration was performed.

Failed Bump Tests

If a bump test shows the sensor is not responding correctly, either no response, delayed response, or failure to alarm at the correct concentration, the instrument must be removed from service and either calibrated or repaired before it is used again. A failed bump test is a strong indicator that more frequent calibration is warranted.

Regulatory Requirements for Gas Detector Calibration

Navigating the regulatory landscape around gas detector calibration requires understanding which regulations apply to your industry and jurisdiction. Here is a practical overview for safety professionals working in common regulated sectors.

SectorApplicable Standard / AuthorityKey Calibration Requirement
Regular inspection and calibration per the manufacturerOSHA 29 CFR 1910Equipment in safe operating condition; follow manufacturer specs
Construction (US)OSHA 29 CFR 1926Confined space and hazardous atmosphere requirements
Oil & Gas (Offshore US)BSEE / API RP 505Regular inspection and calibration per manufacturer
Mining (US)MSHA 30 CFRSpecific methane detector calibration requirements for underground coal
European UnionATEX Directive / EN 60079-29Calibration per manufacturer; documented maintenance records
InternationalIEC 60079-29-2Installation, testing, and maintenance of flammable gas detectors

Beyond regulatory minimums, many industries operate under management system standards (ISO 45001, OSHA’s Voluntary Protection Programs) and client-mandated HSE requirements that specify calibration intervals more precisely than the underlying regulations. Always review your site’s safety management system documentation alongside applicable regulations.

Common Calibration Mistakes to Avoid

Calibration errors are more common than most safety programs acknowledge. Here are the mistakes that most frequently undermine calibration quality.

Using Expired Calibration Gas

Calibration gas cylinders have a certified shelf life, typically 12–36 months, depending on the gas mixture and cylinder type.

After the expiry date, the certified concentration can no longer be guaranteed; reactive gases may have degraded, and the balance gas composition may have shifted.

Using expired calibration gas means you are adjusting the instrument to an unknown reference, which defeats the entire purpose of calibration.

Wrong Flow Rate

Applying calibration gas at too low a flow rate starves the sensor and produces a falsely low reading, causing the instrument to over-correct.

Too high a flow rate can also affect some sensor types. Always use the demand-flow regulator and calibration fixtures specified by the instrument manufacturer, and verify that the flow rate matches the calibration procedure requirements.

Calibrating in a Contaminated Environment

Zero calibration performed in an atmosphere that contains trace concentrations of target gas will produce a falsely elevated baseline.

This is a particular risk when calibrating instruments in areas near chemical storage, fuel dispensing, or process areas.

Always perform zero calibration in fresh, clean air, either outdoors upwind of any potential contamination or using a certified zero-air cylinder.

Skipping the Zero Step

Span calibration alone, without a prior zero calibration, can produce a misleadingly accurate-looking result while the actual response curve remains offset. Both steps are required for a valid full calibration.

Ignoring Sensor Warm-Up Time

Electrochemical sensors require time to reach thermal and electrochemical equilibrium after powering on.

Calibrating immediately after startup, before the sensor has stabilized, produces unreliable results.

Follow the manufacturer’s specified warm-up time, which is typically at least 30 seconds but may be several minutes for some sensor types.

No Documentation

An undocumented calibration cannot be verified, audited, or used to identify drift trends over time.

Without records, you cannot demonstrate compliance to regulators, insurers, or incident investigators. Every calibration must be documented.

Calibration Records and Documentation

Good calibration records serve multiple purposes: they demonstrate regulatory compliance, they create a maintenance history that can identify sensor degradation trends, and they provide evidence of due diligence in the event of an incident investigation.

At a minimum, each calibration record should capture.

  • Instrument manufacturer, model, and serial number.
  • Date and time of calibration.
  • Name and qualification of the technician performing calibration.
  • Sensor type and gas being monitored for each channel.
  • Calibration gas mixture composition, certified concentration, cylinder lot number, and expiry date.
  • Pre-calibration readings (as-found values) for each sensor channel.
  • Post-calibration readings (as-left values) for each sensor channel.
  • Calibration pass/fail status for each channel.
  • Any corrective actions taken (sensor replacement, instrument quarantine, etc.),

Many safety-critical industries now use calibration management software or instrument docking stations that generate electronic records automatically.

These systems eliminate transcription errors and make it easy to retrieve calibration history for specific instruments during audits or incident reviews.

Retain calibration records for the period required by applicable regulations and your site’s document retention policy.

In many jurisdictions, safety equipment records should be retained for a minimum of 3–5 years, though some regulations (particularly in mining and offshore sectors) may require longer retention periods.

Frequently Asked Questions About Gas Detector Calibration

Can I calibrate a gas detector myself, or does it require a specialist?

Most portable gas detectors are designed to be calibrated in the field by trained technicians without specialist equipment beyond the calibration gas cylinder, regulator, and calibration accessories.

The key requirements are proper training on the procedure, use of the correct calibration gas, and accurate documentation.

For fixed gas detection systems with multiple channels and safety system integration, calibration may require a qualified instrumentation technician and adherence to a formal maintenance procedure.

What happens if I skip calibration?

If calibration is skipped, sensor drift goes uncorrected. The detector may still appear to function normally; it will power on, run self-diagnostics, and produce readings, but those readings may be meaningfully inaccurate.

An instrument that reads 40 ppm CO when the actual concentration is 60 ppm will not alarm at the correct threshold, potentially exposing workers to hazardous concentrations without warning.

Beyond the safety risk, using uncalibrated instruments can constitute a regulatory violation and may affect insurance coverage and liability in the event of an incident.

Does bump testing replace calibration?

No. A bump test confirms that the sensor responds to gas and that the alarm activates, but it does not verify reading accuracy.

A sensor can pass a bump test, detecting gas and alarming, while its span sensitivity has drifted enough that the reading is significantly inaccurate.

Bump testing and calibration serve complementary but distinct functions in a gas detector maintenance program.

How do I know when a sensor needs to be replaced rather than calibrated?

Most instrument manufacturers specify sensor replacement intervals (typically 2–3 years for electrochemical sensors, though this varies by sensor type and environmental conditions).

Indicators that a sensor may need replacement rather than calibration include: repeated calibration failures; a very large offset between the as-found reading and the calibration gas concentration (sometimes called a high calibration coefficient); slow or absent response during a bump test; and response time that exceeds the manufacturer’s specification.

When a sensor consistently fails to calibrate within acceptable limits, replacement is the appropriate corrective action.

What is the difference between calibration and certification?

Calibration is the technical process of adjusting a detector’s sensor response to match a known reference. Certification (or calibration certification) refers to the documentation, the calibration certificate, or record that attests that calibration was performed correctly on a specific instrument on a specific date using traceable calibration gas. The certificate is the documentary evidence; the calibration is the physical process it documents.

Conclusion

Calibration is not a bureaucratic checkbox. It is the technical foundation of gas detection reliability. Every alarm threshold, every confined space entry decision, and every permit-to-work that relies on a gas detector reading depends on calibration being performed correctly and consistently.

The key principles to carry forward from this guide.

  • Calibration adjusts a gas detector’s sensor response to match a certified known concentration of gas, correcting for sensor drift over time.
  • Bump testing confirms the sensor responds to gas; calibration verifies and corrects the accuracy of that response. Both are necessary; neither replaces the other.
  • Use certified reference gas mixtures with a traceable concentration certificate, and never use expired cylinders.
  • Calibrate at the interval specified by the manufacturer, typically every 3–6 months, and bump test before every use.
  • Document every calibration with instrument serial number, technician name, calibration gas lot number, as-found and as-left readings, and the calibration date.
  • Environmental severity, sensor type, and any calibration failure event are all reasons to calibrate more frequently than the minimum recommended interval.

A gas detector that is regularly calibrated and bump tested is an instrument you can trust. One that is not is simply an object that looks like a safety instrument while offering none of the protection.

Honeywell BW Solo Single Gas Detector Review

If you’re searching for a reliable, low-maintenance single gas detector for your team, the Honeywell BW Solo keeps coming up, and for good reason. In this hands-on review, we break down everything you need to know before you buy.

What Is the Honeywell BW Solo?

The Honeywell BW Solo is a next-generation portable single gas detector designed for workers operating in hazardous environments where toxic or oxygen-deficient atmospheres may be present.

Manufactured by Honeywell Analytics, one of the most trusted names in gas and flame detection, the BW Solo is engineered to be the easiest-to-service single-gas detector on the market.

Unlike older gas detectors that require tools and technical expertise to service, the BW Solo is built around a philosophy of simplicity, reliability, and low total cost of ownership.

Whether you’re working in oil and gas, petrochemicals, confined spaces, wastewater treatment, or general industrial environments, this detector is designed to keep up with you.

The device is compact, lightweight, and can be worn on a shirt collar or vest clip throughout a full workday without fatigue.

But what sets it apart from the crowd goes much deeper than form factor; it’s the combination of sensor flexibility, wireless connectivity, intelligent compliance signaling, and ecosystem integration that makes the BW Solo a standout product.

BW Solo Model Variants

Honeywell offers the BW Solo in three main configurations, allowing buyers to match the unit to their specific operational needs and budget.

BW Solo Standard

The baseline model includes data logging, IntelliFlash compliance indicators, and full serviceability. It communicates with Honeywell’s IntelliDoX docking station via direct connection for data download and instrument configuration. This is the workhorse version for teams that already use a docking station-based workflow.

BW Solo Wireless

The wireless version adds Bluetooth Low Energy (BLE) connectivity, allowing the detector to pair with a smartphone running Honeywell’s Safety Communicator app.

Gas readings are transmitted in real time to Honeywell’s cloud-based Safety Suite platform, providing supervisors with remote visibility into worker safety status and location.

This is the recommended version for teams that want live monitoring without relying solely on a fixed docking infrastructure.

BW Solo Lite

A simplified, cost-effective entry point. The Solo Lite retains the same robust sensor options and IP68 protection but removes data logging and Bluetooth functionality.

This makes it a great option for smaller operations that want dependable detection without the added cost of connectivity features.

Note: As of this writing, the original BW Solo Standard has been discontinued by Honeywell. The BW Solo Wireless is now the primary serviceable model available, with the BW Solo Lite serving budget-conscious buyers and only available in some regions.

Key Features

One-Button Operation

The BW Solo is designed to be operated with a single button, even while wearing heavy work gloves.

Power on, navigate readings, and access TWA/STEL values all from one control point. Language selection is prompted on first power-on and supports English, French, Spanish, German, Italian, Russian, Japanese, Chinese, Korean, and Portuguese.

Field-Swappable Sensors

One of the BW Solo’s most valuable engineering decisions is the ability to swap sensors in the field without tools. Simply pop off the front cover to replace the sensor or filter.

Battery replacement requires only a single Phillips-head screw. This dramatically reduces downtime and eliminates the need to send units back to a service center for routine maintenance.

Sensor Options

The BW Solo supports detection of 14 different gases, covering both common industrial hazards and more exotic chemical exposures.

This sensor flexibility means a single detector platform can serve multiple departments or applications within the same facility.

Triple Alarm System

When a gas event is detected, the BW Solo triggers a simultaneous audible, visual, and vibrating alarm.

The audible alarm reaches 95 dB, loud enough to be heard over significant industrial background noise.

Alarm types include: Low, High, TWA (time-weighted average), STEL (short-term exposure limit), and non-compliance.

IntelliFlash™ Compliance Indicator

Honeywell’s patented IntelliFlash technology provides an instant visual compliance status check at a glance:

  • Flashing green = detector has been bump tested and is actively monitoring.
  • Flashing red = bump test is due, gas event detected, calibration needed, or battery low.

This feature is invaluable for safety supervisors who need to quickly visually confirm that workers’ detectors are in compliance without stopping workflow.

IP66/68 Ingress Protection

The BW Solo is rated IP66/68, meaning it is protected against powerful water jets and can be submerged to 1.2 meters for up to 45 minutes.

This level of protection makes it suitable for outdoor use in rain, high-humidity environments, or areas with frequent wash-downs.

Data Logging

The standard and wireless models log data for six months at 5-second intervals, providing a comprehensive record of gas exposure events that supports regulatory compliance reporting and incident investigation.

Technical Specifications

SpecificationDetail
Dimensions2.7 × 2.6 × 1.4 in (7.0 × 6.7 × 3.6 cm)
Weight103–116 g (3.6–4.1 oz), depending on sensor
Ingress ProtectionIP66/68 (1.2 m for 45 min)
Operating Temperature-40°C to +60°C (-40°F to +140°F)
Humidity Range0%–95% RH (non-condensing)
Battery LifeUp to 12 months (6 months for 1-Series O2 sensor)
Alarm Sound Level95 dB
Alarm TypesAudible, Visual, Vibrating; Low, High, TWA, STEL, non-compliance
Wireless TechnologyBluetooth Low Energy (BLE) — Wireless model only
Data Logging6 months at 5-second intervals
Self-TestSensor integrity, circuitry, battery, audible/visual on activation; battery continuous
Hazardous Area RatingClass I, Division 1, Groups A, B, C, D, T4
Warranty3 years for 1-Series sensors and detectors (excl. battery); 2 years for 4-Series; 1 year for select sensors

Supported Gases

The Honeywell BW Solo can be configured to detect any one of the following 14 gases.

GasSymbolMeasurement Range
Hydrogen SulfideH₂S0–200 ppm
Carbon MonoxideCO0–2,000 ppm
OxygenO₂0–30% vol
ChlorineCl₂0–50 ppm
Chlorine DioxideClO₂0–1 ppm
Ethylene OxideETO0–100 ppm
HydrogenH₂0–1,000 ppm
Hydrogen CyanideHCN0–100 ppm
AmmoniaNH₃0–1,000 ppm
Nitric OxideNO0–250 ppm
Nitrogen DioxideNO₂0–100 ppm
OzoneO₃0–1 ppm
PhosphinePH₃0–5 ppm
Sulfur DioxideSO₂0–100 ppm

The BW Solo also supports CO₂ detection (0–50,000 ppm) in a dedicated model variant using the 1-Series sensor platform.

From a professional standpoint, coverage of gases like HCN, PH₃, ETO, and ClO₂, which are typically considered “exotic” hazards, is a significant advantage that many competing single-gas detectors at this price point don’t offer.

IntelliFlash and Compliance Monitoring

One of the BW Solo’s most underappreciated features is how it fundamentally changes the compliance management workflow on a job site.

In traditional gas monitoring programs, a safety officer has to physically check each detector or rely on paper records to confirm that bump tests and calibrations are current. With IntelliFlash enabled, compliance status is visible in real time, passively, just by observing the unit clipped to a worker’s lapel.

You can configure.

  • Calibration and bump test reminder intervals
  • Latching alarms (alarm remains active until manually acknowledged)
  • High and low alarm setpoints
  • Worker and location assignment tags
  • TWA/STEL reset options

These configurations can be done via the IntelliDoX docking station or through Honeywell’s SafetySuite Device Configurator software.

IntelliDoX and Safety Suite Integration

For teams managing multiple detectors across a fleet, the IntelliDoX docking station is a game-changer.

Simply place the BW Solo into an IntelliDoX dock, and it will automatically.

  • Perform a bump test
  • Update firmware
  • Transfer alarm and peak reading data to connected software
  • Recalibrate if configured to do so

Each IntelliDoX module has its own LCD screen, keypad, and pump for independent operation, but modules can share power and calibration gas supply when daisy-chained.

Data flows to a connected PC via Ethernet or USB, where Honeywell’s Safety Suite platform aggregates records, automates regulatory reporting, and flags non-compliant units.

For wireless model users, detector data can also be pushed directly to SafetySuite via BLE — no dock required, making it a strong option for remote or distributed worksites where a docked infrastructure isn’t practical.

The wireless BW Solo also pairs with the Safety Communicator mobile app, which sends real-time gas readings to Honeywell Safety Suite Real Time, a cloud platform that gives supervisors remote visibility into worker status and location from any internet-connected device.

Serviceability and Maintenance

This is where the BW Solo genuinely earns its reputation.

Most single-gas detectors are designed as sealed units. When a sensor fails or a battery dies, the unit either goes back to the factory or gets replaced entirely. The BW Solo takes the opposite approach:

  • Sensor filter replacement: Pop off the front door, no screwdriver needed
  • Sensor replacement: Field-swappable, no disassembly required
  • Battery replacement: Single Phillips-head screw removal

The 1-Series sensor (used for CO, H₂S, O₂, and CO₂) is Honeywell’s premium sensor platform, engineered for high accuracy, fast response time, and reliable performance across temperature extremes from -40°C to +60°C. It also tolerates transient pressure, humidity, and other environmental stresses that would degrade lesser sensors.

The typical battery life of up to 12 months means most users will only change batteries once per year, a significant operational advantage compared to rechargeable units that must be managed daily.

Total cost of ownership for the BW Solo is genuinely lower than most competitors in this class when you factor in reduced service labor, longer sensor and battery life, and fleet management automation through IntelliDoX.

Pros and Cons

✅ Pros

  • Outstanding serviceability sensors, filters, and battery, all user-replaceable without tools (or with just one screw).
  • Up to 12 months of battery life reduces operational overhead significantly.
  • IP66/68 rated tough enough for outdoor and wet industrial environments.
  • 14 gas options, including exotic hazards, most competitors don’t cover.
  • IntelliFlash makes real-time compliance status visible at a glance.
  • BLE wireless model enables remote monitoring via smartphone and cloud platform.
  • IntelliDoX compatibility automates bump testing, calibration, and fleet management.
  • Wide operating temperature range (-40°C to +60°C) handles extreme environments.
  • Three-year warranty on 1-Series sensors and detectors.
  • Single-button operation works even with gloved hands.
  • Multi-language support, including Spanish ideal for Latin American operations.

❌ Cons

  • Single-gas detection is not suitable as a standalone solution where multi-gas monitoring is required by regulation or site safety plans.
  • BLE wireless is model-specific. The Lite version does not include Bluetooth.
  • IntelliDoX is a separate purchase; the full fleet management benefits require investment in docking infrastructure.
  • Standard model discontinued buyers are now pushed toward the Wireless version, which carries a higher price point
  • CO₂ sensor battery life drops to only 2 months, which is a significant limitation for facilities monitoring carbon dioxide.

Who Should Buy the Honeywell BW Solo?

The BW Solo is an excellent fit for.

Industrial safety managers overseeing teams in oil and gas, petrochemicals, mining, utilities, or confined space entry, particularly those who want to reduce maintenance costs and automate compliance documentation.

Safety officers in facilities where a single primary hazard exists, such as H₂S in oil and gas, CO in boiler rooms, O₂ deficiency in confined spaces, or Cl₂ in water treatment. The sensor swap capability means one SKU can serve multiple environments.

Operations running 14+ detectors who want to leverage IntelliDoX for automated fleet management and eliminate manual logbooks.

International operations that need multi-language support, robust environmental ratings, and a well-established supply chain for calibration gas and accessories.

Budget-conscious buyers who value total cost of ownership, the long battery life, replaceable sensors, and automated compliance tools make the BW Solo less expensive to run over time than many cheaper alternatives.

It is not the right tool if.

  • Your site requires simultaneous detection of multiple gases (consider a multi-gas unit like the BW Clip4 or BW Ultra instead).
  • You need a CO₂-primary detector with long battery life (the CO₂ variant’s 2-month battery is a real limitation).
  • Your operation has no bump testing or calibration infrastructure and is not willing to invest in it.

Final Verdict

The Honeywell BW Solo is one of the best-engineered single gas detectors on the market in its class.

It earns that distinction not through one exceptional feature but through a consistently thoughtful approach to every aspect of real-world industrial use: serviceability, compliance management, sensor accuracy, environmental durability, and fleet scalability.

For any safety program that takes personal gas monitoring seriously, and most regulatory frameworks require that you do so, the BW Solo offers a compelling combination of reliability and low maintenance burden that will be felt in both your safety records and your maintenance budget.

SafeguardSense Rating: 4.7 / 5

If you’re building or upgrading a gas monitoring program, the BW Solo Wireless is the version to specify.

Add IntelliDoX docking stations as your fleet grows, and you’ll have a compliance-ready gas detection infrastructure that practically manages itself.

Frequently Asked Questions

What gases can the Honeywell BW Solo detect?

The BW Solo supports 14 gas types: H₂S, CO, O₂, Cl₂, ClO₂, ETO, H₂, HCN, NH₃, NO, NO₂, O₃, PH₃, and SO₂. A dedicated CO₂ variant is also available.

Is the Honeywell BW Solo waterproof?

Yes. It carries an IP66/68 rating, meaning it is protected against strong water jets and can withstand submersion to 1.2 meters for up to 45 minutes.

How long does the BW Solo battery last?

Up to 12 months for most sensor configurations (6 months for the 1-Series O₂ sensor, and 2 months for the CO₂ variant). Battery replacement requires removing a single screw.

Can I replace the sensor myself?

Yes. The BW Solo is designed for field serviceability. Sensor and filter replacement requires no tools, just removing the front door cover.

Does the BW Solo have Bluetooth?

Yes, the Wireless model includes Bluetooth Low Energy (BLE). The Standard and Lite versions do not.

The wireless model pairs with Honeywell’s Safety Communicator app and Safety Suite Real Time cloud platform.

What is IntelliFlash?

IntelliFlash is Honeywell’s patented compliance indicator. A flashing green LED means the detector complies (bump tested and actively monitoring); a flashing red LED signals a non-compliance condition, such as a missed bump test, gas alarm, or low battery.

What is the warranty on the BW Solo?

Three years for 1-Series detectors and sensors (excluding battery); two years for 4-Series units; one year for NH₃, Cl₂, O₃, ETO, ClO₂, HCl, and HF sensors.

Can the BW Solo be used for confined space entry?

Yes. It is widely used for confined space entry monitoring, particularly in H₂S, CO, and O₂ configurations.

However, confined space regulations in many jurisdictions require multi-gas detection; verify your local regulatory requirements before specifying a single-gas unit for confined space entry alone.

What is the difference between the BW Solo and the BW Solo Lite?

The Lite version removes data logging and Bluetooth connectivity for a lower price point. It retains the same sensor options, IP68 protection, IntelliFlash indicator, and triple alarm system.

What Is a Bump Test in Gas Detection?

If you work in an environment where gas hazards are a real risk, your gas detector is only as reliable as your last verification.

That’s where the bump test comes in, and understanding it could make the difference between a detector that saves your life and one that fails silently.

What Is a Bump Test?

A bump test (also called a functional test or challenge test) is a quick, qualitative check performed on a portable gas detector to confirm that its sensors respond to gas and that its alarms activate correctly.

During a bump test, you briefly expose the detector to a known concentration of target gas, typically a calibration gas mixture in a small cylinder, and confirm that.

  • The sensor reads a gas concentration above zero.
  • The alarm (audible, visual, or vibration) triggers as expected.

Crucially, a bump test does not verify that the reading is accurate to a specific value. It simply confirms the detector is alive and responding. Think of it as a go/no-go check, not a precision measurement.

Bump Test vs. Calibration: What’s the Difference?

This is one of the most common points of confusion in gas detection, so it’s worth addressing directly.

Adjust the sensor to read accuratelyFull Calibration
PurposeConfirm sensor response and alarm functionAdjust sensor to read accurately
Time required30–60 secondsSeveral minutes
ResultPass/failCorrected sensor output
Adjusts the sensor?NoYes
FrequencyBefore each use (recommended)Per manufacturer schedule or as needed

A bump test tells you the detector works. Calibration tells you the detector reads correctly. You need both, but they serve different purposes in your maintenance program.

Why Are Bump Tests Important?

Gas detectors are electrochemical or catalytic instruments. Over time, sensors can degrade, become poisoned by contaminants, or simply fail without any visible warning to the user.

Here’s what a bump test protects against.

Sensor poisoning

Certain chemicals, silicones, heavy metals, and chlorinated compounds can coat a catalytic bead or electrochemical cell and suppress its response.

A detector that has been exposed to these agents may display a zero reading even in a hazardous atmosphere.

Sensor end-of-life failure

Sensors don’t last forever. Electrochemical oxygen sensors, for example, typically last 1–3 years. When they fail, they can do so silently. A bump test catches this before the detector enters service.

Blocked or clogged inlet

Dust, paint, or debris can physically block the gas inlet port. Without exposing the sensor to gas, you’d never know.

Electronics or alarm failure

A bump test exercises the alarm circuit, confirming the buzzer, LED, and/or vibrator actually function. A dead alarm battery or a failed buzzer is a critical hidden defect.

In short, a gas detector that doesn’t alarm is worse than no detector at all, because it gives the worker a false sense of security.

How to Perform a Bump Test: Step-by-Step

The exact procedure varies slightly by instrument and manufacturer, but the general process is consistent across most portable multi-gas detectors (such as Industrial Scientific, Honeywell, BW Technologies, or MSA units).

What You’ll Need

  • Your gas detector (fully charged).
  • An appropriate calibration gas cylinder containing the target gas(es) at a known concentration above the alarm setpoint
  • A regulator (demand-flow or fixed-flow, as required by your instrument)
  • A bump test cap or tubing to direct gas to the sensor inlet

Step-by-Step Procedure

Step 1: Verify the calibration gas

Check the cylinder label. Confirm it contains the correct gas(es) at the correct concentration, and that the cylinder is within its expiration date.

Step 2: Power on the detector

Allow the instrument to complete its self-diagnostic startup sequence. Confirm there are no pre-existing fault codes.

Step 3: Connect the gas

Attach the regulator and tubing or bump cap to the sensor inlet port. Do not apply gas yet.

Step 4: Apply the calibration gas

Open the cylinder valve and allow gas to flow to the sensor. For demand-flow regulators, place the cap firmly on the inlet to allow flow.

Step 5: Observe the response

Within a few seconds (typically 5–30 seconds depending on the gas and sensor type), the reading should rise, and the alarm should activate. Most instruments require the reading to exceed the low alarm setpoint.

Step 6: Remove gas and confirm sensor recovery

Close the cylinder valve and allow fresh air to flush the sensor. The reading should return to baseline (zero or ambient oxygen level).

Step 7: Record and document

Log the bump test result pass or fail along with the date, time, and instrument serial number. Many modern docking stations do this automatically.

What Gases Are Typically Used in Bump Tests?

The gas mixture used should contain the same gases your detector is configured to detect, at concentrations that will trigger the alarm. Common mixtures include.

  • 4-gas mix: LEL combustibles (typically methane or pentane), oxygen (O₂), carbon monoxide (CO), and hydrogen sulfide (H₂S)
  • Single-gas cylinders for detectors configured for specific hazards (e.g., ammonia, chlorine, SO₂)
  • Specialty mixes for confined space entry in petrochemical, wastewater, or mining environments

The concentration in the cylinder is usually chosen to be above the low alarm setpoint but well below dangerous levels, for example, 50% LEL methane, 18% O₂, 50 ppm CO, and 25 ppm H₂S is a very common 4-gas standard.

How Often Should You Bump Test?

This is where industry guidance and regulatory standards sometimes diverge.

Industry best practice and most manufacturer recommendations: Bump test before every single use.

This is the position of organizations like the Industrial Scientific Corporation, Honeywell Analytics, and most gas detection manufacturers.

Some regulatory frameworks allow for less frequent functional testing if.

  • The instrument has a documented calibration history showing consistent accuracy.
  • Environmental conditions are stable and low-risk.
  • The organization has a written gas detection program that justifies the reduced frequency.

However, for high-hazard environments confined space entry, oil and gas, mining, and wastewater, a pre-use bump test is the only defensible standard.

The cost of a bump test (a few seconds and a fraction of a cent worth of calibration gas) is trivially small compared to the consequences of a failed detector.

Automated Bump Testing: Docking Stations

Many modern gas detection programs use automated docking stations to perform bump tests and calibrations with minimal manual intervention.

When you dock your instrument at the end of a shift or at the start of the day, the station.

  1. Reads the instrument’s sensor data and history.
  2. Applies calibration gas and verifies sensor response.
  3. Performs a full calibration if the bump test result falls outside tolerance.
  4. Charges the battery.
  5. Generates a compliance report.

Popular systems include the iNet platform from Industrial Scientific, Safety Suite 2.0 from Honeywell/BW Technologies, and Galaxy GX2 from MSA.

Docking stations are particularly valuable for large fleets where manual testing of every unit every day is impractical, and where compliance documentation is required for regulatory or insurance purposes.

Bump Testing and Regulatory Compliance

Depending on your industry and jurisdiction, bump testing requirements may be embedded in.

  • OSHA standards (e.g., 29 CFR 1910.146 for confined space entry in the US)
  • ATEX/IECEx documentation requirements in Europe
  • NFPA codes relevant to your facility type
  • Manufacturer instructions, which are typically incorporated by reference into regulatory requirements

Regardless of the specific regulation, maintaining a documented bump test log is essential for demonstrating due diligence. In the event of an incident, the absence of bump test records is a significant liability exposure.

Common Bump Test Mistakes to Avoid

Using expired calibration gas

Calibration gas cylinders have a shelf life, typically 12–36 months, depending on the mixture and cylinder type. Reactive gases like H₂S degrade faster. Always check the expiration date.

Using the wrong gas concentration

If the cylinder concentration is below your alarm setpoint, the detector won’t alarm, and you may incorrectly record a fail or worse, incorrectly assume a pass if you’re not watching carefully.

Not allowing enough exposure time

Some sensors, particularly electrochemical sensors for H₂S, SO₂, or chlorine, respond more slowly than LEL catalytic bead sensors. Allow adequate exposure time per the manufacturer’s guidelines.

Skipping the recovery check

Always confirm the sensor returns to baseline after removing the gas. A sensor stuck at an elevated reading or one that drops to zero suspiciously fast may indicate a sensor problem.

Not documenting results

A bump test that isn’t recorded might as well not have happened from a compliance standpoint.

When a Bump Test Fails: What to Do

If a detector fails a bump test, meaning it doesn’t respond to gas, doesn’t alarm, or doesn’t recover to baseline, remove it from service immediately.

Next steps typically include.

  1. Perform a fresh full calibration and repeat the bump test.
  2. If it still fails after calibration, inspect for physical damage, sensor poisoning, or a blocked inlet.
  3. Replace the sensor if indicated.
  4. Contact the manufacturer or authorized service center if the cause is unclear.
  5. Document the failure and resolution in your maintenance log.

Never return a failed instrument to service without confirming the issue has been resolved, and a successful bump test has been completed.

Key Takeaways

  • A bump test is a quick, qualitative verification that a gas detector’s sensors and alarms are functioning.
  • It is not the same as calibration; it doesn’t correct sensor readings.
  • Bump tests should ideally be performed before every use in high-hazard environments.
  • The test requires a calibration gas cylinder with a concentration above the alarm setpoint.
  • Document every test pass or fail for compliance and liability protection.
  • Automated docking stations can simplify bump testing at scale.
  • A detector that fails a bump test must be removed from service until resolved.

Final Thoughts

In industrial safety, the instruments we rely on are only useful if they actually work. A bump test is your daily handshake with your gas detector, a simple, fast confirmation that it’s ready to protect you.

If you’re building or reviewing a gas detection program, make the pre-use bump test non-negotiable. The procedure takes under a minute. The consequences of skipping it can be permanent.

Multi-Gas Monitors: Which Sensors Do You Actually Need?

If you’ve ever stood in front of a gas detection catalog trying to figure out which sensors your multi-gas monitor actually needs, you’re not alone.

The options can feel overwhelming: LEL, PID, H2S, CO, SO₂, NH₃, O₂, and the wrong choice can mean either a false sense of security or an unnecessary equipment bill.

The truth is, there is no universal sensor combination that fits every job. The right configuration depends on your industry, your specific work environment, and the hazards that are realistically present.

Get it right, and a multi-gas detector is one of the most powerful tools in your safety program. Get it wrong, and you could be walking into a dangerous atmosphere with blind spots you don’t even know about.

This guide cuts through the confusion. We’ll explain what multi-gas monitors are, how the most common sensor types work, and most importantly, how to decide which sensors you actually need for your specific situation.

What Is a Multi-Gas Monitor?

A multi-gas monitor (also called a multi-gas detector) is a portable or fixed instrument that simultaneously measures the concentration of two or more hazardous gases in the atmosphere.

Unlike single-gas detectors, which are dedicated to one specific target gas, a multi-gas monitor gives you a real-time snapshot of multiple atmospheric hazards at the same time.

Most industrial multi-gas monitors come in a 4-gas configuration as the baseline standard. That classic 4-gas combination, LEL, O₂, H2S, and CO, was designed around the most common hazards found in confined spaces, refineries, and general industrial work.

But modern instruments can carry five, six, or even more sensors, and many are field-upgradeable, meaning you can add sensors as your job requirements change.

Understanding what each sensor detects and why is the first step toward building the right configuration for your team.

The Core Four: The Standard Starting Point

LEL Sensor (Lower Explosive Limit): Combustible Gas

What it detects

Flammable gases and vapors, including methane, propane, hydrogen, butane, and many others.

How it works

Most LEL sensors use catalytic bead (pellistor) technology. A target gas oxidizes on a heated bead, generating a temperature change that corresponds to gas concentration.

The reading is expressed as a percentage of the Lower Explosive Limit, the minimum concentration at which a gas can ignite.

A reading of 100% LEL means the atmosphere has reached ignition territory. Most monitors are set to alarm at 10% LEL (warning) and 25% LEL (danger).

When you need it

Almost always. Any environment where flammable gases or vapors may be present, such as oil and gas, chemical processing, utilities, wastewater, confined spaces, and storage tanks, requires LEL monitoring.

Key limitations

Catalytic bead LEL sensors can be poisoned by silicones and high concentrations of halogenated compounds (like certain refrigerants).

In environments where poisoning is a risk, some instruments use infrared (IR) LEL sensors instead, which are immune to poisoning but generally cost more.

Pro tip

If you’re working in an environment with a high concentration of a known gas like methane on a pipeline inspection make sure your LEL sensor is calibrated to that specific gas. Correction factors matter when accuracy is critical.

How to detect methane

O₂ Sensor (Oxygen): Oxygen Deficiency and Enrichment

What it detects

Atmospheric oxygen concentration. Normal air is 20.9% O₂.

How it works

Electrochemical cell technology. Oxygen diffuses through a membrane and reacts with an electrode, generating a current proportional to concentration. Alarms are typically set at 19.5% O₂ (deficiency) and 23.5% O₂ (enrichment).

When you need it

Every time you enter or work in a confined space, full stop. Oxygen deficiency is one of the leading causes of confined space fatalities.

Oxygen can be displaced by inert gases (nitrogen purging), consumed by biological processes (decomposition in sewers), or absorbed by rusting metal. Oxygen enrichment, too much O₂, dramatically increases the risk of fire and explosion.

Key limitations

O₂ sensors have a finite lifespan (typically 2 years) and are sensitive to temperature and humidity extremes.

They also consume themselves over time through normal use. Keep track of sensor age and replace them on schedule.

H2S Sensor (Hydrogen Sulfide): Toxic Gas

What it detects

Hydrogen sulfide is a colorless, highly toxic gas with a characteristic rotten egg odor at low concentrations.

At high concentrations, H2S paralyzes the olfactory nerve, meaning you lose your sense of smell precisely when concentrations are most dangerous.

How it works

Electrochemical sensor. H2S reacts at an electrode, generating a current proportional to concentration.

Alarms are typically set at 10 ppm (warning) and 15 ppm (danger), per NIOSH and OSHA guidelines. The IDLH (Immediately Dangerous to Life and Health) is 50 ppm.

When you need it

Oil and gas exploration and production, refineries, wastewater and sewage treatment, paper and pulp mills, agricultural manure handling, landfills, and any confined space where organic matter may be decomposing.

H2S is one of the most common industrial killers if there’s any chance of it being present, there’s no good reason not to monitor for it.

Key limitations

H2S sensors can be cross-sensitive to other gases, including SO₂. High concentrations can temporarily saturate or damage the sensor. After an exceedance event, allow the sensor to recover fully before trusting its readings again.

CO Sensor (Carbon Monoxide): Toxic Gas

What it detects

Carbon monoxide, an odorless, colorless gas produced by incomplete combustion. CO is often called the “silent killer” because it gives no sensory warning.

How it works

Electrochemical sensor. CO is oxidized at the sensing electrode, generating a measurable current. Alarm levels are commonly set at 25 ppm (TWA), 35 ppm (STEL), and 200 ppm (danger).

When you need it

Any environment where combustion equipment operates, such as generators, engines, compressors, furnaces, and boilers.

CO is especially dangerous in enclosed or semi-enclosed areas where exhaust can accumulate. It is also produced during certain chemical processes and fires.

Key limitations

CO sensors can cross-react with hydrogen (H₂). In environments where hydrogen is present, such as battery charging rooms and some chemical plants, you may see falsely elevated CO readings. Some manufacturers offer CO sensors with H₂ compensation to address this.

Is a 4-gas monitor a necessity?

Beyond the Core Four: When You Need More

The 4-gas combo handles many industrial situations well, but it won’t catch everything. Here are the additional sensors to consider based on your specific hazard profile.

PID Sensor (Photoionization Detector): Volatile Organic Compounds (VOCs)

What it detects

A broad range of volatile organic compounds (VOCs), including benzene, toluene, xylene, styrene, and hundreds of other chemical vapors.

PID sensors are expressed in parts per million (ppm) and are extremely sensitive, capable of detecting VOCs at sub-ppm levels.

How it works

A UV lamp ionizes gas molecules. Ionized molecules generate a current proportional to concentration.

Different lamps (10.6 eV is most common; 9.8 eV and 11.7 eV are also used) ionize different ranges of compounds.

When you need it

Chemical plants, refineries, hazmat response, industrial hygiene surveys, remediation sites, laboratories, and any environment where exposure to organic solvents or hydrocarbons is a concern.

If your LEL sensor tells you there’s something combustible in the air, but you need to know what it is and at what level workers are being chemically exposed, a PID is the right tool.

Key limitations

PIDs cannot detect methane (the ionization energy is too high). They are also affected by humidity; high moisture can decrease sensitivity.

The lamp requires periodic cleaning and replacement. PIDs are not gas-specific; they give a total VOC reading unless the instrument is programmed with correction factors for specific gases.

SO₂ Sensor (Sulfur Dioxide): Toxic Gas

What it detects

Sulfur dioxide is a sharp-smelling, toxic gas produced by burning sulfur-containing fuels and during certain industrial chemical processes.

When you need it

Refineries (especially near sulfur recovery units), pulp and paper mills, power plants burning sulfur-rich coal or oil, smelters, and chemical plants. SO₂ is also present wherever H2S is combusted, including flares and thermal oxidizers.

Alarm levels

NIOSH REL is 0.5 ppm (ceiling). OSHA PEL is 5 ppm (8-hour TWA). IDLH is 100 ppm.

NH₃ Sensor (Ammonia): Toxic Gas

What it detects

Ammonia is a pungent, corrosive gas used widely as a refrigerant and in agricultural and chemical applications.

When you need it

Cold storage facilities and food processing plants using ammonia refrigeration, fertilizer production and storage, wastewater treatment (ammonia is a byproduct of biological decomposition), and chemical manufacturing.

Alarm levels

NIOSH REL is 25 ppm (TWA) and 35 ppm (STEL). IDLH is 300 ppm.

Key note

Ammonia refrigeration leak scenarios can escalate rapidly. In facilities where NH₃ refrigeration is the primary system, fixed detection supplemented by portable multi-gas monitors with NH₃ sensors is standard best practice.

Cl₂ Sensor (Chlorine): Toxic Gas

What it detects

Chlorine gas is a highly toxic yellow-green gas used in water treatment, chemical manufacturing, and paper production.

When you need it

Water and wastewater treatment plants, chemical plants, pulp mills, and any facility that stores or handles chlorine gas or hypochlorite compounds that can off-gas chlorine.

Alarm levels

NIOSH REL ceiling is 0.5 ppm. IDLH is 10 ppm. Even low concentrations cause significant respiratory irritation and damage.

HCN Sensor (Hydrogen Cyanide): Toxic Gas

What it detects

Hydrogen cyanide is an extremely toxic gas produced during the combustion of nitrogen-containing materials such as plastics, wool, and nylon.

When you need it

Firefighting and fire investigation, chemical manufacturing, electroplating and metal finishing, and fumigation operations. HCN is a particular concern in structural fires involving modern synthetic materials.

Alarm levels

NIOSH REL is 4.7 ppm (ceiling). IDLH is 50 ppm.

NO₂ Sensor (Nitrogen Dioxide): Toxic Gas

What it detects

Nitrogen dioxide, a reddish-brown toxic gas produced during combustion at high temperatures, particularly from diesel engines.

When you need it

Tunneling and underground construction, mines, enclosed parking structures, and any confined or semi-enclosed environment where diesel-powered equipment operates. NO₂ is also generated during welding operations.

Alarm levels

NIOSH REL is 1 ppm (ceiling). IDLH is 20 ppm.

How to Choose the Right Sensor Configuration

Here is a practical framework to determine which sensors belong in your multi-gas monitor.

Step 1: Define Your Environment

Ask these questions:

  • Is it a confined space entry (permit-required or non-permit)?
  • What processes occur in or near this space?
  • What materials, chemicals, or fuels are stored, used, or produced nearby?
  • What type of equipment operates in the area (diesel, gas, electric)?
  • What has historical monitoring or incident data shown?

Step 2: Identify Hazards from Safety Data Sheets (SDS)

Review the SDS for every chemical and substance present in the work area. The SDS lists the physical and chemical properties, including flammability limits, vapor pressure, and exposure limits.

This tells you which gases could realistically be present and at what concentrations they become dangerous.

Step 3: Consult Regulatory Requirements

OSHA, NIOSH, and industry-specific standards (NFPA, API, ATEX) may mandate specific monitoring for certain industries and processes. Confined space entry under OSHA 29 CFR 1910.146 requires monitoring for oxygen, flammable gases, and toxic air contaminants. Know your regulatory baseline before making equipment decisions.

Step 4: Consider the Sensor Combination Practically

Work EnvironmentRecommended Sensor Combination
General confined space entryLEL + O₂ + H2S + CO
Oil and gas upstreamLEL + O₂ + H2S + CO + PID (optional)
Refinery / downstreamLEL + O₂ + H2S + CO + SO₂
Wastewater / sewageLEL + O₂ + H2S + CO + NH₃
Chemical plant (VOC processes)LEL + O₂ + CO + PID
Ammonia refrigerationLEL + O₂ + CO + NH₃
Tunneling / underground constructionLEL + O₂ + CO + NO₂
Fire investigation / hazmatLEL + O₂ + CO + HCN + PID
Water treatmentLEL + O₂ + CO + Cl₂

Step 5: Don’t Over-Configure

More sensors are not always better. Each additional sensor adds weight, cost, battery drain, maintenance requirements, and potential for nuisance alarms.

If a gas is genuinely not present in your environment, adding its sensor creates complexity without improving safety.

A well-chosen 4-gas configuration that workers trust and maintain properly is safer in practice than a 7-gas instrument that generates alarms nobody understands.

Sensor Maintenance: The Factor Most People Overlook

Owning the right sensors is only half the equation. Sensors that aren’t maintained correctly are as dangerous as having no sensors at all.

Bump testing

Before every use, perform a bump test by briefly exposing the sensor to a known concentration of target gas and confirm it responds and alarms.

This is different from calibration. A bump test confirms the sensor is working. Calibration confirms it is measuring accurately.

Calibration

Calibrate your instrument with certified calibration gas at the frequency recommended by the manufacturer, typically every 30 to 180 days, depending on the sensor type and use conditions. Never skip calibration on O₂ sensors or toxic gas sensors used for confined space entry.

Sensor replacement

Every sensor has a rated lifespan. Electrochemical sensors (O₂, CO, H2S) typically last 2–3 years. Catalytic bead LEL sensors can last 3–5 years under normal conditions.

PID lamps need periodic replacement. Track sensor age and follow manufacturer replacement schedules.

Environmental effects

Extreme heat, cold, and humidity all affect sensor accuracy and lifespan. Store instruments in appropriate conditions, and allow them to acclimate to the work environment before use in temperature extremes.

Common Mistakes to Avoid

Relying on the “standard” 4-gas without evaluating the actual hazards

The 4-gas combination is a starting point, not a universal solution. If SO₂ is present at your site and you’re only running LEL/O₂/H2S/CO, you have a real gap.

Skipping bump tests because “it worked yesterday

Sensors can fail overnight. Temperature swings, humidity, accidental exposure to sensor-damaging compounds, any of these can render a sensor inactive without any visible sign of malfunction. Bump test every shift.

Confusing LEL and PID readings

An LEL sensor at 0% doesn’t mean there are no VOCs present. LEL sensors have detection thresholds. A PID can detect VOCs at concentrations orders of magnitude below what an LEL sensor can register.

Ignoring cross-sensitivity

Many sensors respond to gases other than their target gas. Know your instrument’s cross-sensitivity table and factor it into your interpretation of readings, especially in complex chemical environments.

Not training workers on alarm response

A monitor is only useful if the person wearing it knows what to do when it alarms. Alarm response procedures should be written, trained, and drilled, not improvised in the moment.

Final Thoughts

A multi-gas monitor is one of the most important tools in an industrial safety professional’s kit, but it only protects people when it’s properly configured for the actual hazards present.

The 4-gas standard LEL, O₂, H2S, and CO covers a wide range of common scenarios and is the right foundation for most industrial applications.

From there, the specific gases you add should be driven by a clear-eyed assessment of your environment, your processes, your materials, and your regulatory requirements.

Take the time to do that assessment properly. Review your SDS documentation. Talk to your industrial hygienist.

Consult the manufacturer’s application guides. And once you’ve chosen your sensor configuration, build the maintenance and calibration discipline to back it up.

The right multi-gas monitor, properly configured and properly maintained, is one of the most effective ways to protect the people doing the work that keeps industry running.

Frequently Asked Questions

What is the standard sensor configuration for a multi-gas monitor?

The standard baseline is a 4-gas configuration: LEL (combustible gas), O₂ (oxygen), H2S (hydrogen sulfide), and CO (carbon monoxide).

This combination addresses the most common hazards in confined space entry and general industrial work.

Do I need a PID sensor in my multi-gas monitor?


You need a PID sensor if you work in environments where exposure to volatile organic compounds (VOCs) is a concern, such as chemical plants, refineries, remediation sites, or laboratories.

A PID detects a broad range of organic vapors at very low concentrations that LEL sensors cannot register.

How often should I calibrate my multi-gas monitor?

Manufacturer recommendations vary, but most multi-gas monitors should be calibrated every 30 to 180 days, and bump tested before every use.

O₂ and toxic gas sensors used for confined space entry should never go into service without a current bump test.

Can one multi-gas monitor detect all gases?

No single instrument can detect every possible gas hazard. Multi-gas monitors are configured for specific gases based on the expected hazards.

Choosing sensors based on a thorough hazard assessment of your work environment is essential.

What is the difference between bump testing and calibration?

A bump test confirms the sensor responds to gas and alarms properly. Calibration verifies that the sensor is measuring concentration accurately against a known standard gas. Both are necessary bump tests before every use, and calibrations on a scheduled cycle.

Written by a certified industrial safety engineer with hands-on experience in gas and flame detection systems.

How to Calibrate a Gas Detector: Best Practices

Gas detectors are only as reliable as their last calibration. Whether you’re protecting workers in a confined space, monitoring a boiler room for carbon monoxide, or overseeing a petrochemical facility, a miscalibrated detector can either fail to warn you of a real hazard or trigger costly false alarms that erode trust in the system. Either outcome puts lives and operations at risk.

This guide walks through exactly how to calibrate a gas detector, what equipment you need, how often calibration should happen, and the best practices that safety professionals and OSHA guidelines recommend.

If you’ve already selected your detector but aren’t sure how to keep it accurate, you’re in the right place.

See our guide to choosing the right gas detector for your environment.

What Is Gas Detector Calibration And Why Does It Matter?

Calibration is the process of exposing a gas detector to a known concentration of gas and adjusting the instrument’s response to accurately reflect that concentration.

In simple terms: you tell the detector what it should be reading, and you correct it if it’s off.

Over time, sensors drift. Temperature swings, humidity, physical shock, exposure to high gas concentrations, and ordinary aging all degrade sensor accuracy.

A detector that was perfectly calibrated six months ago may now read 40 ppm when the actual concentration is 60 ppm, a dangerous underreport for a toxic gas like hydrogen sulfide (H₂S).

Environmental factors, exposure to certain gases, and normal wear and tear can all affect a detector’s accuracy without any visible warning signs on the device itself.

The stakes are significant. Improperly calibrated detectors contribute to a meaningful percentage of preventable workplace exposure incidents each year.

A gas detector that under-reports hazardous levels can fail to trigger alarms, creating life-threatening conditions, while one that over-reports causes unnecessary evacuations and breeds complacency over time.

Bump Test vs. Calibration: Understanding the Difference

Before diving into the calibration procedure, it’s important to understand that bump testing and calibration are two distinct processes, and both are necessary.

Bump Test

A bump test is a brief functional check. You expose the detector to a known concentration of gas for a short period (typically 15–20 seconds) to confirm that the sensors respond and the alarms activate.

It answers one question: Is this detector working? It does not confirm whether the readings are accurate.

Calibration

A full calibration is a quantitative process that adjusts the sensor’s output to match a certified, known concentration.

It answers a different question: Is this detector accurate? A calibration corrects for sensor drift, the gradual degradation of sensor performance that can cause readings to diverge from actual gas concentrations over time.

A useful analogy: a bump test is like tapping a car’s speedometer to see if the needle moves. Calibration is like driving a measured mile to confirm the needle is reading the correct speed.

Both are required

A passed bump test does not replace calibration, and a recently calibrated detector should still be bump-tested before each day’s use in high-risk environments.

Types of Calibration: Zero and Span

A full gas detector calibration involves two distinct steps, commonly called zero calibration and span calibration. Together, they form what’s known as a two-point calibration.

Zero Calibration

Zero calibration establishes a clean baseline. The detector is exposed to zero gas, typically pure nitrogen or clean ambient air that contains no target gas, and the instrument is adjusted to read zero. This ensures the detector isn’t registering a concentration when none is present.

Important

Perform zero calibration in a truly clean-air environment, away from exhaust fumes, chemical vapors, or any source of the target gas.

Zeroing in contaminated air introduces an error that propagates through every subsequent reading.

Span Calibration

Span calibration uses a certified calibration gas at a known concentration to set the upper accuracy point.

The standard approach is to apply a gas concentration that falls in the 40–60% range of the sensor’s full detection range.

For example, a sensor with a 0–100 ppm detection range would typically use a 40–60 ppm calibration gas.

This two-point approach (zero + span) corrects the sensor’s accuracy across its entire detection range, since most gas sensors produce a linear output.

What You Need Before You Start

Gather the following before beginning any calibration procedure:

The detector’s manufacturer’s manual

Calibration procedures vary by model; always follow model-specific instructions.

Certified calibration gas

Must match the target gas(es) your detector monitors and must be NIST-traceable with an unexpired certification date.

Appropriate regulator

Match the flow rate to your detector type (fixed-flow regulators at 0.5–1.0 L/min for diffusion-based units; demand-flow regulators for pump-equipped units).

Calibration cap or tubing

To deliver gas directly to the sensor inlet.

A clean-air environment

Well-ventilated, free of the target gas and interfering vapors.

Calibration log or docking station

For documentation.

Critical note on calibration gas

Always use the specific gas blend and concentration recommended by your detector’s manufacturer.

Using the wrong gas, an impure blend, or an expired cylinder can produce calibration errors that are worse than no calibration at all.

Check the expiration date on every cylinder before use. Reactive gases including H₂S degrade in cylinders over time and cannot be assumed to be at labeled concentration past their certified date.

How to Calibrate a Gas Detector: Step-by-Step

The following procedure covers the standard approach for portable gas detectors. Fixed detectors follow similar principles but may require a certified technician and have additional site-specific steps.

Step 1: Pre-Calibration Inspection

Before exposing your detector to calibration gas, inspect the unit.

  • Check battery level, as a low battery can affect sensor readings and cause calibration errors.
  • Inspect the sensor inlet for debris, dust, or contamination and clean as needed.
  • Confirm the detector is powering on correctly and displaying a stable reading in clean air.
  • Note that the ambient temperature and humidity calibration should ideally be performed in conditions similar to the actual operating environment, since sensor sensitivity can vary with temperature and humidity.

Step 2: Allow the Detector to Warm Up

Power on the detector and allow it to warm up fully in clean air before beginning calibration. Most portable units require 30–60 seconds, but some electrochemical sensors require longer warm-up periods. Refer to the manufacturer’s manual for the recommended warm-up time.

Step 3: Perform Zero Calibration

With the detector running in a clean-air environment (or connected to a certified zero gas cylinder):

  1. Enter the detector’s calibration mode as described in the manufacturer’s manual
  2. Initiate the zero calibration function
  3. Wait for the reading to stabilize at zero
  4. Confirm and save the zero point

If using zero gas from a cylinder rather than ambient air, apply it at the manufacturer-specified flow rate and wait for the reading to stabilize before confirming.

Step 4: Connect the Calibration Gas

Attach the calibration cap to the detector’s sensor inlet. Connect the calibration gas cylinder through the appropriate regulator and verify that.

  • The gas concentration and blend match the detector’s requirements.
  • The cylinder has not expired.
  • The flow rate matches the manufacturer’s specification (typically 0.5–1.0 L/min for diffusion sensors).

Step 5: Perform Span Calibration

  1. Open the calibration gas flow and apply gas to the detector inlet.
  2. Enter span calibration mode (if not already active) and enter the known concentration value from the calibration gas certificate when prompted.
  3. Allow the sensor reading to stabilize. This typically takes 1–2 minutes, longer than a bump test
  4. Confirm and save the span calibration value.
  5. Close the gas flow.

Step 6: Verify and Post-Calibration Check

After saving calibration values, perform a verification step.

  • Confirm the zero reading returns to zero in clean air.
  • Re-expose the sensor to the calibration gas and verify it reads within the manufacturer’s acceptable tolerance (commonly ±5–10% of the true value).
  • Test alarms at the detector’s programmed alarm thresholds if the device allows.

If the detector fails to read within acceptable limits after calibration, remove it from service and contact the manufacturer or a certified calibration service provider.

Step 7: Document Everything

OSHA recommends developing standard procedures for gas detector calibration that include formal documentation. Record the following for every calibration.

  • Date and time of calibration.
  • Detector model and serial number.
  • Calibration gas used (gas type, concentration, lot number, expiration date).
  • Zero and span readings before and after calibration.
  • Pass/fail result.
  • Name of the technician performing calibration.
  • Next calibration due date.

Docking stations can automate this logging and generate audit-ready records, particularly valuable in regulated industries like confined space entry, petrochemicals, wastewater, and mining.

How Often Should You Calibrate a Gas Detector?

There is no single universal answer, but the following framework covers most situations.

ProcedureRecommended Frequency
Bump testBefore each day’s use (daily minimum)
Full calibrationAt minimum every 6 months; monthly recommended as a baseline
After any of the trigger events belowImmediately

Calibrate immediately (regardless of schedule) after any of the following:

  • A failed bump test.
  • Exposure to very high gas concentrations or sensor-poisoning substances (silicones, phosphates, lead).
  • Physical impact or drop.
  • Extended storage.
  • Extreme temperature or humidity exposure.
  • Sensor replacement.
  • Erratic, slow, or inconsistent readings.
  • Any safety incident or near-miss involving gas hazards.

Many manufacturers, including industry leaders like mPower, recommend calibrating at intervals no longer than 6 months, with higher-frequency calibration for detectors used in particularly harsh or high-risk environments.

Higher-quality sensors with lower drift rates may tolerate longer calibration intervals, while lower-quality sensors may require more frequent correction.

Regulatory note

OSHA does not prescribe a specific calibration frequency by regulation, but its Safety and Health Information Bulletin (SHIB) emphasizes verifying detector accuracy before each day’s use and recommends employers develop and document standard calibration procedures.

MSHA, ATEX, and many industry-specific standards may impose additional requirements depending on your sector.

Common Gas Detector Calibration Mistakes to Avoid

Even experienced technicians run into preventable errors. Watch out for these.

Using expired calibration gas

Reactive gases, especially H₂S, degrade inside cylinders over time. An expired cylinder may contain a lower concentration than labeled, which will cause the detector to be calibrated incorrectly.

Zeroing in on contaminated air

If background levels of the target gas are present in your “clean air” environment, the zero baseline will be offset, introducing error into all subsequent readings.

Using the wrong regulator

Fixed-flow and demand-flow regulators are not interchangeable. A mismatched regulator delivers gas at the wrong flow rate, preventing proper sensor response during calibration.

Skipping the warm-up period

Sensors that haven’t stabilized can produce variable readings during calibration, resulting in an inaccurate span value.

Not documenting calibrations

Regulators and insurers may require calibration records during incident investigations or audits. Undocumented calibrations offer no legal or operational protection.

Repeating DIY calibration after two failures

If a detector fails calibration twice, it should be sent to a certified professional or manufacturer service center rather than attempting repeated field adjustments.

Fixed vs. Portable Gas Detectors: Calibration Differences

The calibration principles above apply to both portable and fixed detectors, but there are some important practical differences.

Portable detectors are typically calibrated by the user or a site safety officer using a portable calibration kit. Because they move between environments and are handled frequently, they are more susceptible to physical damage and contamination, making regular bump testing and calibration especially important.

Fixed gas detection systems are permanently installed and may be harder to access for manual calibration and gas delivery. Many fixed systems use automated calibration gas delivery through tubing connected to cylinders, or support remote calibration initiated from a control panel. Fixed systems often require a certified technician for calibration and may have stricter documentation requirements under site safety management systems.

Learn more about fixed vs. portable gas detection systems

When to Use a Professional Calibration Service

While bump testing and routine calibration can be performed in-house by trained personnel, there are situations where a professional calibration service is the right call:

  • The detector has failed calibration multiple times.
  • The sensor is aging or out of specification and may need replacement.
  • Your regulatory environment requires third-party calibration records (e.g., for ATEX or certain MSHA certifications).
  • You lack access to the correct calibration gas or equipment.
  • The detector has been involved in a safety incident, and its integrity needs independent verification.

Professional calibration services return the detector with a formal certificate of calibration, which can be essential for compliance audits and incident investigations.

Calibration Best Practices Summary

To keep your gas detection program on track, follow these core best practices:

  • Always read the manufacturer’s manual, calibration procedures, gas types, flow rates, and tolerance limits vary by model.
  • Bump test before every day’s use in any environment where gas hazards exist.
  • Calibrate fully at least every 6 months at a minimum, or more frequently in demanding environments.
  • Use only NIST-traceable, unexpired calibration gas that matches your detector’s target gases.
  • Zero the detector in genuinely clean air remote from exhaust, chemicals, or any source of the target gas.
  • Use the correct regulator and flow rate for your detector type.
  • Allow the sensor to stabilize before confirming calibration values.
  • Document every calibration with date, gas lot, technician, and result.
  • Remove from service immediately any detector that fails calibration or bump test.

Final Thoughts

A gas detector that isn’t properly calibrated isn’t a safety device; it’s a false sense of security. Calibration is not a bureaucratic checkbox; it is the process that connects your detector’s electronic readings to real-world gas concentrations and, ultimately, to real-world safety outcomes.

By following a consistent calibration schedule, using the right equipment, and keeping thorough records, you give your gas detection system the foundation it needs to protect the people who depend on it.

Have questions about calibrating a specific type of detector? Leave a comment below or contact us. We’re happy to help.

Fixed vs. Portable Gas Detection Systems: How to Choose the Right Solution for Your Facility

When a gas leak goes undetected, the consequences can be catastrophic explosions, mass poisonings, or fatalities.

The question of which gas detection system to deploy isn’t a minor operational detail. It is a life-safety decision with real legal, financial, and human consequences.

Two primary categories of gas detection technology dominate industrial and commercial facilities worldwide: fixed gas detection systems and portable gas detectors.

Both serve the same overarching goal, identifying hazardous gas concentrations before they reach dangerous levels, but they differ fundamentally in how, where, and when they do the job.

This guide breaks down fixed vs. portable gas detection systems in depth: how each works, what each does well, where each falls short, and most importantly, how to determine which solution is right for your specific application.

What Is a Fixed Gas Detection System?

A fixed gas detection system consists of permanently installed sensors, wired or wirelessly connected to a central control panel, that continuously monitor one or more locations for specific gases or vapor concentrations.

Fixed systems are the backbone of gas detection in refineries, chemical plants, offshore platforms, power generation facilities, wastewater treatment plants, and any site where hazardous gases are routinely present or produced as part of normal operations.

How Fixed Systems Work

Each fixed detector contains a sensing element, a catalytic bead, an electrochemical cell, an infrared optical cell, or a photoionization detector, depending on the target gas housed in an explosion-proof or weather-resistant enclosure mounted at a strategic location.

The detector outputs a continuous 4–20 mA signal (or digital protocol such as HART or Modbus) proportional to gas concentration.

This signal feeds into a gas detection controller or safety PLC, which.

  • Displays real-time concentration readings in parts per million (ppm) or percent Lower Explosive Limit (%LEL).
  • Triggers audible and visual alarms at pre-set threshold levels (typically alarm 1 at 10–20% LEL and alarm 2 at 40–60% LEL for flammable gases).
  • Activates automated responses such as ventilation fans, emergency shutdowns (ESD), or valve closures.
  • Logs data for regulatory compliance and post-incident analysis.

Fixed systems can monitor dozens or hundreds of points from a single control room, giving safety personnel and operators a real-time map of atmospheric conditions across the entire facility.

Strengths of Fixed Gas Detection Systems

Continuous, 24/7 monitoring

Fixed systems never sleep, take breaks, or forget to switch on. A gas build-up at 2 a.m. on a Sunday will trigger the same alarm as one during peak operating hours.

Integrated safety responses

Fixed systems can be interlocked with process control and emergency shutdown systems. When a sensor trips an alarm, the system can automatically shut down equipment, open relief valves, or activate ventilation without waiting for a human to react.

No dependence on human compliance

Portable detectors only protect a worker if the worker is wearing one, has charged the battery, and has calibrated it recently. A fixed system removes the human compliance variable from continuous area monitoring.

Regulatory compliance support

Many jurisdictions and industry standards, including OSHA, IEC 60079-29, and API RP 505, require fixed gas detection in classified hazardous areas where flammable or toxic gases are routinely handled.

Data logging and trend analysis

Fixed systems connected to SCADA or DCS platforms provide a historical record of gas concentrations, enabling engineers to identify process drift, recurring leak events, or sensor degradation over time.

Limitations of Fixed Gas Detection Systems

Coverage gaps

Fixed sensors only detect gas at their installed location. A leak that develops in a confined space, a rarely accessed area, or a location not covered by an installed sensor may go undetected.

High installation cost

Wiring, conduit, cable trays, intrinsically safe barriers, junction boxes, and control panel integration make fixed system installation expensive, especially in hazardous-area-classified zones where all electrical components must be certified Ex equipment.

Inflexibility

If a process changes, a new piece of equipment is installed, or operations shift to a different area, the fixed sensors may no longer cover the right locations.

Relocating fixed sensors requires new wiring runs and potentially new hazardous area classifications.

Maintenance access

Fixed sensors require periodic bump testing and calibration, often in locations that are difficult to access at height, inside process enclosures, or in classified areas requiring hot work permits.

What Is a Portable Gas Detector?

A portable gas detector is a handheld or body-worn instrument that measures gas concentrations in real time and alerts the user through audible, visual, and sometimes vibrating alarms when concentrations exceed preset limits.

Portable detectors range from single-gas instruments designed to monitor one specific hazard, such as hydrogen sulfide (H₂S) or carbon monoxide (CO), to multi-gas monitors capable of simultaneously measuring four or more gases, typically oxygen (O₂), combustible gases (%LEL), H₂S, and CO as a standard combination.

How Portable Detectors Work

Most portable detectors use the same sensing technologies as fixed systems: electrochemical sensors for toxic gases, catalytic bead sensors for flammable gases, and photoionization detectors (PIDs) for volatile organic compounds (VOCs).

The difference is packaging: the sensors, power source, alarm components, and display are integrated into a compact, ruggedized housing that a worker can carry or clip to a belt or lapel.

Workers activate the detector at the start of a shift, allow it to complete a warm-up cycle, and then enter a monitored area.

The detector provides continuous readings and alerts if concentrations rise above alarm setpoints.

Confined space entry scenarios often require sampling with a probe before a worker enters the detector is lowered or extended into the space to test the atmosphere before human entry, as required by OSHA 29 CFR 1910.146.

Strengths of Portable Gas Detectors

Mobility and flexibility

A portable detector goes where the worker goes. It monitors the specific breathing zone of the individual rather than a fixed point in space, providing the most relevant exposure information.

Essential for non-routine work

Maintenance, inspection, hot work, confined space entry, and emergency response all take place in locations or conditions not anticipated during facility design. Portable detectors are the only practical solution for these scenarios.

Lower upfront cost

A quality multi-gas portable detector typically costs a fraction of a fixed detection point with all associated wiring and installation.

For small facilities or infrequent hazard exposures, portables may be the most cost-effective solution.

Rapid deployment. Portable detectors can be issued, activated, and in use within minutes. No installation, no wiring, no engineering review.

Personal alarm

Because the detector is on the worker’s body, the alarm is immediate and personal; there is no delay waiting for a control room operator to see an alert and dispatch someone to investigate.

Limitations of Portable Gas Detectors

Dependent on human compliance

A portable detector only works if it is carried, activated, properly calibrated, and the battery is charged.

Compliance programs, bump-test records, and fleet management software are all necessary to ensure portables are actually providing protection.

No automated response capability

A portable detector can alert the wearer. It cannot automatically shut down a compressor, close an isolation valve, or activate emergency ventilation. Human action is always required.

Limited data continuity

Most portable detectors log data internally, but this data is often not integrated into facility safety systems in real time.

Wireless-enabled portables connected to fleet management platforms can partially address this, but require additional infrastructure.

Not suited for continuous area monitoring

Deploying portable detectors to continuously monitor a large area would require stationing workers permanently at each monitoring point not practical or cost-effective.

Sensor drift and battery dependency

Electrochemical sensors degrade over time and require regular calibration. A detector with a depleted battery or out-of-calibration sensor is worse than no detector at all; it may give a false sense of security.

Fixed vs. Portable Gas Detection Systems: Side-by-Side Comparison

FeatureFixed SystemPortable Detector
Monitoring continuity24/7, continuousActive during use only
Location coverageFixed pointsWorker’s breathing zone
Automated responseYes (ESD, ventilation)No
Installation costHighLow
FlexibilityLowHigh
Regulatory complianceRequired in many classified areasRequired for confined space entry
Dependency on complianceLowHigh
Data integrationReal-time SCADA/DCS integrationTypically post-shift download
Best forPermanent hazard zonesNon-routine work, mobility

When to Use Fixed Gas Detection

Fixed gas detection systems are the appropriate primary layer of protection when:

Hazardous gases are routinely present as part of normal operations

Any process that handles, stores, transfers, or produces flammable or toxic gases in significant quantities warrants continuous fixed monitoring.

Refineries, petrochemical plants, LNG terminals, ammonia refrigeration systems, and hydrogen production or storage facilities are examples where fixed detection is essential and usually mandated.

The hazardous area is classified

If your facility has formally classified hazardous areas under NEC Article 500–516 or IEC 60079-10 (Zone 0, 1, or 2; or Division 1 or 2), fixed gas detection is typically part of the area’s safety integrity requirement.

Automated safety responses are needed

When a gas release demands immediate process shutdown without waiting for a human decision, such as in unmanned compressor stations, offshore topside areas, or high-consequence chemical processes, fixed detection integrated with ESD systems is non-negotiable.

Regulatory or insurance requirements mandate it

Jurisdictions, including the European Union (ATEX directive), the UK (DSEAR), and various OSHA and EPA process safety standards, may require fixed detection based on inventory thresholds or process hazard analysis outcomes.

When to Use Portable Gas Detectors

Portable gas detectors are the appropriate tool when.

Workers enter confined spaces

OSHA’s confined space standard explicitly requires atmospheric testing before entry and continuous monitoring during occupancy in permit-required confined spaces. Portable multi-gas detectors are the standard tool for this purpose.

Maintenance and hot work is performed in normally non-hazardous areas

A mechanical seal replacement, a vessel opening, or a welding job in an area not covered by fixed detection requires a portable detector for the duration of the task.

Emergency responders enter an incident scene

Firefighters, hazmat teams, and emergency response personnel use portable detectors, including extended-range instruments and PIDs, for unknown atmosphere characterization as their primary monitoring tool when fixed infrastructure may be compromised or absent.

Survey or leak detection work is performed

Portable detectors, particularly flame ionization detectors (FIDs) and PIDs, are used to survey pipelines, process equipment, and connections for fugitive emissions as part of leak detection and repair (LDAR) programs.

The workforce is mobile, and hazards are location-variable

In construction, utilities, environmental remediation, and similar industries where the hazard location changes day to day, portable detectors are the practical standard.

The Case for Using Both: A Layered Approach

The most effective gas detection strategy in any facility with significant hazard potential is a layered approach that uses fixed and portable systems in complementary roles not one or the other.

Think of fixed detection as your facility’s immune system: always running, covering the known hazard zones, capable of automated response, integrated into your safety architecture.

Think of portable detection as your workers’ personal shield: protecting individuals in the specific locations they occupy, covering scenarios and areas the fixed system was not designed to address.

A practical layered strategy looks like this:

Layer 1

Fixed detection covers all classified hazardous areas, high-consequence process areas, and locations identified in the process hazard analysis (PHA) as requiring continuous monitoring. Fixed detectors are integrated with alarms, ventilation, and ESD systems.

Layer 2

Portable detection is issued to all workers entering hazardous areas, required for all confined space entries, mandatory for any non-routine work (maintenance, inspection, hot work), and used for LDAR survey work.

Layer 3

Wireless-enabled portables with fleet management (for larger organizations) provide real-time visibility into worker location, gas exposure history, and detector status, bridging the gap between portable protection and centralized monitoring.

This layered approach is consistent with guidance from the ISA (International Society of Automation), the Energy Institute’s Model Code of Safe Practice, and site-specific requirements under OSHA PSM (Process Safety Management) for highly hazardous chemicals.

Key Factors in Your Selection Decision

When evaluating which solution or what combination is right for your facility, consider these factors.

Nature of the hazard

What gases are present? At what concentrations? Under what conditions? Flammable gas in a continuously operating compressor station demands fixed detection. Potential oxygen deficiency during vessel entry demands a portable multi-gas detector.

Frequency and type of occupancy

Is the hazardous area continuously occupied, periodically occupied, or entered only for non-routine tasks? Continuous occupancy and critical processes favor fixed systems. Infrequent, task-based entry favors portables.

Regulatory requirements

Review OSHA standards (29 CFR 1910.146 for confined spaces; 29 CFR 1910.119 for PSM), applicable NEC/IEC hazardous area classifications, and any industry-specific standards (API, NFPA, ISA).

Budget and lifecycle cost

Fixed systems have higher upfront costs but lower per-measurement lifecycle costs in high-frequency monitoring applications.

Portables have lower upfront costs but require ongoing calibration, battery management, and eventual sensor and instrument replacement.

Integration requirements

If your safety architecture requires real-time, automated response capability, a fixed system or wireless-networked portable fleet with real-time connectivity is necessary. A standalone portable detector cannot provide this.

Maintenance capability

Fixed sensors in hard-to-reach or classified locations require structured maintenance programs. Portable detectors require daily bump testing, periodic calibration, and battery management. Assess your maintenance team’s capability to support each system type before committing.

Frequently Asked Questions

Can portable detectors replace fixed gas detection systems?

In most industrial applications with classified hazardous areas or continuous process operations, no.

Portable detectors require a person to carry them to be effective and cannot initiate automated safety responses.

Fixed systems are typically required for continuous area monitoring in high-consequence environments and may be mandated by regulation.

Do I need both fixed and portable gas detectors?

In most facilities with significant gas hazards, yes. Fixed detection provides continuous area monitoring and automated response capability.

Portable detection protects individual workers during non-routine tasks, confined space entry, and maintenance activities in areas not covered by fixed sensors.

How often do gas detectors need to be calibrated?

Portable detectors should be bump-tested before each use and formally calibrated according to the manufacturer’s schedule (typically every 3–6 months, or as required by site policy).

Fixed sensors are typically calibrated on a 3–6 month cycle or when a sensor trip or drift is suspected. Calibration intervals should be documented and traceable for regulatory compliance.

What is the difference between a bump test and a calibration?

A bump test exposes the detector to a known concentration of test gas to verify that the sensor responds and that the alarm triggers.

It does not adjust the sensor’s output. A full calibration uses certified test gas at a known concentration to adjust the instrument’s response to a verified reference point. Bump tests are for daily verification; calibration corrects sensor drift.

What gases should a multi-gas portable detector monitor?

The standard four-gas configuration monitors oxygen (O₂), combustible gases (%LEL), hydrogen sulfide (H₂S), and carbon monoxide (CO).

This combination addresses the most common hazards in general industrial settings. Specific applications may require additional sensors for gases such as ammonia, chlorine, SO₂, or VOCs, depending on the process.

Summary

Fixed gas detection systems and portable gas detectors serve distinct, complementary roles in a facility’s overall gas hazard management strategy.

Fixed systems provide the continuous, automated, integrated monitoring that classified hazardous areas and high-consequence processes require. They are the permanent backbone of facility-level gas safety.

Portable detectors protect individual workers where and when fixed coverage does not apply in confined spaces, during maintenance, in emergency response, and anywhere the hazard location is variable or non-routine.

The most robust gas safety programs deploy both, with clear protocols defining when each is required, how each is maintained, and how both layers integrate into the facility’s overall emergency response plan.

If you are evaluating or designing a gas detection strategy for your facility, the starting point is always a thorough hazard assessment identifying which gases are present, at what concentrations, in which locations, and under what operational conditions. From that foundation, the right combination of fixed and portable detection becomes clear.

SafeguardSense covers gas detection, flame detection, and industrial safety technology for engineers and safety professionals.

Browse our articles on detector selection, calibration best practices, and hazardous area classification to build out your safety knowledge base.

Which Smoke Detector is Right for You? An Extensive Comparison and Buying Guide

In today’s fast-paced world, ensuring the safety of our homes has never been more important. One of the most critical components of a robust home safety system is the smoke detector.

These devices serve as our first line of defense against fire, providing early warnings that can save lives and protect property. With myriad options on the market, choosing the right smoke detector can be daunting.

This article aims to simplify that process by offering a comprehensive comparison of the best smoke detectors currently available.

We’ll explore various models, highlighting their key features, pros, and cons, and providing real customer feedback to help you make an informed decision. 

Whether you’re looking for a basic model for a small apartment or a more advanced system for a large home, this guide will cover all the essential aspects you need to consider.

By the end of this article, you’ll have a clear understanding of what makes a smoke detector reliable and how to choose the best one for your specific needs. 

Let’s delve into the best smoke detectors and ensure your home is equipped with the best protection available.

What Are The Types of Smoke Detectors?

When it comes to safeguarding your home, understanding the different types of smoke detectors is essential.

Each type uses distinct technology to detect smoke and fire, and knowing the differences can help you choose the best one for your needs. Here’s a detailed look at ionization, photoelectric, and combination smoke detectors.

Ionization Smoke Detectors

Ionization smoke detectors are highly effective at detecting fast-flaming fires. They work by using a small amount of radioactive material placed between two electrically charged plates, which ionizes the air and creates a current between the plates.

When smoke enters the chamber, it disrupts the flow of ions, reducing the current and triggering the alarm.

These detectors are particularly sensitive to the smaller particles produced by fast-burning fires, such as those caused by paper or flammable liquids. However, they are prone to false alarms from everyday activities like cooking or steam from showers.

Pros

  • Quick detection of fast-flaming fires
  • Generally less expensive than photoelectric detectors
  • Widely available and easy to install

Cons

  • More prone to false alarms from non-fire sources
  • Less effective at detecting smoldering fires

Photoelectric Smoke Detectors

Photoelectric smoke detectors are designed to detect smoldering fires more effectively. These fires typically produce larger smoke particles, which photoelectric detectors are particularly sensitive to.

The device uses a light source and a light sensor placed at an angle in a sensing chamber. When smoke enters the chamber, it scatters the light, which then hits the sensor and triggers the alarm.

This technology makes photoelectric detectors less likely to give false alarms from cooking or steam.

Pros

  • Quick detection of smoldering fires
  • Less prone to false alarms from cooking or steam
  • Effective at detecting larger smoke particles

Cons

  • Generally, more expensive than ionization detectors
  • Might not detect fast-flaming fires as quickly

Combination Smoke Detectors

Combination smoke detectors, as the name suggests, use both ionization and photoelectric technologies to offer comprehensive protection.

By incorporating the strengths of both types, combination detectors can effectively detect both fast-flaming and smoldering fires.

These detectors are designed to reduce the number of false alarms while providing a broader range of fire detection capabilities.

They are ideal for homeowners who want the best of both worlds without having to install multiple units.

Pros

  • Comprehensive protection against both fast-flaming and smoldering fires
  • Reduced the number of false alarms
  • Convenient and cost-effective solution

Cons

  • More expensive than single-technology detectors
  • May require more maintenance due to the dual-sensing technology

Each type of smoke detector has its strengths and weaknesses, and the best choice for your home depends on your specific needs and circumstances.

Ionization detectors are great for detecting fast-flaming fires, while photoelectric detectors excel at catching smoldering fires.

Combination detectors provide the most comprehensive protection, though they come at a higher price point.

By understanding how each type works and its respective advantages, you can make an informed decision to ensure your home is well-protected against fire hazards.

Key Features to Consider When Selecting The Best Smoke Detector

When selecting a smoke detector, understanding its key features can make a significant difference in ensuring the safety of your home.

Here, we delve into four critical aspects: sensitivity, response time, battery life, and the false alarm rate.

These elements are essential in evaluating the overall effectiveness and reliability of a smoke detector.

Sensitivity

The sensitivity of a smoke detector refers to its ability to detect smoke particles in the air. A highly sensitive smoke detector will quickly pick up on the presence of smoke, even if it is minimal.

This feature is crucial for early detection, giving occupants more time to evacuate and reducing the risk of damage and injury.

Sensitivity levels can vary between different types of smoke detectors. Ionization models are generally more sensitive to fast-flaming fires, while photoelectric detectors are better at detecting smoldering fires with larger smoke particles.

When choosing a smoke detector, consider the environment in which it will be installed. For areas like kitchens or bathrooms, where smoke and steam are common, a less sensitive model might be preferable to reduce false alarms.

Response Time

Response time is the duration it takes for a smoke detector to react and sound an alarm once smoke is detected.

This feature is paramount because a faster response can mean the difference between a contained fire and a catastrophic one.

Ionization smoke detectors tend to have quicker response times to flaming fires, while photoelectric detectors respond more rapidly to smoldering fires.

Combination detectors aim to balance these response times, providing quick alerts for both types of fires. A smoke detector’s response time is also influenced by its placement within a home.

For instance, installing detectors in strategic locations, such as near bedrooms and on every level of a house, can ensure that an alarm is heard promptly.

Battery Life

Battery life is a critical factor in the reliability of smoke detectors. Smoke detectors typically use either replaceable batteries or long-life sealed lithium batteries.

Units with replaceable batteries require regular maintenance to ensure they remain operational, usually every six months to a year.

Long-life sealed lithium batteries can last up to ten years, aligning with the typical lifespan of the smoke detector itself.

Hardwired smoke detectors often have battery backups to maintain functionality during power outages.

Regularly testing your smoke detectors and replacing batteries as recommended is essential for consistent performance.

Opting for a smoke detector with a long-lasting battery can reduce maintenance efforts and ensure continuous protection.

False Alarm Rate

The false alarm rate refers to how often a smoke detector sounds an alarm without a genuine fire hazard.

Frequent false alarms can be a significant inconvenience, leading to the temptation to disable the alarm, which poses a safety risk.

Factors such as cooking, steam from showers, or even dust can trigger false alarms in some detectors.

Photoelectric smoke detectors are generally less prone to false alarms caused by cooking and steam, while ionization detectors might be more susceptible.

Many modern smoke detectors include features like hush buttons or smart technology that allows temporary silencing of false alarms.

When selecting a smoke detector, it’s crucial to consider the environment and choose a model with a low false alarm rate to ensure that any alarm is taken seriously.

Which Smoke Detector is Right for You?

Smoke Detectors Reviews and Comparisons. In-depth reviews of top-rated smoke detectors.

X-Sense 10-Year Battery Smoke Alarm with LED Indicator & Silence Button, Model SD2J0AX – B08LL1HRKW

If you’re in the market for a reliable smoke detector, look no further than the X-Sense Smoke Alarm, SD2J0AX.

This nifty device is designed with your safety and convenience in mind. Let’s talk about why this should be at the top of your list.

First off, this smoke alarm comes with a 10-year battery. Yes, you heard that right, an entire decade of uninterrupted protection without the hassle of frequent battery changes.

Imagine the peace of mind knowing your home is protected even during power outages. It’s powered by an energy-efficient lithium battery, which not only ensures maximum reliability but is also eco-friendly.

What makes this smoke alarm stand out is its sensitivity and accuracy. It features an advanced photoelectric sensor and an intelligent ST chipset, which means it can quickly and accurately detect dangerous smoke levels from smoldering fires.

This ensures you get the earliest possible warning. Plus, it has a dust-proof isolating plate inside, which keeps the detection sensitivity intact, so you won’t have to worry about false alarms.

Speaking of false alarms, this smoke detector comes with a Smart Auto-Check feature. It constantly monitors itself, and if anything goes wrong, be it a malfunction or a low battery, you’ll be notified immediately. This way, you can quickly resolve any issues and ensure your home remains protected.

Installation is a breeze with this model. Whether you prefer using the provided screws for a stable setup or the magnetic adhesive pads for a quick, wireless installation, it’s up to you. No need to deal with complicated wiring, just set it up and you’re good to go.

Now, let’s talk about its build. The X-Sense Smoke Alarm is made from premium ABS plastic

Key Features

10-Year Battery

Sensitive & Accurate

Smart Auto-Check

Easy Installation

Premium Quality

Pros

  1. Easy installation
  2. 10-year battery life
  3. No false alarms
  4. High-quality design
  5. Effective in various environments

Cons

  1. Alarm volume could be louder
  2. Built-in battery is non-replaceable
  3. The alarm may not be heard in distant rooms

Customers Reviews

The reviews for the X-Sense Smoke Alarm, SD2J0AX, are largely positive, with users praising its ease of installation and long battery life.

Many reviewers appreciated the straightforward setup, noting that the instructions were clear and the process was hassle-free.

The 10-year battery life is frequently highlighted as a significant advantage, providing peace of mind and reducing the need for frequent battery replacements.

Several users commended the smoke alarm’s reliability, mentioning that it performed its intended function well without any false alarms, even when used in kitchens or other areas prone to smoke or steam.

The overall build quality and sturdy design also received positive feedback, suggesting that the product is durable and well-constructed.

On the downside, a few users pointed out that the alarm volume could be louder. This concern was raised by individuals who installed the alarm in larger or more distant areas, such as garages, and doubted whether the alarm would be audible from all parts of their home.

Another point of criticism was the non-replaceable battery, which, while lasting up to ten years, cannot be changed.

This means the entire unit needs to be replaced once the battery is depleted. A small number of reviews also mentioned that the alarm might not always trigger as expected, though these instances were rare.

Overall, the X-Sense Smoke Alarm, SD2J0AX, is well-regarded for its ease of use, long battery life, and reliable performance, though a few minor drawbacks, like alarm volume and battery replaceability, were noted by some users.

Kidde Smoke and Carbon Monoxide Detector with LED Indicators, AA Battery Powered, Single Pack – B0BZT85TLG

Introducing the Kidde Smoke & Carbon Monoxide Detector, Model 900-CUDR, your ultimate home safety device that combines cutting-edge smoke, fire, and carbon monoxide detection into one efficient unit.

Powered by two AA batteries (included), this detector ensures uninterrupted protection even during power failures, giving you peace of mind 24/7.

Equipped with advanced photoelectric sensing technology, this detector can accurately sense visible fire particles typically associated with smoldering fires.

Additionally, its electrochemical sensor effectively detects harmful levels of carbon monoxide, ensuring early warnings for both fire and gas hazards.

The device’s self-testing components continuously monitor its operation, so you always know it’s functioning correctly.

When danger is detected, the Kidde alarm alerts you with a powerful 85-decibel sound and flashing red LEDs, making it impossible to miss.

Three distinct LED indicators, green for normal operation, amber for faults, and red for smoke or carbon monoxide detection, provide clear, at-a-glance status updates. This thoughtful design ensures you’re always aware of your home’s safety status.

The Smart-Hush button feature is perfect for those everyday situations where false alarms might occur, such as during cooking or steamy showers.

This function temporarily silences the alarm for about 8 minutes, allowing you to address the situation without disabling the detector.

Designed for easy installation, this smoke and carbon monoxide detector should be placed on every level of your home and near sleeping areas to ensure comprehensive coverage.

With UL certification and a 10-year limited manufacturer’s warranty, you can trust in the quality and reliability of this Kidde product.

Key Features

  • 2-in-1 Detection
  • 24/7 Self-Testing
  • Easy Installation
  • Photoelectric Sensor
  • 85-Decibel Alarm
  • LED Warning Indicators
  • Battery Operated
  • UL Listed Warranty

Pros

  1. Reliable protection
  2. Easy installation
  3. Great quality
  4. Dual sensitivity
  5. Good value

Cons

  1. Chirps frequently
  2. Battery issues
  3. False alarms

Customers Reviews

Many users have expressed satisfaction with the Kidde Smoke & Carbon Monoxide Detector, highlighting its reliable protection and ease of installation.

They appreciate the clear voice alerts and the sleek design, which ensures it fits well into their home environments.

The inclusion of a battery backup is frequently mentioned as a significant benefit, providing peace of mind during power outages.

Customers also commend the device for its quality and certifications, which enhance their trust in the product’s safety capabilities.

The dual sensitivity for detecting both smoke and carbon monoxide, combined with its affordability and recommendation from trusted sources like Consumer Reports, adds to its appeal.

However, some users have reported issues with the detector chirping frequently, which they suspect might be due to dust or external factors.

This chirping often necessitates the use of compressed air to clear, which can be inconvenient.

Additionally, there are concerns about the built-in battery in some models, as they become non-functional once the battery is depleted, contrary to the promised lifespan.

False alarms, especially at night, have also been a point of frustration for some users, affecting their overall satisfaction with the product.

Overall, while the Kidde Smoke & Carbon Monoxide Detector is highly regarded for its safety features, ease of use, and reliability, a few users have experienced issues that could affect its long-term dependability.

Kidde Smoke Detector with 10-Year Battery and LED Warning Indicators – B0CX6PRPGY

Step up your fire safety game with the Kidde Smoke Detector, Model 20SD10. This innovative device is designed to provide top-tier protection and peace of mind for your home.

Sporting a sleek and compact 5-inch design, this smoke detector seamlessly blends into any living space, from your living room to the kitchen, hallway, or bedroom.

What sets this smoke detector apart is its advanced sensing technology, specifically engineered to minimize false alarms caused by everyday activities like cooking.

It’s all about giving you those crucial extra moments to act in case of an emergency. The built-in 10-year lithium battery means you won’t need to worry about changing batteries for the entire lifespan of the detector, ensuring uninterrupted protection day and night.

This Kidde model is not only easy to install, thanks to its twist-and-click mounting bracket, but also self-testing.

It continuously monitors its own performance, alerting you if any issues arise, so you always know it’s ready to protect.

The LED warning light indicators provide clear, at-a-glance status updates, with green for normal operation, amber for any issues, and red for smoke or fire detection.

Additionally, the detector comes with an end-of-life alert system that beeps to remind you when it’s time to replace the unit, ensuring you are never left without protection.

Tested and certified to meet the latest UL standards for safety and reliability, as well as FCC and CSFM requirements, you can trust this device to keep your home safe.

Elevate your home safety with the Kidde Smoke Detector, Model 20SD10, a reliable, easy-to-use, and highly effective choice for any household.

Ensure your family’s safety with this state-of-the-art smoke detector that stands out in both performance and design.

Key Features

  • Detects Smoke
  • 10-Year Battery
  • Enhanced Sensing Technology
  • Self-Testing Alarm
  • 3 LED Notifications
  • Easy Installation
  • Test & Hush Button
  • 10-Year Limited Warranty

Pros

  1. Excellent and long-lasting
  2. Professional quality
  3. Easy to set up
  4. Reliable battery life
  5. High sensitivity

Cons

  1. Frequent chirping issues
  2. Mounting plate limitations
  3. Battery failure

Customers Reviews

The Kidde Smoke Detector has received a wealth of positive feedback from users, praising its excellent performance and longevity.

Many reviewers have noted its simple installation process and the reliable 10-year battery life. The detector has proven effective in diverse environments, such as workshops, without triggering false alarms, and users appreciate its sturdy construction and professional feel.

Some customers emphasize its reliability, pointing out that this detector gives them confidence in its ability to alert them in case of danger.

The inclusion of clear instructions and a permanent silencing switch at the end of its lifespan further enhances its user-friendly design.

However, a few users have faced issues with the mounting plate, finding it difficult to fit with certain types of electrical boxes.

Additionally, there have been occasional reports of the detector chirping after a few years, necessitating replacement or maintenance.

Despite these minor drawbacks, the overall consensus is that the Kidde Smoke Detector is a high-quality, reliable product that delivers on its promises, providing essential safety and peace of mind for its users.

Ecoey Smoke Alarm, Battery Included, with Test Button and Low Battery Signal, Compact Fire Detector

The Ecoey Smoke Alarm offers exceptional accuracy and reliability in a compact design, making it a vital addition to any home.

Utilizing advanced photoelectric technology, it is highly sensitive to light smoke and slow smoldering fires, providing rapid warnings that help ensure your family’s safety around the clock.

Despite its small size, with a diameter of just 3.3 inches, this smoke detector is a powerhouse when it comes to detecting potential fire hazards.

A key feature of this smoke alarm is the test button, which allows you to verify its functionality each week by pressing the button for five seconds.

The alarm will alert you when the battery is low by chirping every 32 seconds and flashing a red LED light, reminding you to change the batteries promptly.

Installation is straightforward with the included mounting bracket, eliminating the need for hardwiring.

This flexibility means you can place the detector in any room, except high airflow areas like kitchens and bathrooms, ensuring it is at least three feet away from such locations.

In the event of detecting smoke or combustion particles, the alarm produces a loud 85 dB sound along with a rapidly flashing red LED, effectively alerting all household members to the potential danger.

If the alarm encounters a fault, simply clean it with a fan to remove any dust or smoke particles.

Home fire safety is crucial, with incidents occurring every 38 seconds in the US. Early detection significantly increases the chances of safely evacuating your home.

The Ecoey Smoke Alarm reduces the risk of home fire fatalities by 50%, offering a reliable and effective solution for protecting your family.

With Ecoey, you are investing in a high-quality smoke detector designed to deliver optimal performance and peace of mind 24/7, ensuring your home is always safeguarded against potential fire hazards.

Key Features

  • High Accuracy Detection
  • Weekly Test Button
  • Easy Installation
  • Sound & LED Warning
  • Comprehensive Home Protection

Pros

  1. High-accuracy detection
  2. Easy installation
  3. Loud alarm warnings
  4. Compact size
  5. Included batteries

Cons

  1. Potential defective batteries
  2. Smaller than expected

Customers Reviews

Customers have praised these smoke alarms for their small size and ease of installation. Many found them to be a great value, especially with the inclusion of 9-volt batteries. Users appreciated how easy they were to place and test, recommending them for their reliability and the loudness of the alarm, which ensures everyone in the house can be alerted in case of an emergency.

Some reviewers highlighted the convenience of the adhesive mount, which eliminates the need for screws and makes the installation process even simpler.

The high sensitivity of these alarms is also a common point of praise, as they can quickly alert residents to potential fires.

However, some users did encounter issues with the batteries included in the package, noting that a few of them were defective from the start and caused low-voltage warning beeps.

Despite this, most users found the smoke alarms to be a good value for their basic function, offering reliable performance at an affordable price.

FAQs: Which Smoke Detector is Right for You?

What type of smoke detector is best?

The best type of smoke detector depends on the specific needs and environment of your home. There are three main types of smoke detectors: ionization, photoelectric, and dual-sensor.

  • Ionization Smoke Detectors: These are generally more responsive to fast-flaming fires but may be prone to false alarms from cooking smoke or steam.
  • Photoelectric Smoke Detectors: These are better at detecting slow-smoldering fires, which produce a lot of smoke before bursting into flames, and are less likely to cause false alarms.
  • Dual-Sensor Smoke Detectors: These combine both ionization and photoelectric sensors, providing comprehensive detection for both types of fires. For optimal safety, a dual-sensor model is often recommended.

What is the best recommended smoke alarm?

The Kidde Smoke & Carbon Monoxide Detector is highly recommended due to its dual detection capabilities, combining both smoke and carbon monoxide sensors.

It features advanced sensing technology to reduce false alarms and includes a 10-year built-in lithium battery for continuous protection.

The clear voice alerts and easy installation process add to its appeal, making it a top choice among users.

Which is better, First Alert or Kidde?

Both First Alert and Kidde are reputable brands in the smoke detector market, each with its own strengths.

  • First Alert: Known for its reliability and comprehensive range of models, First Alert smoke detectors often feature advanced technology and are highly rated for their durability and ease of use.
  • Kidde: Kidde smoke detectors are praised for their innovative features, such as voice alerts and dual smoke and carbon monoxide detection. They also tend to be user-friendly and come with long-lasting batteries.

Choosing between the two often comes down to specific preferences and needs, such as whether you prefer a voice alert system or a model with dual detection capabilities.

What is the best technology for smoke detectors?

The best technology for smoke detectors is often the dual-sensor technology, which incorporates both ionization and photoelectric sensors.

This ensures comprehensive detection of both fast-flaming and slow-smoldering fires, offering the highest level of safety.

Additionally, integrating carbon monoxide detection into a smoke alarm adds another layer of protection, especially in preventing carbon monoxide poisoning.

How often should smoke detectors be replaced?

Smoke detectors should generally be replaced every 10 years. Over time, the sensors can become less sensitive, reducing their effectiveness.

It’s important to check the manufacturer’s recommendations and ensure regular maintenance and testing to keep the detectors in optimal working condition.

Where should smoke detectors be installed?

Smoke detectors should be installed on every level of your home, including the basement and inside each bedroom.

They should also be placed outside sleeping areas and in hallways. It’s recommended to avoid installing them near kitchens or bathrooms to prevent false alarms caused by steam or cooking smoke.

For the best protection, refer to the guidelines provided by the National Fire Protection Association (NFPA) and your local building codes.

Conclusion

Each of these smoke alarms offers unique features suited to different needs and preferences. The Kidde Smoke & Carbon Monoxide Detector stands out with its dual sensor and comprehensive detection capabilities, while the LSHOME 4-Pack and Ecoey models excel in affordability and ease of installation.

For those prioritizing compact design and long battery life, the Kidde Smoke Detector with 10-Year Battery is an excellent choice.

Finally, the LSHOME Smoke Detector combines essential features with economical value, making it a reliable choice for any home.

When choosing a smoke alarm, consider the specific needs of your home environment, including the type of fires most likely to occur, ease of installation, and long-term maintenance.

With this comprehensive comparison, you can confidently select the smoke alarm that best ensures the safety of your home and loved ones.