Carbon Monoxide Detectors: What Every Homeowner Needs to Know

Carbon monoxide kills roughly 400 Americans every year and sends more than 100,000 to the emergency room, and most of those incidents happen inside the home.

What makes it so dangerous is exactly what makes it so hard to detect: you cannot see it, smell it, or taste it.

A carbon monoxide detector is the only reliable line of defense between your family and this silent killer.

Yet many homeowners either don’t have one, have one in the wrong place, or are using a detector that expired years ago without realizing it.

This guide covers everything you need to know about CO forms, how detectors work, where to place them, which type to buy, and how to maintain them so they actually protect you when it matters.

What Is Carbon Monoxide and Why Is It So Dangerous?

Carbon monoxide (CO) is a colorless, odorless gas produced when fuels such as natural gas, propane, wood, coal, gasoline, and kerosene burn incompletely.

Any combustion appliance in your home is a potential CO source if it malfunctions, is poorly maintained, or is used in an enclosed space.

Common household sources include:

  • Gas furnaces and boilers
  • Gas water heaters
  • Fireplaces and wood-burning stoves
  • Attached garages (running vehicles)
  • Gas ranges and ovens
  • Portable generators (a leading cause of fatal CO poisoning)
  • Kerosene space heaters

The reason CO is so deadly is biochemical. When you inhale it, CO binds to hemoglobin in your red blood cells roughly 200 times more readily than oxygen does, forming carboxyhemoglobin.

Your cells are starved of oxygen even as your body keeps breathing normally. Because the early symptoms, headache, dizziness, nausea, and fatigue, resemble the flu, many victims don’t connect their symptoms to CO until it’s too late.

At higher concentrations, CO causes confusion, loss of consciousness, and death. Infants, elderly individuals, and people with heart or respiratory conditions are especially vulnerable, but no one is immune.

How Do Carbon Monoxide Detectors Work?

A carbon monoxide alarm doesn’t just flip a switch when CO appears. It measures accumulation over time, which is important because the danger threshold depends on both concentration and duration of exposure.

There are three main sensor technologies used in residential CO detectors.

Electrochemical Sensors

The most common and most accurate type found in modern home detectors. A chemical reaction between the CO gas and an electrolyte solution generates a small electric current proportional to the CO concentration.

The detector measures the current and triggers the alarm when a dangerous level is reached. Electrochemical sensors are highly sensitive and reliable, with a typical lifespan of five to seven years.

Metal Oxide (Semiconductor) Sensors

These use a metal oxide film, usually tin oxide, whose electrical resistance drops in the presence of CO.

They are durable and work well over a wide temperature range, but tend to be less precise than electrochemical sensors and can generate more false alarms. They are commonly found in lower-cost units.

Biomimetic Sensors

A gel that changes color when it absorbs CO, mimicking the binding reaction in human blood. A light sensor detects the color change and triggers the alarm.

These are less common in modern detectors but are used in some marine and specialty applications.

Alarm Thresholds

Detectors in the United States must meet UL 2034 standards, which require the alarm to trigger at the following exposure levels (at a minimum).

CO Concentration (ppm)Time to Alarm
70 ppmWithin 1–4 hours
150 ppmWithin 10–50 minutes
400 ppmWithin 4–15 minutes

This time-weighted design means a detector will not alarm immediately at low concentrations. It’s calibrated to reflect genuine biological risk, not instantaneous trace readings.

Where to Place Carbon Monoxide Detectors in Your Home

Placement is just as important as having a detector at all. CO mixes readily with air and doesn’t stratify the way some gases do, but there are still best-practice guidelines for placement.

General Rules

Install at least one detector on every level of your home

, including the basement. Carbon monoxide can accumulate anywhere, but a leak in the basement can take longer to reach upper floors, giving you valuable warning time if you have basement coverage.

Place one outside each sleeping area

CO poisoning is especially dangerous at night because victims may not wake up from the early symptoms.

A detector outside bedroom doors can alert occupants before CO concentrations become incapacitating.

Mount detectors at wall-outlet height or on a shelf

Unlike smoke, which rises and hugs the ceiling, CO is very close to the same density as air. The International Association of Fire Chiefs recommends placing CO detectors at knee-to-shoulder height on the wall or on a shelf, not on the ceiling.

Strategic Placement Tips

  • Place a detector in or near the garage if your home has an attached garage. Running a car engine, even briefly, with the door open, can push CO into living spaces.
  • Place one near any fuel-burning appliance: furnace room, utility room, boiler room.
  • If you use a fireplace frequently, place a detector in that room.
  • Avoid placing detectors directly next to fuel-burning appliances (within five feet) — this can cause nuisance alarms from minor combustion by-products.
  • Keep detectors away from humid areas like bathrooms, which can interfere with electrochemical sensors.

How Many Do You Need?

For a typical two-story home with a basement, three detectors is a reasonable minimum: one on each floor and one in the basement.

Larger homes or homes with multiple sleeping areas may need more. Think of it like smoke detectors: one per floor is the floor, not the ceiling.

Types of Carbon Monoxide Detectors: Which One Should You Buy?

The market offers several formats, each with trade-offs in terms of convenience, reliability, and cost.

Plug-in CO Detectors

Plug directly into a standard wall outlet, usually with a battery backup for power outages. Easy to install, easy to move, and the battery backup is a critical safety feature.

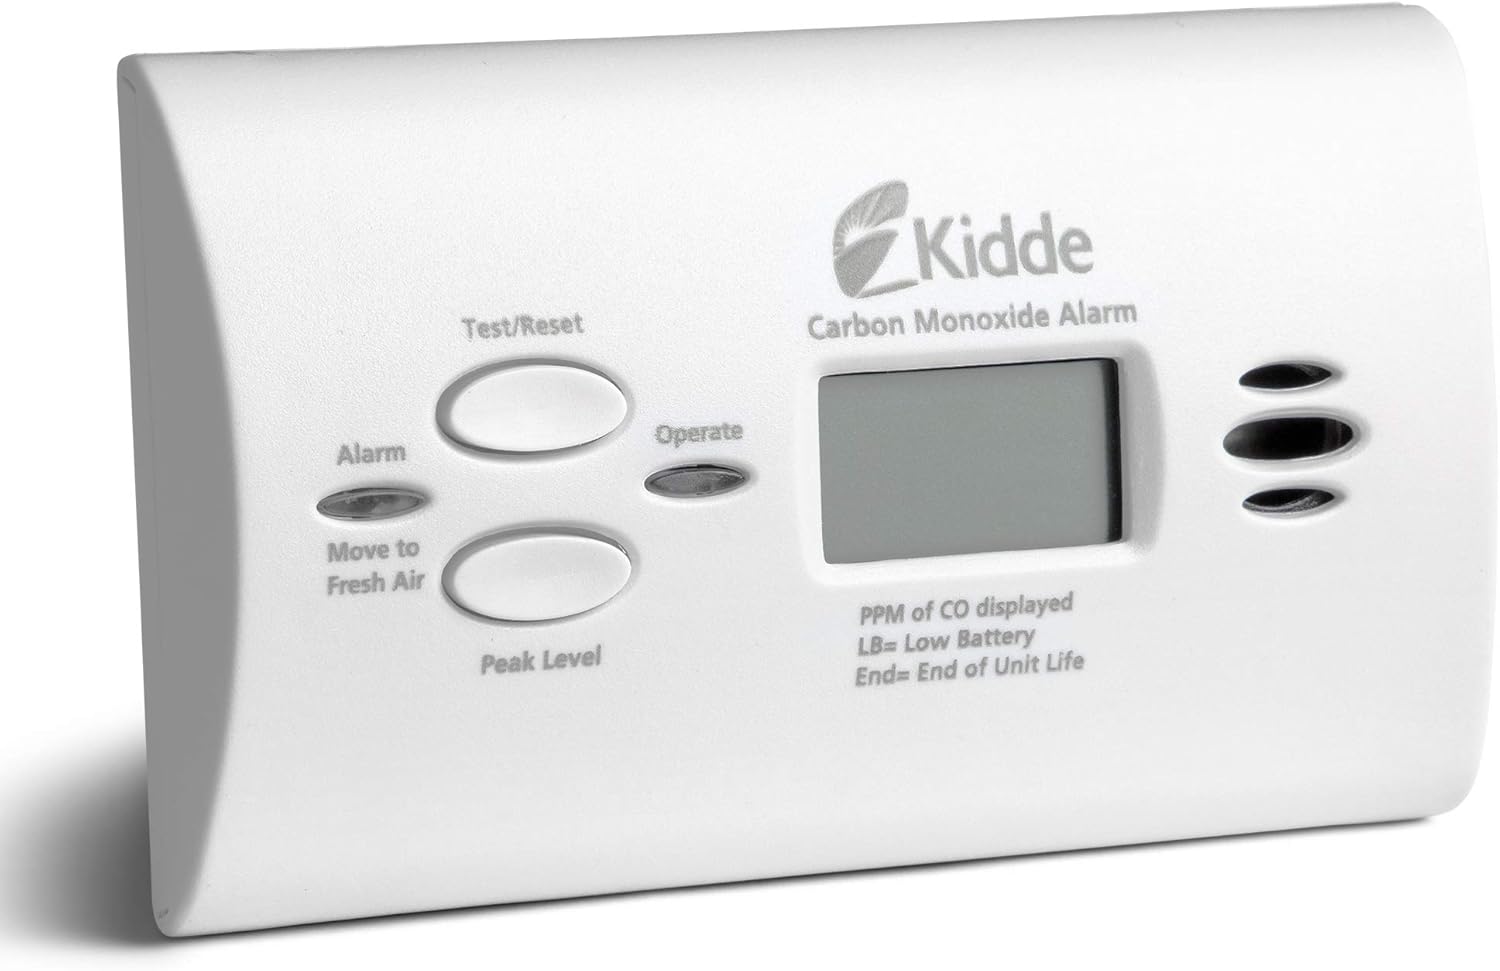
Look for models with a digital display showing current CO levels, useful for monitoring low-level buildup before it reaches alarm thresholds.

Best for

Most homeowners. Simple, reliable, and versatile.

Hardwired CO Detectors

Wired directly into your home’s electrical system, typically with battery backup. Often interconnected, meaning if one alarm triggers, all alarms in the house sound simultaneously.

This is a significant safety advantage in larger homes where a single detector might not be heard from all areas.

Best for

New construction, renovations, or homeowners who want a whole-home system.

Battery-Only CO Detectors

Entirely battery-powered, no outlet or wiring required. Flexible placement, including areas without nearby outlets.

The trade-off is the need to replace batteries regularly; many units chirp when the battery runs low, but this is easy to ignore.

Best for

Locations without a convenient outlet or as supplemental detectors.

Combination Smoke/CO Detectors

A single unit that detects both smoke and carbon monoxide. Convenient for reducing the number of devices on ceilings and walls.

The caveat: since smoke detectors belong on the ceiling and CO detectors work best at wall height, a combination unit is a compromise.

If you choose a combo unit, ceiling placement is still preferred since smoke detection is typically the higher priority.

Best for

Rentals, minimalists, or areas where a single device needs to cover both hazards.

Smart CO Detectors

Wi-Fi or Bluetooth-connected units that send alerts to your smartphone, log CO levels over time, and integrate with smart home systems.

Some models, like the Nest Protect, also perform regular self-tests and notify you of low batteries or end-of-life status.

Premium price, but the remote notification capability is genuinely useful if you travel or rent out your property.

Best for

Tech-savvy homeowners, landlords, and smart home enthusiasts.

What to Look for When Buying a Carbon Monoxide Detector

Not all detectors are created equal. Here are the key factors to evaluate.

UL 2034 Certification

The baseline standard for residential CO alarms in the US. Any detector you buy should carry this certification. Don’t settle for uncertified products.

Digital Display

A display showing current CO concentration in parts per million (ppm) tells you far more than a simple alarm.

You can monitor low-level accumulation and catch problems before they reach alarm thresholds.

Battery Backup

If your detector is hardwired or plug-in, battery backup is non-negotiable. Power outages often accompany the weather events and system failures that can also cause CO leaks.

Lifespan Indicator

Good detectors include an end-of-life signal, typically a different chirp pattern, to tell you when the unit needs replacing. Some have a clearly marked expiration date on the back.

Sensor Type

For home use, electrochemical sensors are the gold standard. Look for units that specify the sensor type in their product documentation.

Interconnectability

If you’re outfitting a larger home, choose a brand that offers interconnected units (either wired or wireless) so all alarms sound together.

Carbon Monoxide Detector Maintenance and Lifespan

Buying a detector is step one. Keeping it functional is step two, and this is where many homeowners fall short.

Test Your Detectors Monthly

Every CO detector has a test button. Press it monthly to confirm the alarm sounds and the unit is functioning. This takes five seconds and could save your life.

Replace Batteries at Least Annually

If your detector uses replaceable batteries, change them every year, even if they haven’t died. A convenient habit is to change them when you set the clocks back in the fall. Never ignore a low-battery chirp.

Know the Lifespan of Your Detector

This is the most commonly overlooked maintenance issue: CO detectors expire. The electrochemical sensors degrade over time, typically after five to seven years, and a detector that has passed its lifespan may not alarm even when CO is present.

Check the manufacturer’s date, usually on a label on the back or bottom of the unit, and replace the detector within the manufacturer’s recommended timeframe. If you don’t know how old your detector is, replace it.

Don’t Paint Over or Cover Detectors

Paint, stickers, or covers that block the sensing vents will impair the unit’s ability to detect CO. Keep the sensing area clear.

Respond Immediately to Any Alarm

If your CO detector alarms.

  1. Immediately move everyone (including pets) outside to fresh air.
  2. Call 911 from outside. Do not re-enter to make the call.
  3. Do not return inside until emergency services have cleared the building and identified the source.
  4. Seek medical attention if anyone feels unwell.

Do not assume the alarm is a false alarm. Investigate every CO alarm as if it were real.

Carbon Monoxide Laws and Requirements by State

Most US states now require CO detectors in residential properties, though the specifics vary. Requirements typically cover.

  • Single-family homes
  • Multi-family dwellings and apartments
  • New construction vs. existing homes
  • Rental properties (landlord obligations)

States with fuel-burning appliances in homes, attached garages, or both almost universally mandate CO alarms.

Check your state’s fire code or consult your local fire marshal’s office for the requirements in your area. If you are a landlord, compliance is typically your legal responsibility.

Even in states without a mandate, installation is basic common sense. The cost of a quality CO detector, typically $25 to $60, is trivially small compared to the risk.

Frequently Asked Questions

How long do carbon monoxide detectors last?

Most residential CO detectors have a lifespan of five to seven years. Check the manufacturer’s date on the back of your unit and replace it within the manufacturer’s recommended window. When in doubt, replace it.

Can a CO detector detect natural gas?

No. CO detectors are specifically calibrated for carbon monoxide. Natural gas (methane) requires a separate gas leak detector. Combination CO/natural gas detectors are available if you want both functions in one unit.

What does a CO alarm sound like?

The standard alert pattern under UL 2034 is four beeps, a pause, then four more beeps repeated continuously.

This distinguishes it from a smoke alarm (typically a continuous or three-beep pattern) and from a low-battery chirp (usually a single chirp every 30–60 seconds).

Can I put a CO detector in the garage?

The garage itself is not typically recommended as a primary installation location because CO concentrations there can be extremely high during normal vehicle operation, leading to nuisance alarms.

A better approach is to place a detector near the interior door connecting your garage to your living space.

Where should you not put a CO detector?

Avoid placing detectors within five feet of fuel-burning appliances, in high-humidity areas like bathrooms, in direct sunlight, near windows or air vents that could dilute readings, and in enclosed spaces like closets.

Final Thoughts

A carbon monoxide detector is one of the simplest and most effective safety investments a homeowner can make.

The technology is reliable, the cost is minimal, and the protection it provides is real. But it only works if you have the right number of detectors, they are properly placed, and they are not expired.

Take fifteen minutes to audit your home today

  • Check the manufacturer’s date on every CO detector you own.
  • Verify they are positioned at the right height, on every level, and outside every sleeping area.
  • Test each unit with the test button.
  • Replace any unit older than seven years or without a known manufacturer date.

If you’re starting from scratch, invest in detectors with digital displays and battery backup from a reputable brand carrying UL 2034 certification. Interconnected units are worth the upgrade in larger homes.

Carbon monoxide protection doesn’t require expertise or a large budget. It requires the right equipment, correctly placed, and properly maintained. That’s entirely within reach for any homeowner.

Smoke Detector Selection Guide: Ionization vs. Photoelectric vs. Combination

When was the last time you thought seriously about your smoke detectors? Most people install them, test the battery once a year (if that), and never think twice about whether they have the right type for their home.

But here’s the thing: not all smoke detectors respond to the same kind of fire the same way, and choosing the wrong type could cost you critical minutes in an emergency.

This guide breaks down the three main smoke detector technologies: ionization, photoelectric, and combination, so you can make an informed decision about protecting your home, family, or facility.

Why the Type of Smoke Detector Matters?

There are two fundamentally different types of fires you need to protect against.

Fast-flaming fires

These ignite and spread rapidly, producing intense heat and large combustion particles. Think of grease fires, paper fires ignited by a candle, or electrical sparks that catch on dry material.

Slow-smoldering fires

These can burn for hours before breaking into flames, producing dense, fine smoke particles and toxic gases long before visible fire appears. A smoldering couch cushion or overheated wiring inside a wall are classic examples.

The critical problem: no single sensor technology detects both equally well.

That’s not a minor technicality. A 2004 NIST (National Institute of Standards and Technology) study found that ionization detectors responded to fast-flaming fires faster, while photoelectric detectors were significantly quicker to alert during slow-smoldering fires, sometimes by 30 to 50 minutes. In a residential fire, that time gap can be the difference between evacuation and tragedy.

This is why understanding the technology behind your detector isn’t just an interesting engineering detail; it’s a life-safety decision.

How Ionization Smoke Detectors Work

The Technology

Ionization detectors contain a small amount of Americium-241 (Am-241), a mildly radioactive element.

This material continuously ionizes the air between two electrically charged plates inside the detector, creating a small, steady current.

When smoke enters the sensing chamber, the combustion particles disrupt this ionized current. The detector’s electronics register the drop in current and trigger the alarm.

What Ionization Detectors Detect Best

Ionization detectors excel at detecting large combustion particles produced by fast-flaming fires. Because these particles are physically large enough to significantly disrupt the ion current, the detector responds quickly.

Best applications.

  • Kitchens (though placement matters, see common mistakes below)
  • Living rooms where fast-igniting materials are present
  • Garages with flammable liquids or materials

Limitations of Ionization Detectors

  • Slower response to smoldering fires that produce fine, dense smoke.
  • More prone to nuisance alarms from cooking vapors, steam, and humidity.
  • Contain a small radioactive source (safe in normal use, but requires proper disposal; do not throw in regular trash).

Cost

Ionization detectors are generally the least expensive option, often available for $8–$20 per unit. They are the most widely deployed type in North American homes, largely due to their lower cost.

How Photoelectric Smoke Detectors Work

The Technology

Photoelectric detectors use a light source (typically an LED) and a light sensor positioned at a 90-degree angle inside a sensing chamber. Under normal conditions, the beam travels straight across the chamber without reaching the sensor.

When smoke enters the chamber, particles scatter the light beam, deflecting some of it toward the sensor. The detector interprets this light scattering as smoke and triggers the alarm.

This principle is known as the Tyndall effect, the same physics behind why sunlight appears to scatter through dusty or foggy air.

What Photoelectric Detectors Detect Best

Photoelectric detectors excel at detecting fine smoke particles from slow-smoldering fires. Because smoldering combustion produces dense, fine aerosol particles that scatter light very effectively, photoelectric technology responds to these fires significantly faster than ionization technology.

Best applications

  • Bedrooms
  • Hallways
  • Living rooms with upholstered furniture
  • Offices and areas with electronics that might smolder before flaming

Limitations of Photoelectric Detectors

  • Slightly slower response to fast-flaming fires compared to ionization detectors.
  • Generally cost more than basic ionization units ($15–$35 per unit).
  • May be triggered by heavy steam or dusty environments if poorly positioned.

Why Safety Organizations Increasingly Favor Photoelectric

The U.S. Fire Administration, several state fire marshals, and fire safety advocacy groups have increasingly recommended photoelectric detectors for residential bedrooms and sleeping areas.

The reasoning: smoldering fires are particularly dangerous at night because occupants are asleep, and the slow buildup of toxic gases (particularly carbon monoxide) can incapacitate people before a full flaming fire develops.

How Combination (Dual-Sensor) Smoke Detectors Work

The Technology

Combination detectors integrate both ionization and photoelectric sensing technologies into a single unit.

Some models process both sensor inputs independently and alarm when either threshold is exceeded.

More advanced models use signal processing algorithms to reduce nuisance alarms while maintaining fast response across both fire types.

What Combination Detectors Detect Best

The straightforward answer: both types of fires.

Combination detectors are engineered to close the detection gap. They offer.

  • Fast response to flaming fires (via the ionization sensor).
  • Early warning for smoldering fires (via the photoelectric sensor).
  • Reduced the need for installing two separate detector types in some locations.

Are Combination Detectors Always the Best Choice?

Not necessarily, and this is a nuance that often gets overlooked in simple buying guides.

A few considerations.

Cost

Combination units cost more ($25–$60+), and if you’re equipping a large home or facility, that cost multiplies.

Nuisance alarm management

Combining two technologies doesn’t automatically reduce false alarms. In fact, without smart signal processing, a combination unit could alarm more frequently than a single-technology unit.

Look for models that specifically address nuisance alarm performance (discussed in the recommendations section below).

Not a substitute for strategic placement

Even a combination detector positioned incorrectly provides suboptimal protection.

Ionization vs. Photoelectric vs. Combination: Key Differences at a Glance

FeatureIonizationPhotoelectricCombination
Best forFast-flaming firesSlow-smoldering firesBoth fire types
Response to smoldering firesSlowerFasterFast
Response to flaming firesFasterSlightly slowerFast
Nuisance alarm tendencyHigher (kitchen fumes)LowerVaries by model
Cost range$8–$20$15–$35$25–$60+
Contains a radioactive sourceYes (Am-241)NoYes (if ionization sensor included)
Recommended for bedroomsLess idealYesYes
Recommended for kitchensWith cautionPreferredPreferred

Which Smoke Detector Type Is Best for Which Room?

Bedrooms and Sleeping Areas

Recommended: Photoelectric or Combination

The most common deadly residential fires, smoldering fires from upholstered furniture, bedding, and electronics, produce the fine smoke particles that photoelectric technology detects earliest. Since occupants are asleep and may not notice the smoke odor, early warning is critical.

Hallways and Corridors

Recommended: Photoelectric or Combination

Hallways serve as escape routes. Smoke from either fire type can fill these spaces, and early detection here buys evacuation time. Photoelectric technology generally performs well in these locations.

Kitchen

Recommended: Photoelectric, but placement is everything

Kitchens are the leading source of nuisance alarms. Ionization detectors are particularly prone to false alarms from cooking vapors, which frustrates users and, more dangerously, trains them to ignore or disable detectors.

Photoelectric units perform better in kitchens, but placement matters enormously.

  • Keep detectors at least 10 feet from cooking appliances.
  • Avoid positioning directly above or adjacent to stoves, toasters, and ovens.
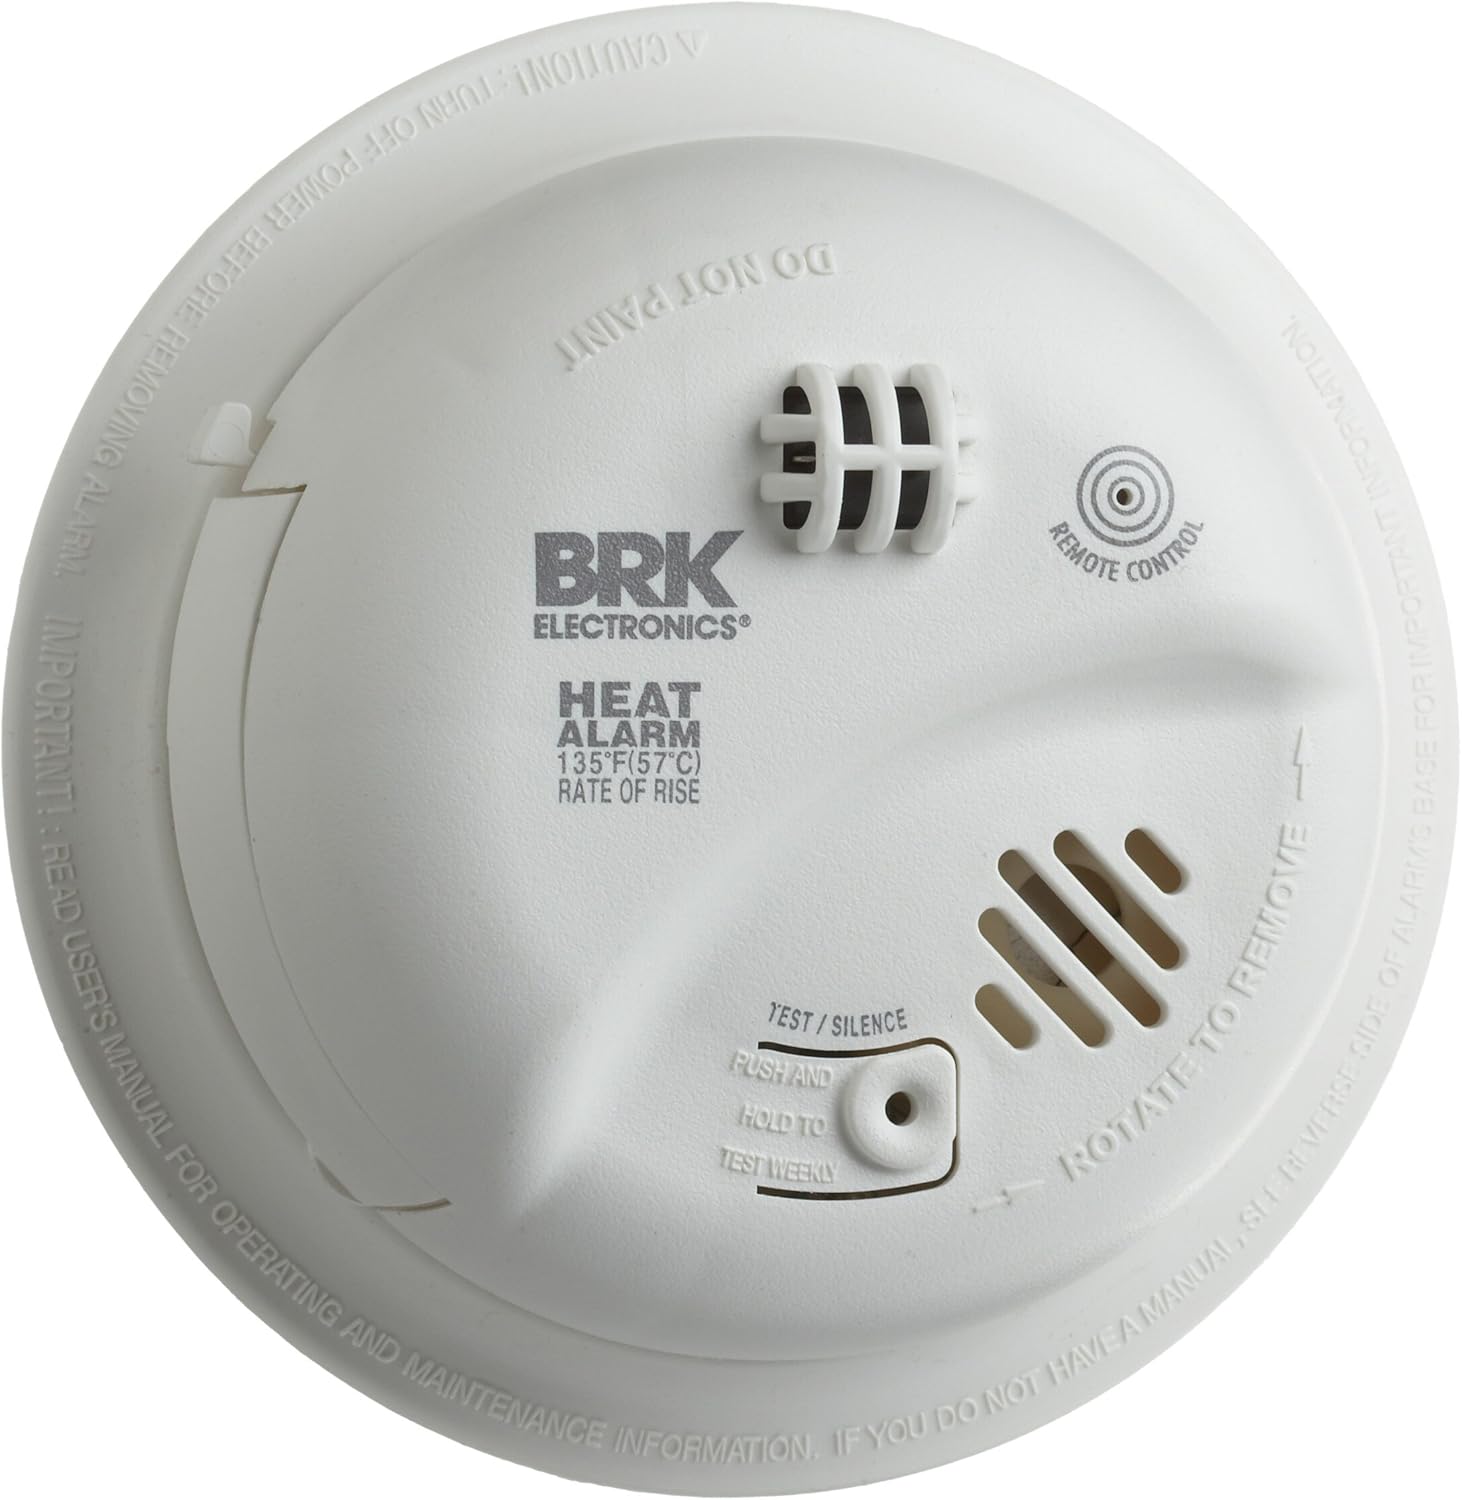
  • Consider a heat detector (not a smoke detector) directly over a cooking area as a supplementary device.

Living Rooms

Recommended: Combination

Living rooms contain a mix of fuel types, upholstered furniture (smoldering risk), curtains, paper materials, and electronics. A combination detector provides the broadest coverage.

Garage

Recommended: Heat detector (not smoke detector) or dedicated garage model

Standard smoke detectors in garages are highly susceptible to false alarms from exhaust fumes, dust, and humidity. A rate-of-rise heat detector is often better suited for garage applications.

Basement

Recommended: Combination or Photoelectric

Basement fires often smolder from electrical or stored material ignition. Photoelectric or combination units are well-suited here.

What Fire Codes and Standards Say

NFPA 72 (National Fire Alarm and Signaling Code)

NFPA 72 is the primary standard governing smoke detector installation in the United States. It specifies placement requirements (floor coverage, ceiling mounting rules, distance from walls and HVAC vents) but does not mandate a specific smoke detector technology for residential applications. It does, however, include performance testing criteria that detectors must meet.

Key placement requirements from NFPA 72

  • Install on every level of the home, including the basement.
  • Install inside every bedroom and outside each sleeping area.
  • Mount on the ceiling or high on walls (4–12 inches from the ceiling for wall-mounted units).
  • Keep at least 3 feet from HVAC supply registers.
  • Test monthly and replace units every 10 years.

UL 217 (Standard for Smoke Alarms)

Underwriters Laboratories UL 217 is the testing standard that smoke detectors sold in the U.S. must meet.

An important update to UL 217 (the 9th edition, effective in 2021) added new smoldering fire performance requirements, making it harder for ionization-only detectors to pass without smoldering sensitivity improvements.

This has gradually pushed manufacturers toward improving ionization detector performance on smoldering fires or adopting combination/photoelectric designs.

When purchasing, look for the UL 217 listing on the packaging.

International Building Code (IBC) and International Residential Code (IRC)

These model codes, adopted with local variations across most U.S. jurisdictions, follow NFPA 72 placement requirements for residential applications.

Commercial and industrial applications are subject to more detailed requirements based on occupancy classification.

Local Jurisdiction Requirements

Always verify local requirements. Some states and municipalities have adopted specific language recommending or requiring photoelectric detectors in certain occupancy types.

California, for example, has enacted legislation (SB 1394) requiring photoelectric-only smoke alarms in certain residential applications for new construction.

Common Mistakes When Choosing and Installing Smoke Detectors

Installing Only One Technology Type Throughout the Home

Given the detection differences between ionization and photoelectric technologies, relying on a single technology in every location leaves coverage gaps.

If the budget allows only one type, photoelectric detectors in bedrooms and sleeping areas are the higher-priority choice.

Installing Detectors Too Close to Kitchens

One of the most common nuisance alarm scenarios, and the one most likely to cause homeowners to remove batteries or permanently disable detectors.

Follow manufacturer clearance recommendations (typically 10+ feet from cooking appliances).

Neglecting to Replace Units Every 10 Years

Smoke detector sensors degrade over time. A 15-year-old detector may appear functional (indicator light is on, test button sounds alarm) but have a significantly degraded sensing capability.

The alarm circuit and the smoke sensing chamber are separate systems. Replace detectors every 10 years from the manufacture date printed on the back of the unit.

Not Interconnecting Detectors

Modern best practice and increasingly a code requirement in new construction is interconnected smoke detectors. When one alarm sounds, all sound.

This is particularly important in larger homes where a basement fire may not be audible in an upstairs bedroom.

Interconnection can be done via hardwired systems or, increasingly, via wireless/RF interconnection in battery-powered units.

Ignoring Combination CO/Smoke Detectors

Combination smoke and carbon monoxide detectors are worth serious consideration, particularly for bedrooms near attached garages, homes with gas appliances, or any sleeping area. CO is colorless and odorless. Only a dedicated sensor can detect it.

Skipping Monthly Testing

The test button only verifies that the alarm circuit (horn and electronics) functions. It does not test the actual smoke-sensing chamber.

While there’s no practical way to test smoke sensing without exposing the unit to smoke or aerosol, regular testing at least confirms the alarm will sound if the sensor triggers.

Top Smoke Detector Recommendations by Category

Note: These recommendations are based on widely recognized performance and feature characteristics. Always verify current availability and confirm UL 217 listing at purchase.

Best Photoelectric Detector

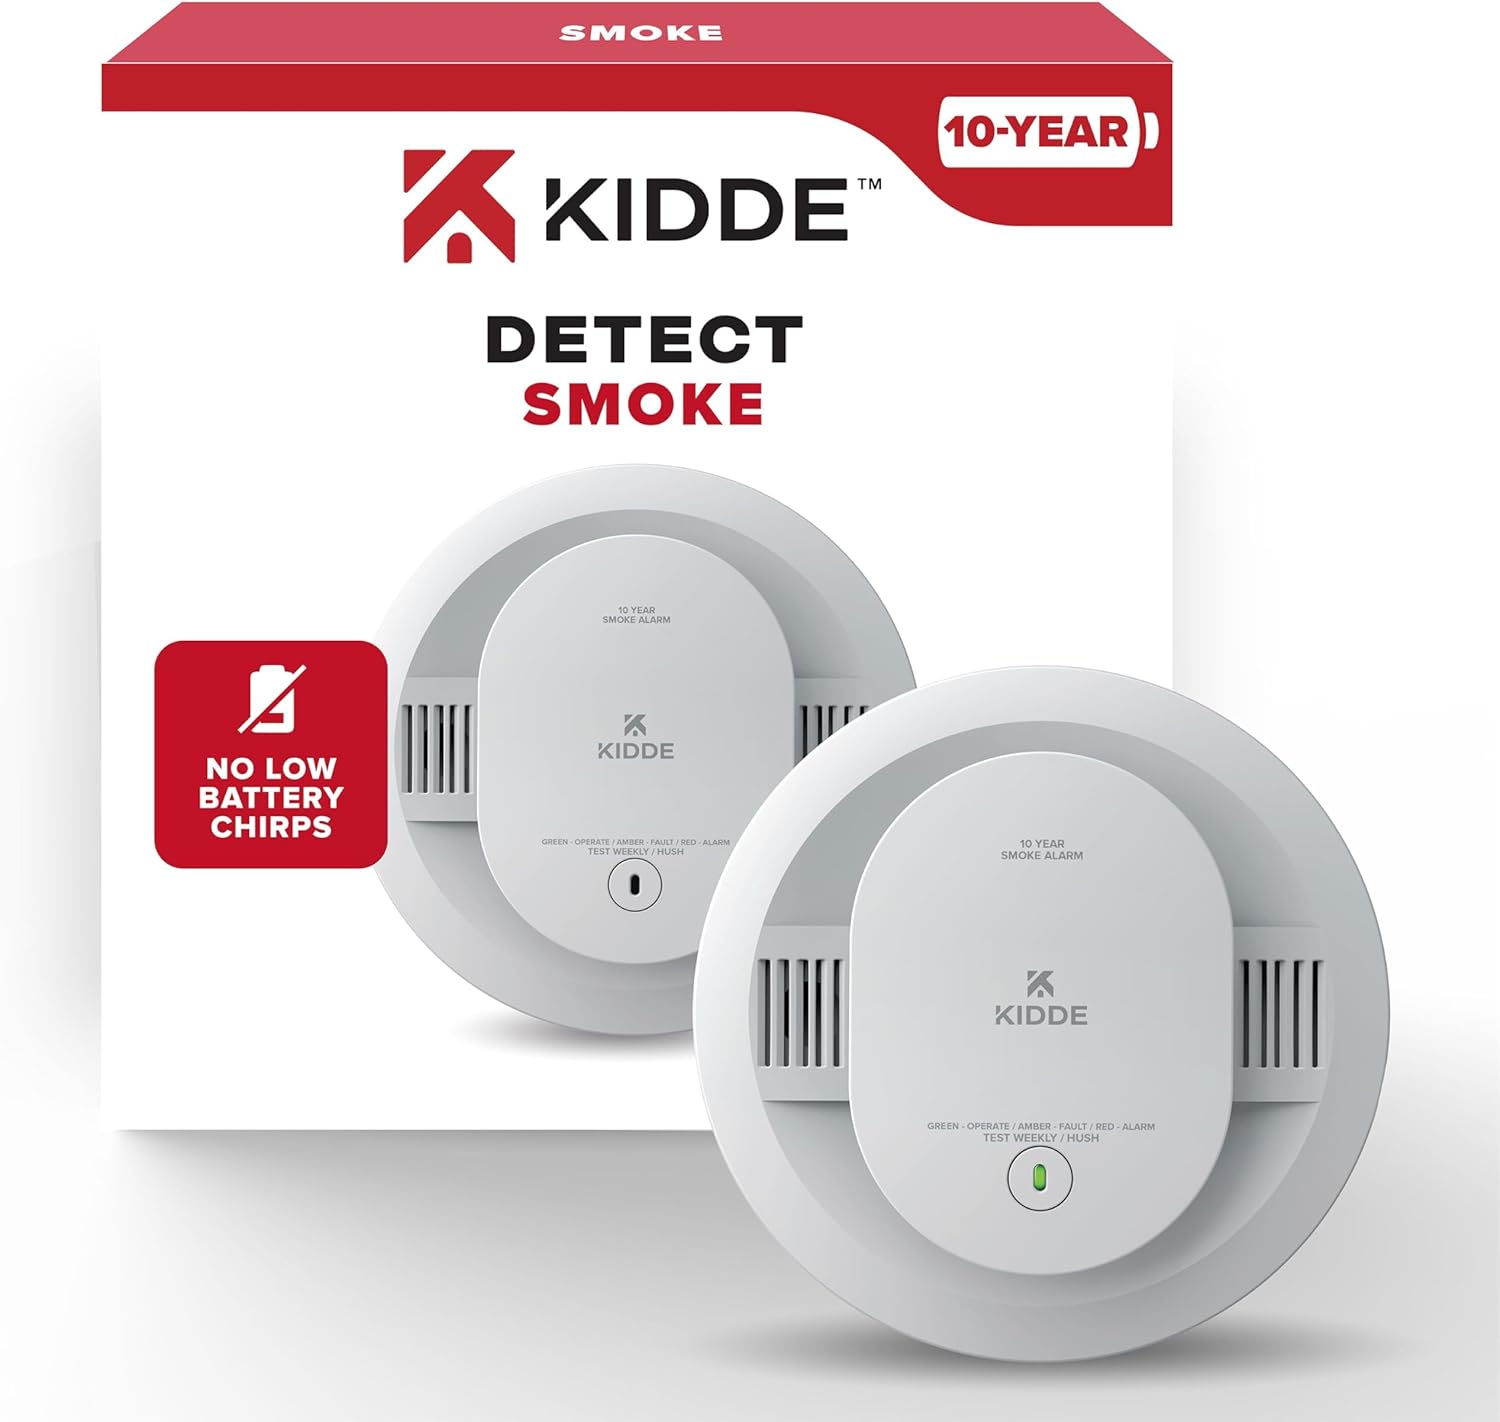
Kidde 10-Year Sealed Battery Photoelectric Smoke Detector

  • 10-year sealed lithium battery eliminates battery replacement for the life of the unit
  • Photoelectric sensing ideal for bedrooms and hallways
  • Meets UL 217 standards
  • Straightforward installation, large Test/Hush button

First Alert BRK PF1911 Photoelectric Detector

  • Well-regarded photoelectric unit from an established manufacturer
  • Affordable entry point for photoelectric coverage
  • Available in interconnectable versions

Best Combination (Dual-Sensor) Detector

Kidde KN-COSM-IBA (Combination Smoke + CO)

  • Integrates ionization smoke detection with photoelectric and CO sensing
  • Hardwired with battery backup
  • Interconnectable up to 18 units

Nest Protect (2nd Generation)

  • Photoelectric sensor with split-spectrum sensing technology
  • Smart home integration (Wi-Fi, app alerts, voice alarm with location announcement)
  • Self-testing, interconnectable, combination smoke + CO
  • Premium price point; well-suited for tech-forward households

Best for Interconnected Systems

First Alert Z-Wave Smoke Detector (ZSMOKE)

  • Z-Wave wireless interconnection for smart home integration
  • Works with most Z-Wave hubs (SmartThings, Wink, etc.)
  • Allows retrofit of interconnection in existing homes without rewiring

Frequently Asked Questions

Do I need both ionization and photoelectric detectors in my home?

The safest approach recommended by many fire safety authorities is to have both technologies represented either as separate units or through combination detectors. At a minimum, ensure photoelectric detectors are in bedrooms and sleeping areas.

Are photoelectric smoke detectors safer than ionization detectors?

Neither type is universally “safer”; they detect different fire signatures with different effectiveness. Photoelectric detectors have an advantage in detecting the smoldering fires that most commonly cause overnight residential fatalities, which is why they’re increasingly recommended for sleeping areas.

Is the radioactive material in ionization detectors dangerous?

The amount of Americium-241 in a residential ionization smoke detector is extremely small and poses no radiation health risk during normal use.

The material is safely enclosed in the sensing chamber. The primary concern is proper disposal. Do not discard ionization detectors in regular household trash. Contact your local waste management authority for hazardous materials disposal options.

How often should I replace smoke detector batteries?

For detectors with replaceable batteries, replace annually or when the low-battery chirp activates.

Many modern units use 10-year sealed lithium batteries that eliminate the annual replacement burden. Regardless of battery status, replace the entire detector unit every 10 years.

Can I install smoke detectors myself, or do I need an electrician?

Battery-powered and plug-in smoke detectors are DIY-installable. Hardwired smoke detectors, particularly in new construction or systems being connected to an existing wired circuit, should be installed by a licensed electrician to comply with electrical codes and ensure proper interconnection.

What is the difference between a smoke detector and a smoke alarm?

A smoke detector is technically a sensing device that is part of a larger fire alarm system it detects smoke and sends a signal to a central control panel.

A smoke alarm is a self-contained unit with its own sensor and audible alert. Most residential products are smoke alarms, though the terms are commonly used interchangeably.

Should I get a combination smoke and CO detector?

For most residential applications, yes, particularly in bedrooms and any area near gas appliances or an attached garage.

Carbon monoxide is an invisible, odorless gas that causes hundreds of deaths annually in the U.S. A single combination unit covers both hazards in one installation.

The Bottom Line

Choosing the right smoke detector comes down to understanding two realities: fires behave differently, and no single sensor technology is perfect for every scenario.

For most homes, the practical answer is this.

  • Photoelectric detectors in all bedrooms and sleeping areas
  • Combination detectors in living rooms and common areas, where the budget allows
  • Interconnect everything so the whole house knows when any detector activates
  • Replace every 10 years without exception

If you’re outfitting a single-family home on a budget and can only choose one technology, lean photoelectric particularly if there are sleeping occupants who may not wake at the first sign of smoldering smoke.

For industrial and commercial applications, the selection criteria expand significantly, factoring in environmental conditions, required detection standards (NFPA 72, FM, UL), duct detection requirements, and system integration with suppression and evacuation systems topics we cover in dedicated guides on SafeguardSense.

What Is Calibration in Gas Detection? A Complete Guide for Safety Professionals

If you work with portable or fixed gas detection equipment, you have almost certainly been told that your detectors need calibration.

But what does that actually mean? What happens during calibration, why does it matter, and how often does it need to be done?

This guide answers all of those questions in plain language. Whether you are a safety officer managing a fleet of gas monitors, a technician responsible for bump testing instruments on a plant site, or simply someone trying to understand what the regulations require, this article will give you a solid foundation.

⚡ Key Takeaway

Calibration in gas detection is the process of exposing a gas detector to a known concentration of target gas and adjusting the instrument’s response to match that known value.

Without regular calibration, a detector may fail to alarm in a genuinely hazardous atmosphere, silently putting workers at risk.

What Is Gas Detector Calibration?

Gas detector calibration is the process of exposing an instrument to a precisely known concentration of target gas called calibration gas or span gas, and adjusting the detector’s output so that it accurately displays that concentration.

The goal is to verify and correct the instrument’s response curve, ensuring the readings shown on the display reflect the actual gas concentration in the air.

To understand this, it helps to know how most electrochemical and catalytic bead sensors work. Over time, sensor output drifts.

Electrochemical sensors age as their electrolyte gradually depletes. Catalytic bead sensors (also called pellistors) can be poisoned by silicones, halogenated compounds, or lead vapors, which coat the catalytic bead and reduce its sensitivity.

Environmental factors, such as heat, humidity, and UV exposure, also contribute to drift. Without calibration, a sensor that has drifted may still power on and appear functional, but its reading may be meaningfully off from the true gas concentration.

Calibration corrects for that drift by resetting the instrument’s span point to a verified reference. Most modern detectors also include a zero calibration step, which sets the baseline reading in clean, fresh air before the span adjustment is made.

Why Calibration Matters in Industrial Safety

The entire purpose of a gas detector is to warn workers before a hazardous atmosphere develops. If the detector’s readings are inaccurate, that warning system fails, and the failure is invisible.

A detector that underreads by 30% will not alarm at the correct threshold. A detector that overreads may trigger nuisance alarms that workers learn to ignore. Both scenarios create serious safety problems.

Consider a confined space entry scenario. The permit requires oxygen levels above 19.5% and combustible gas below 10% of the Lower Explosive Limit (LEL).

If the LEL sensor is drifting low due to sensor aging, it may read 8% LEL when the actual concentration is already at 15% LEL well into the warning zone. The worker enters based on a false reading, and the true hazard is invisible.

This is not a hypothetical risk. Incident reports across the oil and gas, chemical, mining, and utilities sectors document cases where sensor drift contributed to fatalities and serious injuries.

Calibration is the primary technical control that prevents sensor drift from becoming a hidden hazard.

???? Safety Principle

A gas detector with an uncalibrated sensor is not a safety instrument. It is a false sense of security. Regular calibration is the only way to confirm that an alarm threshold is meaningful.

Bump Testing vs. Calibration: Understanding the Difference

These two terms are often confused, and the confusion can lead to inadequate maintenance programs. They are related but not the same thing.

Bump Test (Function Check)

A bump test, also called a function check or challenge test, involves briefly exposing a gas detector to a low concentration of target gas to confirm that the sensor responds and the alarm activates.

It is a qualitative check: it answers the question “does this detector respond to gas?” but does not verify the accuracy of the reading.

A bump test is fast (typically 10–30 seconds per sensor channel), uses relatively small quantities of calibration gas, and can be performed before every shift using a simple docking station or a bump test cap.

What Is a Bump Test in Gas Detection?

Full Calibration (Span Calibration)

A full calibration exposes the instrument to a certified concentration of gas for a sufficient period and adjusts the sensor’s output to match. It answers a more precise question: “Does this detector read accurately?”

This process takes longer, requires a certified calibration gas cylinder with a traceable concentration, and must be performed at defined intervals regardless of bump test results.

Bump TestFull Calibration
PurposeConfirm sensor responds to gasVerify and adjust reading accuracy
FrequencyBefore each use (recommended)Typically every 3–6 months
Duration10–30 secondsSeveral minutes per channel
Typically, every 3–6 monthsLow concentration, any suitable gasCertified calibration gas with traceable concentration
ResultPass / FailSensor adjusted to match known value
Replaces calibration?NoYes (is the calibration)

The practical recommendation from most instrument manufacturers and safety standards is to bump test before every use and perform full calibration at intervals defined by the manufacturer, site conditions, and applicable regulations.

Types of Gas Detector Calibration

Zero Calibration (Fresh Air Calibration)

Zero calibration sets the detector’s baseline reading in a clean atmosphere. The instrument is exposed to either certified zero air (a cylinder of clean, dry air free of target gases) or ambient air that has been verified to be free of contaminants.

The instrument’s zero point is then adjusted to read 0 ppm (or 0% LEL for combustible gas sensors, or 20.9% for oxygen sensors).

Zero calibration should always be performed before span calibration. If the zero is incorrect, the span adjustment will simply shift a drifted baseline rather than correcting it.

Span Calibration

Span calibration is what most people refer to when they say “calibration.” The detector is exposed to a calibration gas cylinder with a certified concentration of the target gas, for example, 50 ppm of hydrogen sulfide (H2S), or 2.5% methane (equivalent to 50% LEL for methane).

The instrument’s display reading is then adjusted until it matches the certified concentration on the calibration gas cylinder certificate.

Two-Point vs. Multi-Point Calibration

Most field instruments use a two-point calibration: zero and one span point. This is sufficient for most industrial applications where the detector operates within a predictable concentration range.

Analytical instruments used in laboratory settings or high-precision monitoring applications may require multi-point calibration, where the instrument’s response is verified and adjusted at several concentrations to characterize the full response curve.

Automatic vs. Manual Calibration

Modern instruments increasingly support automatic calibration via docking stations or calibration controllers.

The instrument is placed in the dock, the calibration gas flows automatically, the instrument adjusts itself, and a calibration record is generated without technician intervention.

Manual calibration requires the technician to control gas flow, observe the reading stabilize, and make adjustments using instrument menus.

Both approaches are valid; automatic calibration reduces human error and is preferred for large fleets of instruments.

How Calibration Works: Step-by-Step

The exact procedure varies by instrument model and manufacturer, but the following sequence describes the general process for a typical portable multi-gas detector.

  • Allow the instrument to warm up fully. Most electrochemical sensors require 30–60 seconds of stabilization time after powering on.
  • Perform a zero calibration in clean, fresh air (or using certified zero air). Verify the reading stabilizes at the correct zero value before proceeding.
  • Attach the calibration gas regulator and demand-flow fitting (or use a calibration dock). Confirm you are using the correct calibration gas mixture for all sensor channels.
  • Initiate the span calibration mode through the instrument menu. Apply calibration gas at the flow rate specified by the manufacturer, typically 0.5 to 1.0 L/min for most portable instruments.
  • Wait for the reading to stabilize. This typically takes 30–90 seconds per sensor channel. Electrochemical sensors may take longer in cold or humid conditions.
  • Accept the calibration. The instrument adjusts its internal coefficients to match the certified gas concentration.
  • Remove the calibration gas. Verify the reading returns to zero in clean air. A reading that does not return to zero after gas removal may indicate sensor contamination or a failing sensor.
  • Record the calibration results: instrument serial number, sensor type, calibration gas concentration, cylinder lot number, date, technician name, and pass/fail status. Retain this record according to your site’s document control requirements.

Calibration Gas: What You Need to Know

Calibration gas quality directly determines calibration accuracy. A gas detector can only be as accurate as the calibration gas used to set it.

Certified Reference Mixtures

Calibration gases should be certified reference mixtures (CRMs) with a traceable concentration accuracy of ±2% or better, certified against national standards such as NIST (National Institute of Standards and Technology) in the United States.

The cylinder should come with a certificate of analysis (COA) showing the certified concentration, the expiry date, and the traceability chain.

Never use calibration gas from an expired cylinder. The gas mixture stability cannot be guaranteed beyond the certified shelf life.

Common Calibration Gas Mixtures

Multi-gas detectors require a calibration gas blend that contains all the target gases in a single cylinder. A typical four-gas monitor calibration mixture might contain.

  • Methane (CH4) at 50% LEL (approximately 2.5% by volume in air).
  • Oxygen (O2) at 18% by volume (to challenge both the oxygen sensor and, in some instruments, the catalytic bead sensor).
  • Carbon monoxide (CO) at 100 ppm.
  • Hydrogen sulfide (H2S) at 25 ppm.

The balance gas (the remainder of the cylinder contents) matters. Nitrogen-balanced calibration gas is appropriate for instruments used in oxygen-deficient environments.

Air-balanced calibration gas is more common for general industrial use and is required for catalytic bead LEL sensors, which need oxygen present to oxidize the combustible gas on the bead.

Cross-Gas Calibration

When it is not practical to calibrate with the actual target gas, for example, when the target gas is highly toxic or difficult to handle safely, some instruments can be calibrated using a surrogate gas and a correction factor.

This is called cross-gas calibration or relative response calibration. The instrument manufacturer provides conversion factors for each sensor and surrogate gas combination.

Cross-gas calibration introduces additional uncertainty and should be used only when direct calibration is not feasible.

How Often Should You Calibrate a Gas Detector?

There is no single universal answer, but there are several authoritative sources of guidance that most safety professionals follow.

Manufacturer Recommendations

Most portable gas detector manufacturers recommend full calibration every 3 to 6 months under normal use conditions, combined with a bump test before each use.

Always consult your specific instrument’s manual. Some sensors, such as photoionization detector (PID) lamps used for VOC monitoring, may require more frequent calibration due to lamp aging and contamination.

Regulatory Requirements

Regulations vary by jurisdiction and industry. In the United States, OSHA does not prescribe specific calibration intervals for gas detectors in most standards, but does require that equipment be maintained in a safe operating condition. However, specific industry standards and consensus standards do set calibration requirements.

  • ANSI/ISA-92.00.01 (Performance Requirements for Gas Detection Instruments) provides technical standards for fixed gas detection equipment.
  • The International Safety Equipment Association (ISEA) published the “Agreement on Gas Detector Bump Testing and Calibration,” which recommends bump testing before each use and calibration at intervals not exceeding the manufacturer’s recommendation or 6 months, whichever is shorter.
  • In regulated industries such as offshore oil and gas, mining, and utilities, company HSE management systems and third-party audit requirements often specify calibration intervals of 3 months or less.
???? Practical Rule of Thumb

Bump test before every use. Calibrate every 3–6 months, or immediately after any event that may have compromised sensor accuracy: high-concentration gas exposure, sensor replacement, instrument repair, or any instance where the detector failed a bump test.

Factors That Affect Calibration Frequency

A fixed interval schedule is a minimum baseline. Several real-world factors should prompt more frequent calibration.

Sensor Type

Electrochemical sensors for toxic gases (CO, H2S, SO2, NH3, Cl2, etc.) typically have working lifespans of 2–3 years and drift gradually over that period.

Catalytic bead (pellistor) sensors for combustible gases are more susceptible to rapid drift from poisoning events.

Infrared (IR) sensors for CO2 and hydrocarbons are more stable and may support longer calibration intervals, but still require regular verification.

Environmental Exposure

Instruments used in harsh environments, such as high temperature, high humidity, corrosive atmospheres, or high-concentration gas exposure events, drift faster than instruments used in mild conditions.

A detector used in a petrochemical plant where H2S concentrations routinely approach alarm thresholds needs more frequent calibration than one used for occasional confined space entry in a municipal utility.

Storage Conditions

Electrochemical sensors can degrade during storage if exposed to temperature extremes or if the sensor dries out.

Instruments that have been stored for extended periods should be calibrated before use, regardless of when the last calibration was performed.

Failed Bump Tests

If a bump test shows the sensor is not responding correctly, either no response, delayed response, or failure to alarm at the correct concentration, the instrument must be removed from service and either calibrated or repaired before it is used again. A failed bump test is a strong indicator that more frequent calibration is warranted.

Regulatory Requirements for Gas Detector Calibration

Navigating the regulatory landscape around gas detector calibration requires understanding which regulations apply to your industry and jurisdiction. Here is a practical overview for safety professionals working in common regulated sectors.

SectorApplicable Standard / AuthorityKey Calibration Requirement
Regular inspection and calibration per the manufacturerOSHA 29 CFR 1910Equipment in safe operating condition; follow manufacturer specs
Construction (US)OSHA 29 CFR 1926Confined space and hazardous atmosphere requirements
Oil & Gas (Offshore US)BSEE / API RP 505Regular inspection and calibration per manufacturer
Mining (US)MSHA 30 CFRSpecific methane detector calibration requirements for underground coal
European UnionATEX Directive / EN 60079-29Calibration per manufacturer; documented maintenance records
InternationalIEC 60079-29-2Installation, testing, and maintenance of flammable gas detectors

Beyond regulatory minimums, many industries operate under management system standards (ISO 45001, OSHA’s Voluntary Protection Programs) and client-mandated HSE requirements that specify calibration intervals more precisely than the underlying regulations. Always review your site’s safety management system documentation alongside applicable regulations.

Common Calibration Mistakes to Avoid

Calibration errors are more common than most safety programs acknowledge. Here are the mistakes that most frequently undermine calibration quality.

Using Expired Calibration Gas

Calibration gas cylinders have a certified shelf life, typically 12–36 months, depending on the gas mixture and cylinder type.

After the expiry date, the certified concentration can no longer be guaranteed; reactive gases may have degraded, and the balance gas composition may have shifted.

Using expired calibration gas means you are adjusting the instrument to an unknown reference, which defeats the entire purpose of calibration.

Wrong Flow Rate

Applying calibration gas at too low a flow rate starves the sensor and produces a falsely low reading, causing the instrument to over-correct.

Too high a flow rate can also affect some sensor types. Always use the demand-flow regulator and calibration fixtures specified by the instrument manufacturer, and verify that the flow rate matches the calibration procedure requirements.

Calibrating in a Contaminated Environment

Zero calibration performed in an atmosphere that contains trace concentrations of target gas will produce a falsely elevated baseline.

This is a particular risk when calibrating instruments in areas near chemical storage, fuel dispensing, or process areas.

Always perform zero calibration in fresh, clean air, either outdoors upwind of any potential contamination or using a certified zero-air cylinder.

Skipping the Zero Step

Span calibration alone, without a prior zero calibration, can produce a misleadingly accurate-looking result while the actual response curve remains offset. Both steps are required for a valid full calibration.

Ignoring Sensor Warm-Up Time

Electrochemical sensors require time to reach thermal and electrochemical equilibrium after powering on.

Calibrating immediately after startup, before the sensor has stabilized, produces unreliable results.

Follow the manufacturer’s specified warm-up time, which is typically at least 30 seconds but may be several minutes for some sensor types.

No Documentation

An undocumented calibration cannot be verified, audited, or used to identify drift trends over time.

Without records, you cannot demonstrate compliance to regulators, insurers, or incident investigators. Every calibration must be documented.

Calibration Records and Documentation

Good calibration records serve multiple purposes: they demonstrate regulatory compliance, they create a maintenance history that can identify sensor degradation trends, and they provide evidence of due diligence in the event of an incident investigation.

At a minimum, each calibration record should capture.

  • Instrument manufacturer, model, and serial number.
  • Date and time of calibration.
  • Name and qualification of the technician performing calibration.
  • Sensor type and gas being monitored for each channel.
  • Calibration gas mixture composition, certified concentration, cylinder lot number, and expiry date.
  • Pre-calibration readings (as-found values) for each sensor channel.
  • Post-calibration readings (as-left values) for each sensor channel.
  • Calibration pass/fail status for each channel.
  • Any corrective actions taken (sensor replacement, instrument quarantine, etc.),

Many safety-critical industries now use calibration management software or instrument docking stations that generate electronic records automatically.

These systems eliminate transcription errors and make it easy to retrieve calibration history for specific instruments during audits or incident reviews.

Retain calibration records for the period required by applicable regulations and your site’s document retention policy.

In many jurisdictions, safety equipment records should be retained for a minimum of 3–5 years, though some regulations (particularly in mining and offshore sectors) may require longer retention periods.

Frequently Asked Questions About Gas Detector Calibration

Can I calibrate a gas detector myself, or does it require a specialist?

Most portable gas detectors are designed to be calibrated in the field by trained technicians without specialist equipment beyond the calibration gas cylinder, regulator, and calibration accessories.

The key requirements are proper training on the procedure, use of the correct calibration gas, and accurate documentation.

For fixed gas detection systems with multiple channels and safety system integration, calibration may require a qualified instrumentation technician and adherence to a formal maintenance procedure.

What happens if I skip calibration?

If calibration is skipped, sensor drift goes uncorrected. The detector may still appear to function normally; it will power on, run self-diagnostics, and produce readings, but those readings may be meaningfully inaccurate.

An instrument that reads 40 ppm CO when the actual concentration is 60 ppm will not alarm at the correct threshold, potentially exposing workers to hazardous concentrations without warning.

Beyond the safety risk, using uncalibrated instruments can constitute a regulatory violation and may affect insurance coverage and liability in the event of an incident.

Does bump testing replace calibration?

No. A bump test confirms that the sensor responds to gas and that the alarm activates, but it does not verify reading accuracy.

A sensor can pass a bump test, detecting gas and alarming, while its span sensitivity has drifted enough that the reading is significantly inaccurate.

Bump testing and calibration serve complementary but distinct functions in a gas detector maintenance program.

How do I know when a sensor needs to be replaced rather than calibrated?

Most instrument manufacturers specify sensor replacement intervals (typically 2–3 years for electrochemical sensors, though this varies by sensor type and environmental conditions).

Indicators that a sensor may need replacement rather than calibration include: repeated calibration failures; a very large offset between the as-found reading and the calibration gas concentration (sometimes called a high calibration coefficient); slow or absent response during a bump test; and response time that exceeds the manufacturer’s specification.

When a sensor consistently fails to calibrate within acceptable limits, replacement is the appropriate corrective action.

What is the difference between calibration and certification?

Calibration is the technical process of adjusting a detector’s sensor response to match a known reference. Certification (or calibration certification) refers to the documentation, the calibration certificate, or record that attests that calibration was performed correctly on a specific instrument on a specific date using traceable calibration gas. The certificate is the documentary evidence; the calibration is the physical process it documents.

Conclusion

Calibration is not a bureaucratic checkbox. It is the technical foundation of gas detection reliability. Every alarm threshold, every confined space entry decision, and every permit-to-work that relies on a gas detector reading depends on calibration being performed correctly and consistently.

The key principles to carry forward from this guide.